31
GROWSPAN
™
GOTHIC PREMIUM HIGH TUNNELS
Revision date: 01.08.21 108179_80_81_82_83_84H
INSTALL THE DROP-DOWN PANEL (continued)
INSTALL PANEL CONDUIT AND ATTACH ROPE
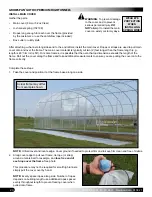
After installing all pulleys, locate the drop-down panels,
131S075 conduit, 1/4" rope (CC5525), FA4652 screws, and
duct tape.
Complete these steps:
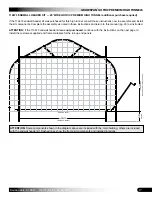
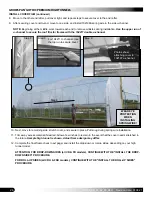
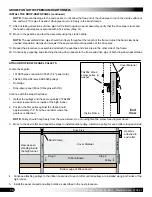
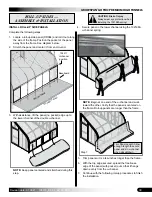
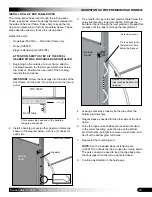
1. Unfold the panel along one side of the frame and
position the conduit pocket along the baseboard.
Panel is longer than the length of the assembled
frame. Panel can be trimmed to the desired
length before or after installation depending on
preference.
NOTE:
Dashed line shows where to position the pocket
of the panel.
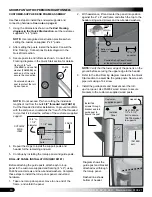
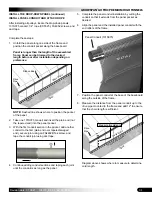
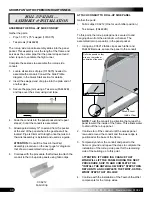
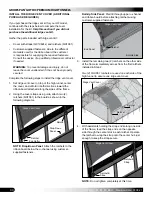
2. Take one 131S075 conduit and insert the plain end (not
the tapered end) into the panel pocket.
3. With the first conduit section in the pocket, add another
conduit to the first (plain end over tapered/swaged
end), secure joint using an FA4482B Tek screw, and
tape the conduit joint using duct tape.
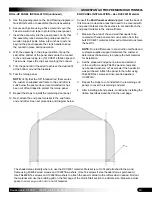
5. Complete the panel conduit installation by cutting the
conduit so that it extends from the panel pocket as
desired.
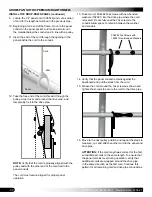
6. Align the panel and the installed panel conduit with the
end rafters of the frame.
7. Position the panel conduit at the base of the baseboard
along the outside of the frame.
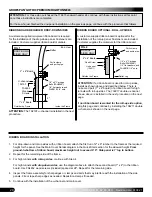
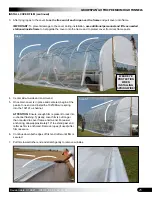
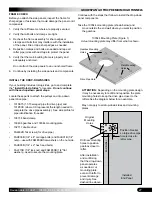
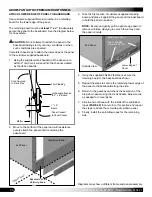
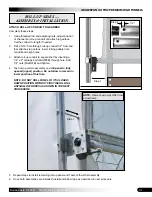
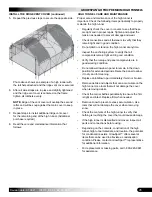
8. Measure the distance
from the panel conduit up to the
drive pipe
mounted to the frame and add 12" to ensure
that the chord length is sufficient.
Diagram above shows where to measure to determine
cord length.
Panel
Ribbon Board
Drive
Pipe
Base Board
Panel Conduit (131S075)
Panel Pocket
1"
Panel
Drive
Pipe
Baseboard
Pocket with Conduit
Measure this distance
4. Continue adding conduit sections and taping each joint
until the conduit is as long as the panel.

