


-30-
G1023S/G1023S110 Heavy-Duty 10'' Table Saw
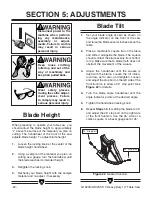
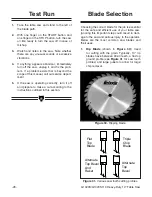
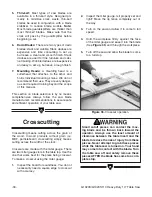
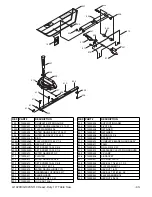
Figure 35. Crosscut operation.
Crosscutting
Crosscutting means cutting across the grain of
the wood. In wood products without grain (i.e.
MDF, particleboard) crosscutting simply means
cutting across the width of the stock.
Crosscuts are made with the miter gauge. There
are two miter gauge slots in the table top. Use the
one that works best for the piece being crosscut.
To make a crosscut using the miter gauge:
1. Inspect the board for soundness. You do not
necessarily need a square edge to crosscut
with accuracy.
5. Thin-kerf: Most types of saw blades are
available in a thin-kerf style. Designed pri-
marily to minimize stock waste, thin-kerf
blades be used in conjunction with a blade
stabilizer to reduce blade wobble.
Note:
Most blade guards/splitters are thicker than
most thin-kerf blades. Make sure that the
stock will pass by the guard/splitter before
beginning a cut.
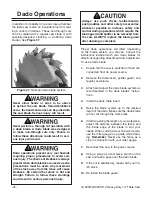
6. Dado Blades: There are two types of dado
blades: stack and wobble. Stack dadoes are
expensive and time consuming to set up
but leave a clean and smooth finish. Stack
dadoes are used for fine furniture and cabi-
net making. Wobble dadoes are inexpensive
and easy to set up, but leave a rough finish.
7. Moulding Heads: A moulding head is a
cutterhead that attaches to the arbor and
holds individual moulding knives. We do not
recommend their use. They are very danger-
ous and required training beyond the scope
of this manual.
This section on blade selection is by no means
comprehensive. Always follow the saw blade
manufacturer's recommendations to assure safe
and efficient operation of your table saw.
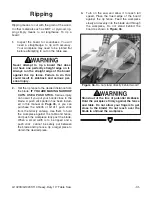
Small cutoff pieces can contact the mov-
ing blade and be thrown back toward the
operator. Always use the least amount of
clearance between the table insert and the
blade to reduce the risk of injury from these
pieces. Never attempt to grab these pieces
while the table saw is turned on. Your hand
may come into contact with the blade. Turn
the table saw off and safely remove these
pieces AFTER the blade has come to a com-
plete stop.
2. Inspect the miter gauge. Is it properly set and
tight? Move the rip fence completely out of
the way.
3. Turn on the saw and allow it to come to full
speed.
4. Hold the workpiece firmly against the face
of the miter gauge and ease it into the blade
(See
Figure 35) and through the workpiece.
5. Turn off the saw and allow the blade to come
to a full stop.
Содержание G1023S
Страница 39: ...G1023S G1023S110 Heavy Duty 10 Table Saw 37 1 1 2...
Страница 40: ...38 G1023S G1023S110 Heavy Duty 10 Table Saw...
Страница 51: ......
Страница 52: ......