


-18-
G1023S/G1023S110 Heavy-Duty 10'' Table Saw
Table Insert
Handwheel
The table insert provides access to the blade
and the arbor when removed. When in place, the
insert provides support for the materials being
cut.
1. Disconnect the power cord from the outlet!
Disconnect power to the
machine when perform-
ing any maintenance,
assembly or adjust-
ments. Failure to do this
may result in serious
personal injury.
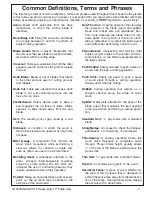
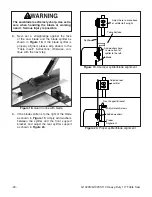
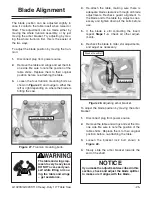
Figure 15. Setscrews on each corner of insert.
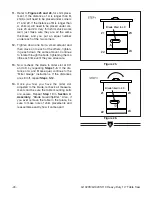
Figure 14. Tightening handle onto handwheel.
NOTICE
The table insert must be flush with the top
of the table or the workpiece will hit the
edge of the table insert at the beginning of
the cut.
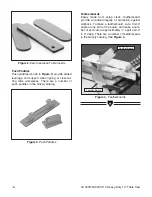
One handwheel has been removed for shipping.
To install, place the handwheel over the threads
and screw the lock knob into the center. Next
insert the handle into the handwheel and tighten
it as shown in
Figure 14. Install the other handle
onto the other handwheel.
2.
Ensure that all four setscrews are firmly in
contact with the table casting.
3. Using a 6mm Allen
®
wrench, raise or lower
each of the four setscrews shown in
Figure
15 until the insert is flush with the table top.
Use a straightedge to make sure the table
insert is flush with the top of the table.
4. Now make sure the blade will not come into
contact with the table insert. Position the
blade at 90°, then raise and lower the blade
through its full range of motion. Also, rotate
the blade, making sure that the blade never
contacts any part of the table insert. Do the
same with the blade in the 45° position. Wear
leather gloves while rotating the blade to pre-
vent being cut.
Setscrews
Содержание G1023S
Страница 39: ...G1023S G1023S110 Heavy Duty 10 Table Saw 37 1 1 2...
Страница 40: ...38 G1023S G1023S110 Heavy Duty 10 Table Saw...
Страница 51: ......
Страница 52: ......