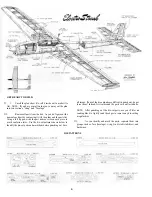
FUSELAGE
PREPARE FUSELAGE SIDES
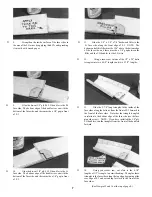
D 1. Lay a 6" x 6" piece of waxed paper on the plan
in the area where the front and rear fuse sides join, to
protect the plan.
D 2. Lay a die-cut 3/32" balsa fuse side front and fuse
side rear on the plan and carefully line them up along the
bottom edge. Apply thin CA glue to the joint, then apply
thick CA glue to fill any gaps. Sand the joint smooth using
a T-bar sander with 100-grit sandpaper.
D 3. While the fuse side is still in place on the plan,
use a straightedge and a pen to mark the locations of
formers F-3 and F-4 only. Note that we have extended the
former lines above and below the fuse for your conven-
ience. Mark this fuse side "Rt. Inside".
of waxed paper between the fuse sides to prevent gluing
them together. Sand the Lt. fuse side joint smooth.
D 5. Remove the waxed paper, put the two fuse sides
together and line them up at the front and the bottom
edges. Then check to make sure they are exactly the same
all the way around. Sand the edges as necessary until the
two fuse sides match. It is especially important that the
overall length be the same. so sand the tail end as neces-
sary.
D 6. Lay the two fuse sides flat on the table, with the
straight portion of the bottom edges touching at the front
half. Then, using a straightedge and a pen, extend the
former location lines onto the fuse side that does not have
them. Also, mark the 2nd. fuse side, "Lt. inside".
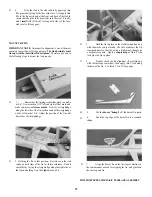
D 7. Glue the 1/8" x 1/8" x 30" balsa stringers to the
inside of the fuse sides, along the bottom. The stringers
begin at the front edge of F-3. Trim the stringers even with
the aft end of the fuse sides.
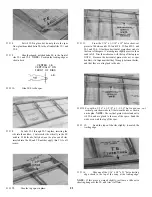
LANDING GEAR NOTE: If you have decided to install a landing
gear, you will now install the Lt. & Rt. LG Doublers. However.
even if you do not plan to use a landing gear, you may wish to install
these doublers anyway, in case you change your mind later. (The
extra fuselage parts required for the LG will add 1/4 oz.).
D 4. Glue the left fuse side halves together by care-
fully positioning them on the right fuse side. Use a piece
6
Содержание Electro Streak
Страница 37: ...37 Use this three view drawing for planning your trim scheme...
Страница 38: ...NOTES 38...


