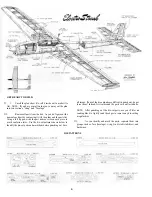
on the motor as shown in the fuse plan side view, trial fit this
assembly into the front of the fuse. Pull the fuse sides
together over the formers and note the fit. If it is necessary
to sand the comers of F-1 for a perfect fit, you must also sand
the top comers of F-2 an equal amount, to maintain the
correct down-thrust angle. NOTE: Remove the formers
from the motor while sanding, to avoid getting pieces of
wood inside the motor. NOTE: When trial fitting, notice
that the right fuse side protrudes in front of F-1. This is
normal, due to the built-in right thrust. You will later sand
everything off even with the front of F-l.
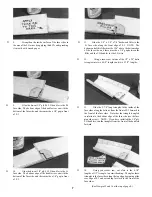
D 8. Holding the motor, F-l and F-2 in place, glue F-l
and F-2 to the fuse sides with thin CA. (Do not glue the
motor to the formers!) Then remove the motor and
reinforce the glue joints by adding thick CA.
D 9. Align the front half of the fuse on the plan (top
view) and hold it down with weights.
NOTE: This sheeting begins at the front of F-4 and ends at the front
of the stab saddle area (trim as necessary).
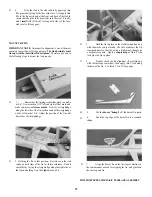
D 13. F r o m t h e 1 / 1 6 " x 3 " x l 5 " h a r d b a l s a s h e e t , c u t f i v e
2-1/2" lengths. Edge glue these pieces together as shown.
Then sand smooth on both sides with your T-bar and 100-grit
sandpaper.
D 10. Pull the aft ends of the fuse sides together, align
with the plans, and glue the triangles together. NOTE: If,
when pulling the fuse sides together, you notice that one side
seems stiff er than the other, you may make a few vertical cuts
in the triangle on the stiff side to "soften" it up and allow it
to bend to the same curvature as the other side.
D 11. Using a T-bar or sanding block, sand the top edges
of formers F-l, F-2, F-3 and F-4 even with the top of the balsa
triangle stringers. Also sand the top of the triangle stringers
even with the top edge of the fuse sides, and to remove any
rough glue joints.
D 14. Glue this sheeting to the bottom of the fuse,
beginning at the front of F-l.
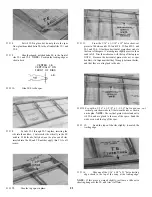
D 15. From one of the 1/16" x 3" x 18" soft balsa sheets
(the other two are used in the wing), cut seven 2-1/2" lengths.
Edge glue these pieces together as shown.
Then sand smooth on both sides with your T-bar and 100-grit
sandpaper.
D 12. Glue the 3/32" balsa top rear sheeting in place.
10
D 16. Glue this sheeting to the bottom of the fuse from
Содержание Electro Streak
Страница 37: ...37 Use this three view drawing for planning your trim scheme...
Страница 38: ...NOTES 38...


