FIN AND STABILIZER
BUILD THE FIN AND RUDDER
1. Find the following parts: Six 3/16" x 3/8" x 18"
balsa sticks, and the die-cut 3/16" balsa rudder bottom and
dorsal fin pieces. Lightly sand the edges of the die-cut
pieces with a sanding block to straighten out any die-cutting
irregularities. Select the two straightest 3/16" x 3/8" x 24"
balsa sticks and set them aside for later use as the stab
trailing edge and the elevator leading edge.
D
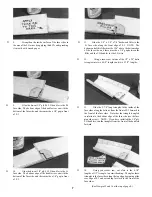
D 2. Working over the separate FIN drawing on the
plan, mark and cut the balsa sticks for the outer framework
of the fin and rudder. Hold or pin the parts over the plan and
glue the outer framework together with thin CA, working on
waxed paper to prevent gluing to the plan.
D 3. Cut the 3/16" x 3/8" balsa ribs to fit between the
leading and trailing edges of the fin and rudder, and glue
them in place.
D 4. Glue the die-cut 3/16" balsa dorsal fin parts
together over the plan, to make the dorsal fin.
D 5. Sand both sides of the fin, rudder and dorsal fin
smooth using your T-bar and 100-grit sandpaper. Draw a
centerline on the fin trailing edge and the rudder leading
edge. Sand the leading edge of the fin to a rounded shape
(except in the area where the dorsal fin will attach). Sand the
leading edge of the rudder to a "V-shape (as shown on the
plan).
D 6. Using your sanding block, sand the rudder to a
taper, as shown in the detail drawing on the plan.
D
D
D
D
D
D
D
D
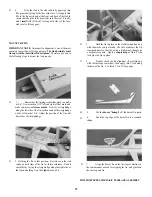
2. Tape a piece of waxed paper over the separate
STABILIZER drawing on the plan, then lay the die-cut
3/16" balsa stab center pieces on the plan and pin in place.
NOTE: These die-cut pieces may have irregular edges, so
you should sand the edges with your T-bar first, until they fit
the plan exactly. Edge glue these stab centerpieces together
with thin CA.
3. From 3/16" x 3/8" balsa sticks, cut the outer
framework pieces and glue them together. Note: The
straightest 3/16" x 3/8" balsa stick should be used for the
trailing edge.
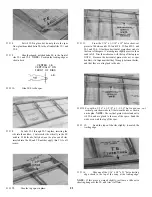
4. Cut the stabilizer ribs from the 3/16" x 3/8" balsa
sticks and glue them in place.
5. Sand both sides of the elevator smooth with your
T-bar, then sand the stabilizer leading edge and ends to a
rounded shape as shown on the plan.
6. In the same manner, working over the plan, build
the elevator.
7. Draw a centerline on the stab TE and elevator LE.
8. Sand the elevator leading edge to a V-shape as
shown on the plan.
9. Sand the elevator to a taper, as shown on the plan.
MAKE THE HINGES
D 1. You'll need the following: The 7" length of hinge
strip material, a piece of 220 grit sandpaper, a ruler, scissors
and a 1/16" drill.
BUILD THE STABILIZER AND ELEVATOR
D 1. Get the following parts together: Die-cut 3/16"
balsa stab and elevator center pieces, two 3/16" x 3/16" x
17" balsa sticks, and the remaining 3/16" x 3/8" balsa sticks.
D
2. Take the strip of hinge material and roughen both
sides with 220 grit sandpaper. This is best done with a small
15
Содержание Electro Streak
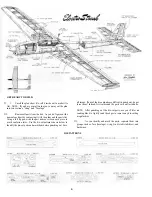
Страница 37: ...37 Use this three view drawing for planning your trim scheme...
Страница 38: ...NOTES 38...


