28
24" [610mm] Pushrod
Use the template in the center of
this manual as a guide for the
bend angles and pushrod length.
❏
15. A mechanical/pneumatic nose gear steering pushrod
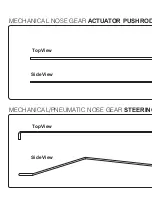
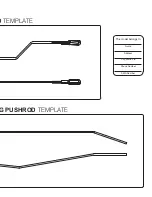
template is provided at the back of this manual. Use a 24"
[610mm] pushrod to make the steering pushrod. The threaded
end will not be used. Insert the pushrod through the other hole
you made in the wheel well. The short bend in the pushrod fi ts
into the slotted link on the retract. The other end fi ts into the
screw lock connector on the rudder steering servo arm. Test
the operation of the steering with your radio system. Adjust
the bends in the pushrod as necessary for bind free operation.
❏
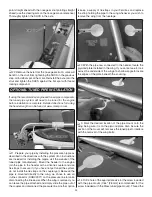
16. Locate the two
small nylon disks and two
nylon torque rod horns
as shown. These parts
will be used as steering
pushrod guides.
❏
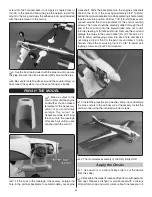
17. Remove the steering pushrod from the fuselage. Slide
the torque rod horns onto the pushrod and reinstall the pushrod
in the fuselage. Space them evenly apart as shown and mark
the positions of the mounting holes onto the retract rail.
❏
18. Drill 1/16" [1.6mm] holes at the marks you made. Thread
a #2 x 1/2" [13mm] self-tapping screw into each hole and back
it out. Apply a drop of thin CA to each hole and let the glue
harden. Align a nylon disk over each hole (a drop of CA will
hold them in place). Attach the torque rod horns using two #2
x 1/2" [13mm] self-tapping screws. Secure the forward end
of the pushrod to the steering link on the retract with a 3/32"
[2.4mm] wheel collar and a 4-40 set screw. Do one fi nal test
of the retract using your radio.
Содержание DIRTY BIRDY .60 ARF
Страница 21: ...Carefully remove this insert in order to use your full size templates on the reverse side...
Страница 23: ...D TEMPLATE G PUSHROD TEMPLATE This model belongs to Name Address City State Zip Phone Number AMA Number...
Страница 24: ...Carefully remove this insert in order to use your full size templates on the reverse side...
Страница 44: ...GPMA1975 Mnl Entire Contents 2011 Hobbico Inc All rights reserved...


