16
❏
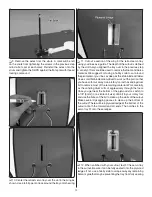
9. Install the retracts using #4 x 5/8" [16mm] self-tapping
screws. Use medium or thick CA to glue the air lines fl at against
the wheel wells and out of the way of the center of the wells.
❏
10. Cut two 2" x 3/16" [51mm x 4.8mm] wire axles (not
included) to 1" [25 mm].
❏
11. Enlarge the axle holes in the included main wheels
using a 13/64" [5.2mm] drill bit. Slide the wheels onto the axles
followed by a 3/16" [4.8mm] wheel collar (not included). Mark
the location of the wheel collar screw holes onto the axles.
❏
12. Use a rotary tool or fi le to grind a fl at spot onto the
axles at the marks you made. Add a drop of oil to each axle
and reinstall the wheels onto the axles. Secure the wheel
collars using 6-32 set screws and thread locking compound.
❏
13. Loosely install a 6-32 x 1/4" [6.4mm] SHCS into each
axle. Slide the axles onto the retract struts and raise the
wheels into the wheel wells. Position the axles on the struts
so that the wheels are centered in the wells. Gently tighten
the screws in the axles against the struts. Raise the struts
and confi rm that the wheels will be aligned straight when the
wing is installed on the fuselage. When satisfi ed, thoroughly
tighten the screws against the struts. Doing so will leave marks
on the struts. Remove the axles, grind fl at spots at the marks
you made, and then reinstall the axles with thread locking
compound on the screws.
❏
14. Join the matching colors of air line with T-fi ttings (not
included) and attach a quick disconnect (not included) to each
T-fi tting with a short length of air line.
Содержание DIRTY BIRDY .60 ARF
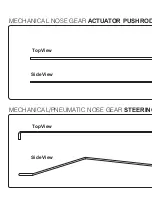
Страница 21: ...Carefully remove this insert in order to use your full size templates on the reverse side...
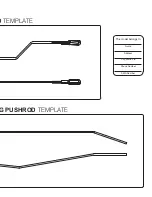
Страница 23: ...D TEMPLATE G PUSHROD TEMPLATE This model belongs to Name Address City State Zip Phone Number AMA Number...
Страница 24: ...Carefully remove this insert in order to use your full size templates on the reverse side...
Страница 44: ...GPMA1975 Mnl Entire Contents 2011 Hobbico Inc All rights reserved...


