21
❏
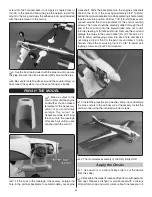
5. Cut a 3-1/2" [89mm] piece from the included 1/4" x 1/4"
x 11-3/4" [6 x 6 x 300 mm] balsa stick that fi ts behind the fuel
tank between the fuse sides. Test fi t the piece and gradually
reduce its length until it fi ts snugly (be sure that the stick does
not cause the sides of the fuselage to bow outward). When
satisfi ed with the length of the stick, securely glue it in place
behind the fuel tank to secure it.
❏
6. Connect a 6-7" [152-178mm] piece of standard fuel
tubing to each tube protruding from the fuel tank.
❏
7. Position the front of the engine drive washer 4-5/8"
[117mm] from the front of the fi rewall. Mark the location of the
engine mount holes onto the mount rails using a Dead Center
Hole Locator. Remove the engine from the mount and use a
6-32 tap and drill set to create threads in the four mounting
holes. Attach the engine to the mount using four 6-32 x 3/4"
[19mm] screws, four #6 fl at washers and four #6 lock washers.
Содержание DIRTY BIRDY .60 ARF
Страница 21: ...Carefully remove this insert in order to use your full size templates on the reverse side...
Страница 23: ...D TEMPLATE G PUSHROD TEMPLATE This model belongs to Name Address City State Zip Phone Number AMA Number...
Страница 24: ...Carefully remove this insert in order to use your full size templates on the reverse side...
Страница 44: ...GPMA1975 Mnl Entire Contents 2011 Hobbico Inc All rights reserved...


