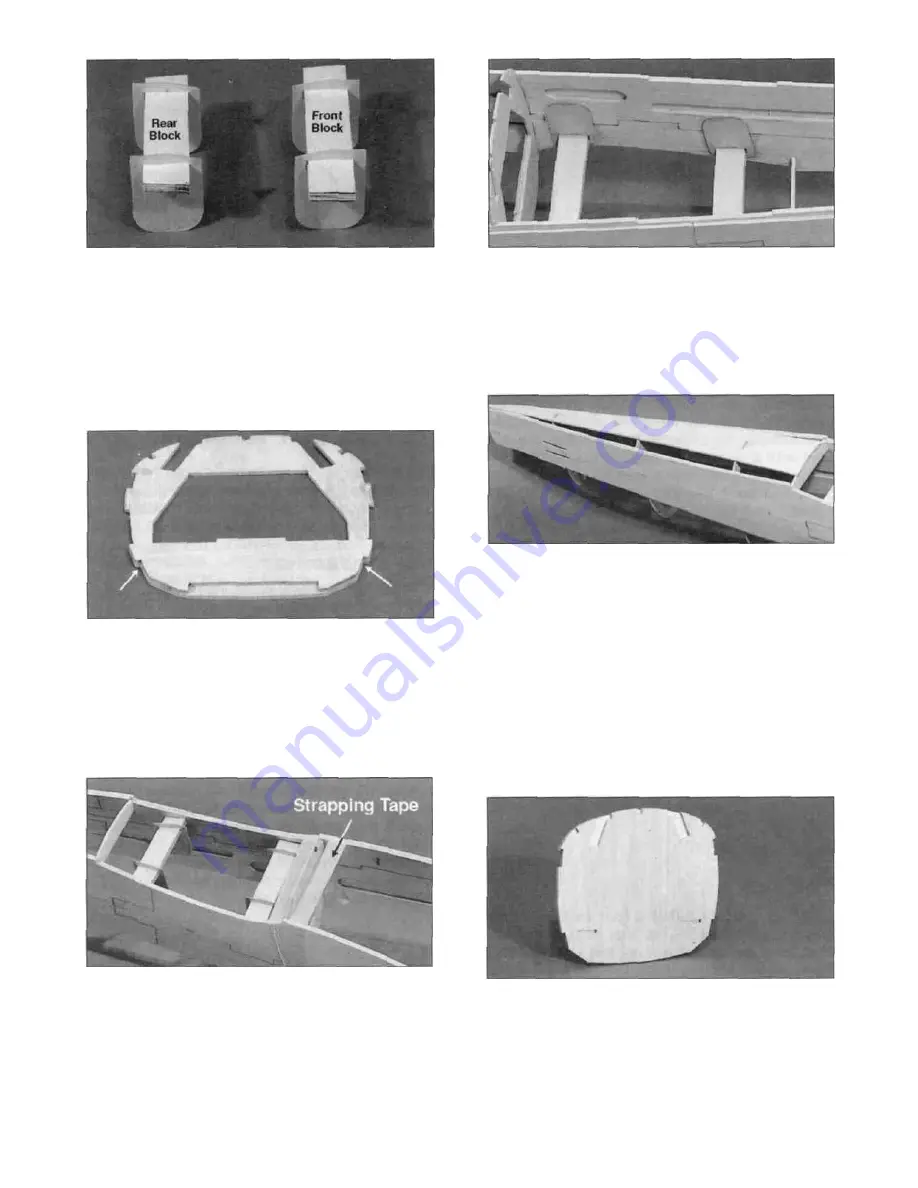
D 4. Slide two die-cut 1/32" ply bolt block braces
(SKY6W06) onto both the 1/4" ply front and rear
wing bolt blocks (SKY6F20 and SKY6F21). Notice
that the slant on the braces is at the front of the
rear block and the rear of the front block to clear
the wing saddle. The photo clearly illustrates this.
D 7. Slide the 1/32" ply braces out against the
fuse sides and securely glue them in place with
thick CA or epoxy.
D 5. Glue die-cut 1/8" ply former LG2 (SKY6F10)
to one side of the die-cut 1/8" ply former F2
(SKY6F12) with thick CA. The bottom of the
interlocking tabs on both formers should line up as
shown in the photo.
D 8. Glue the die-cut 1/8" balsa aft fuse bottom
(SKY6F09) in place with thin CA. The aft tip of the
bottom should be centered on the fuselage sides
and glued in place. The bottom will automatically
keep the aft portion of the fuselage straight. Go
over all the glue joints at formers F3, F4 and F5
and securely glue the fuse sides to the formers
with thin and then thick CA.
D 6. Position former F2 into place and apply CA
near the top notches. Carefully slide both wing bolt
blocks into their respective slots. Pull the fuse
sides together at the bottom of the former and use
strapping tape to hold them tightly against the
former. Make sure the bolt blocks are seated in
their notches, and apply thin CA around the blocks
and the former notches.
D 9. Use thick CA or epoxy to glue the die-cut 1/8"
ply formers F1A and F1B (SKY6F15) together to
form the firewall. NOTE: The embossed centerlines
must be showing on F1A. The interlocking tabs on
both formers should line up. . . but former F1B is
slightly larger than F1A, so just center it on F1A.
Wipe off any excess glue before it cures.
13
Содержание Super Kybolt
Страница 6: ...6 DIE CUT PATTERNS...
Страница 72: ...2 VIEW DRAWING...


