13
8.3 Advance Setup
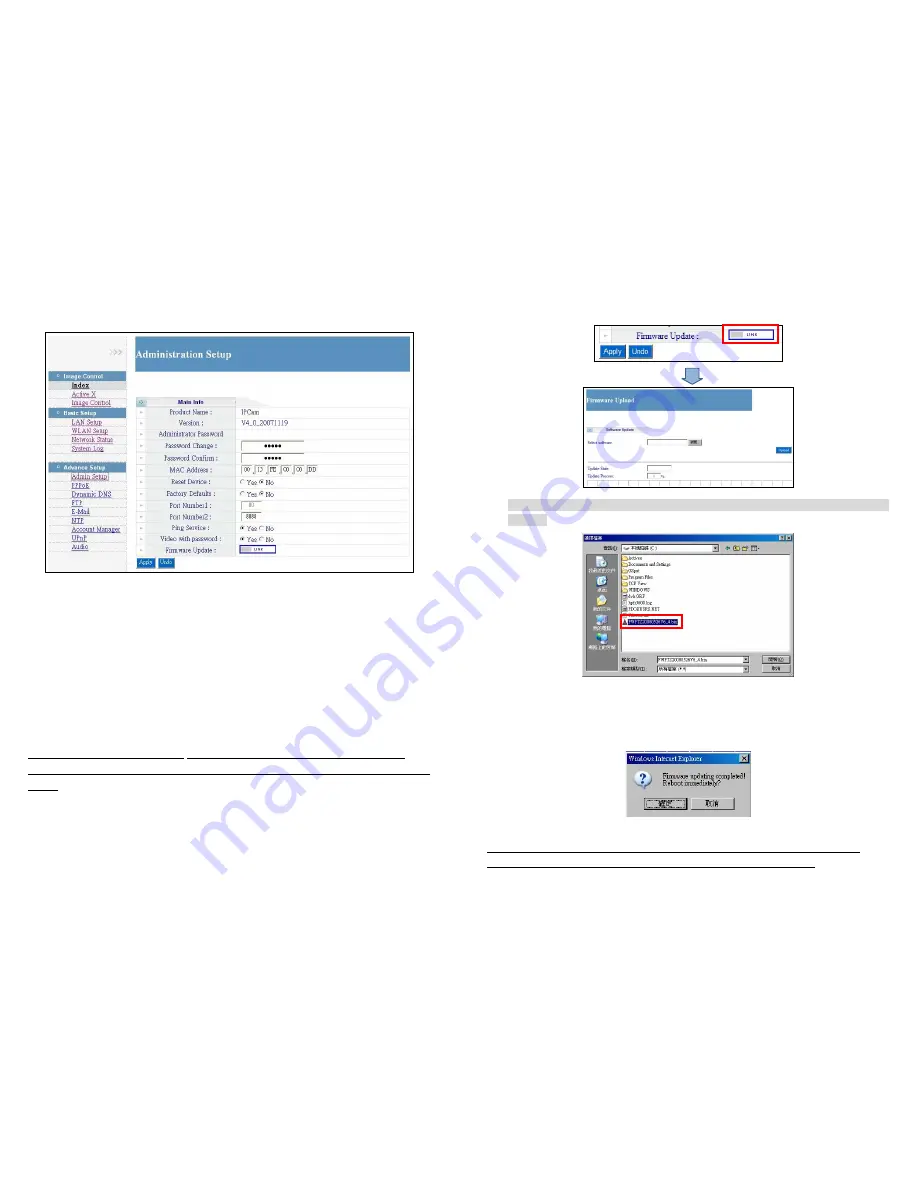
8.3.1 Admin Setup
Product Name:
Display the camera’s name.
Version:
Display the firmware version of camera.
Administrator Password:
-
Password Change:
Enter the new administrator password to access the camera.
-
Password Confirm:
Confirm the new
password, enter it again.
MAC Address:
Display the MAC address of camera.
Reset Device:
Select “
Yes
” and click the “
Apply
” to restart the camera.
Factory Default:
Select “
Yes
” and click the “
Apply
” to restore factory default settings.
Port Setting:
You can change the port number if using multiple cameras (Port Number 1:
Defaulted as 80, Port Number 2: Defaulted as 8888).
NOTE: You must also set up your
router to open the ports of cameras for remote
access the cameras via internet (refer to your router’s user manual for how to open up
ports).
Ping Service:
Select “
No
” to hide the IP address. (prevent the ping command)
Video with password:
Select “Enable”, and you can login the camera without password.
14
Firmware Update:
Search the latest firmware and update automatically.
Step 1:
Click on the
LINK
button to open the
Firmware Upload
page.
Step 2:
Click on the
Browser
button, and there will pop up a dialogue box for you to choose the
firmware.
Step 3:
After choosing the firmware, click the
Upload
button for uploading the file. When the
process is done, there will pop up a message to tell you that the update is completed and ask you
for rebooting the camera.
Notice:
You should
NOT
power off or remove the cable from the camera before the process is
completed. For that will damage your camera and make some hardware errors on it.


