background image

15

2-2  

Audio CD Operation


Preparations:

Connect  your  Portable  DVD  Player  to  its  source  of 
power,  and  connect  any  external  equipment  to  its 
outputs if desired. If external equipment is connected:
 •

Turn the TV on and select the video input source 
that will receive the Player’s video output.

 •

Turn the stereo system on if the Player has been 
connected to one. Select the stereo system’s input 
that will play the audio from the DVD Player.

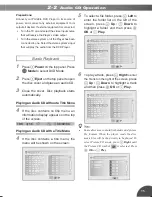
Basic Playback

1

Press 

Power 

on the top panel. Press 

Mode

 to select DVD Mode. 

2

Press 

Eject

on the top panel to open 

the disc cover and place an audio CD. 

3

Close  the  cover.  Disc  playback  starts 
automatically. 

Playing an Audio CD without a Title Menu

4

If  the  disc  contains  no  title  menu,  an 
information display appears on the top 
of the screen. 

TRK   2/16     


     00:02:06

Playing an Audio CD with a Title Menu

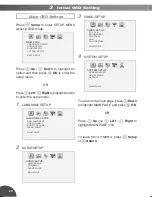
4

If  the  disc  contains  a  title  menu,  the 
menu will be shown on the screen.  

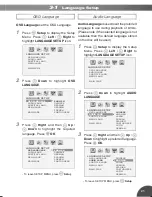
5

To select a fi le folder, press 

Left 

to 

enter  the  folder  list  on  the  left  of  the 
screen,  press 

Up

  /

Down

  to 

highlight  a  folder  and  then  press

OK 

or 

Play

.

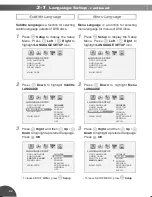
6

To play a track, press 

Right

 to enter 

the fi le list on the right of the screen, 

press 

Up

 /

Down

 to highlight a track

and then press

OK 

or 

Play

.

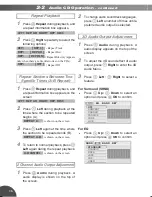
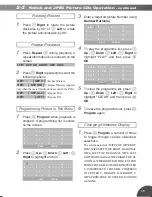
Some discs may contain both music and picture 
fi le formats. When the player reads the disc, 
music fi les will be the priority to be played. To 
select Picture CD mode, press

Right 

until 

the Picture CD symbol 

 is selected. Press 

OK

or 

Play

.


[ ITALIAN OPERA]01–––––– 

01. 01 ––––––

02. 02 ––––––

03. 03 ––––––

04. 04 ––––––

05. 05 ––––––

06. 06 ––––––

07. 07 ––––––

08. 08 ––––––

09. 09 ––––––

10. 10 ––––––

01. CITY JAZZ

02. CLASSICAL

03. MOVIE OST

04. ITALIAN OPERA

05. MUSICAL

06. US POP

07. UK POP

08. HEAVY METAL

09. SONATA

10. RAP

[ ––– CITY JAZZ]01–––––– 

01. 01 ––––––

02. 02 ––––––

03. 03 ––––––

04. 04 ––––––

05. 05 ––––––

06. 06 ––––––

07. 07 ––––––

08. 08 ––––––

09. 09 ––––––

10. 10 ––––––

01. CITY JAZZ

02. CLASSICAL

03. MOVIE OST

04. ITALIAN OPERA

05. MUSICAL

06. US POP

07. UK POP

08. HEAVY METAL

09. SONATA

10. RAP

[ ITALIAN OPERA]08––––––

01. 01 ––––––

02. 02 ––––––

03. 03 ––––––

04. 04 ––––––

05. 05 ––––––

06. 06 ––––––

07. 07 ––––––

08. 08 ––––––

09. 09 ––––––

10. 10 ––––––

01. CITY JAZZ

02. CLASSICAL

03. MOVIE OST

04. ITALIAN OPERA

05. MUSICAL

06. US POP

07. UK POP

08. HEAVY METAL

09. SONATA

10. RAP

[JAPAN]001.JPG

001. 001 

002. 002

003. 003 

004. 004

005. 005 

006. 006

007. 007 

008. 008

009. 009 

010. 010

01. JAPAN

02. CANADA

03. FRANCE

04. BRAZIL

05. EGYPT


Содержание GPTV70WLCD

Страница 1: ...CD DVD DVD R DVD RW Audio CD Kodak Picture CD JPEG Picture CD DVD DVD R DVD RW Audio CD Kodak Picture CD JPEG Picture CD DVD DVD R DVD RW Audio CD Kodak Picture CD JPEG Picture CD DVD DVD R DVD RW Au...

Страница 2: ...es Dolby and the double D symbol are trademarks of Dolby Laboratories This symbol on the product or in the instructions means that your electri cal and electronic equipment should be disposed at the e...

Страница 3: ...Subtitle Languages 13 Viewing from Different Angles 13 Zooming a Scene During Playback 13 Using a DVD Title Menu 13 Searching Scenes During Playback 14 Programming DVD Playback 14 2 2 Audio CD Operat...

Страница 4: ...rovide reason able protection against harmful interference in a residential installation This equipment generates uses and can radiate radio fre quency energy and if not installed and used in accordan...

Страница 5: ...at plug convenience receptacles and the point where they exit from the apparatus 9 Only use attachments accessories specified by the manufacturer 10 Unplug this apparatus during lighting storms or wh...

Страница 6: ...Touching internal parts of the unit is dangerous and may cause serious damage to the unit Do not attempt to disassemble the unit l Do not put any foreign object on the disc tray n Keep away from wate...

Страница 7: ...mote control To resume to Play mode press Power again When turning on the DVD Player the unit directly enters TV Tuner Mode If a disc is already placed on the disc tray the player will start to load t...

Страница 8: ...AV IN Socket 5 COAXIAL Output Socket 6 USB Socket 7 MMC SD Card Slot 8 DC IN Socket 9 AERIAL IN Ant Socket CR2025 OPEN PUSH Right Side View Right Side View Right Side View Battery Installation for th...

Страница 9: ...amplifier with speakers 1 1 Getting Started Remote Control 16 2 18 4 20 6 22 8 24 10 26 12 28 14 29 30 31 17 3 15 1 19 5 21 7 23 9 25 11 27 13 1 Setup Button 2 Power Button 3 Subtitle Button 4 Zoom B...

Страница 10: ...o play the disc Input from External Equipment It is possible to input images and sounds from external equipment by connecting the player to external equipment with Audio cable or Video cable Yellow Vi...

Страница 11: ...is used to replace weak or noisy video signals with a blue screen mute the audio portion which may be disturbing under such conditions When you first turn on the unit the blue screen mode will be ON...

Страница 12: ...1 Press Mode to select TV Tuner Mode 2 Press TV to select FM Radio source The LED display indicates FM source available 3 Press Search the radio program scan starts and will store any found stations...

Страница 13: ...le press Up Down to highlight it and then press OK or Play Returning to the Menu Screen 1 Press Menu or Return during playback Note This function only works when the disc contains a title menu If the...

Страница 14: ...ion relating to Audio Subtitle and Angle is shown 3 To stop displaying scene information press Info again Fast Forward and Backward 1 Press Fast Forward or Fast Backward during playback The speed of a...

Страница 15: ...tely to the selected one When you turn on or remove the disc the DVD player will playback the subtitle language which is selected as the initial setting If you select a subtitle language which is not...

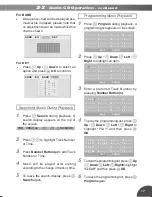
Страница 16: ...p Down Left Right to highlight an item 3 Enter a preferred Title Number or Chapter Number by pressing Number Button s Note Please enter a Title Number before trying to enter a Chapter Number 4 To play...

Страница 17: ...he screen press Up Down to highlight a folder and then press OK or Play 6 To play a track press Right to enter the file list on the right of the screen press Up Down to highlight a track and then pres...

Страница 18: ...REP All Repeat Disc REP REP DIR RepeatDirectory appears only when there are file directories on the CDs REP OFF Repeat Off Repeat Sections Between Two Specific Times A B Repeat 1 Press Repeat during...

Страница 19: ...ued SRND EQ BAND KEY KEY KEY KEY 4 2 0 2 4 SRND EQ BAND BAND BAND BAND KEY Programming Music Playback 1 Press Program during playback A programming list appears on the screen 2 Press Up Down Left Righ...

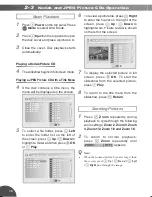
Страница 20: ...ht a file Picture review is shown on the left of the screen 7 To display the selected picture in full screen press OK To start the slideshow from the selected picture press Play 8 To return to the tit...

Страница 21: ...FROM EDGE TO CENTER RANDOM and NONE Rotating Pictures 1 Press Right to rotate the picture clockwise by 90 or Left to rotate the picture anti clockwise by 90 Repeat Playback 1 Press Repeat during playb...

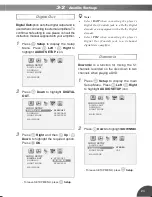
Страница 22: ...AGE AUDIO LANG SUBTITLE LANG MENU LANG MAIN PAGE MAIN PAGE LANGUAGE SETUP AUDIO SETUP VIDEO SETUP SYSTEM SETUP EXIT SETUP AUDIO SETUP DIGITAL OUT DOWNMIX NIGHT MODE MAIN PAGE 3 VIDEO SETUP 4 SYSTEM SE...

Страница 23: ...U LANG MAIN PAGE Audio Language Audio Language is used to set the preferred language to use during playback of DVDs Please note if the selected language is not available then the default language stor...

Страница 24: ...LISH JAPAN FRENCH SPANISH PORTUGUESE GERMAN OFF LANGUAGE SETUP OSD LANGUAGE AUDIO LANG SUBTITLE LANG MENU LANG MAIN PAGE Menu Language Menu Language is a function for selecting menu language for menus...

Страница 25: ...DE MAIN PAGE SPDIF OFF SPDIF RAW SPDIF PCM AUDIO SETUP DIGITAL OUT DOWNMIX NIGHT MODE MAIN PAGE SPDIF OFF SPDIF RAW SPDIF PCM Note Select RAW when connecting the player s RAW when connecting the playe...

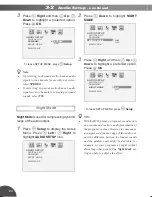
Страница 26: ...NMIX NIGHT MODE MAIN PAGE STEREO VSS 2 Press Down to highlight NIGHT MODE 3 Press Right and then Up Down to highlight a preferred option Press OK To leave SETUP MENU press Setup Note With the DVD form...

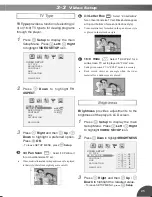
Страница 27: ...N MAIN PAGE 4 3PS 4 3LB 16 9 b b 4 3 Letter Box Select 4 3 LetterBox for a conventional size TV set Black bands appear at top and bottom of screen letter box style Video material not formatted in the...

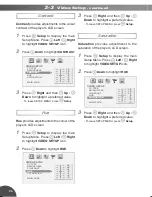
Страница 28: ...trast of the player s LCD screen 1 Press Setup to display the main Setup Menu Press Left Right to highlight VIDEO SETUP icon 2 Press Down to highlight CONTRAST 3 Press Right and then Up Down to highli...

Страница 29: ...SCREEN SAVER ANGLE MARK DEFAULT MAIN PAGE ON OFF Angle Mark Angle Mark is used to display or hide the Angle Mark is used to display or hide the Angle Mark angle mark on the screen when there are mult...

Страница 30: ...ss of whether theANGLE MARK feature is On or Off Default Default will restore the player to the default settings 1 Press Setup to display the main Setup Menu Press Left Right to highlight SYSTEM SETUP...

Страница 31: ...to the LCD settings press Left To leave press LCD 4 1 LCD Setup Panel Invert Colour Bright Normal 16 9 4 3 Zoom Close Colour Setting 1 Press LCD the LCD settings are shown on the screen 2 Press Down t...

Страница 32: ...l connections Check the settings menu to make sure that the digital output is set to on Check if the audio format of the selected audio language matches your receiver capabilities Distorted picture Ch...

Страница 33: ...sc has a number from angles recorded these angles may be recorded for specific scenes only No sound when connecting to Check if the disc supports 5 1 Channel 5 1 Channel speaker Check if the speaker i...

Страница 34: ...ur which will cause noise If the disc is brought from a cold to a warm environment moisture may form on the disc Wipe the moisture off with a soft dry lint free cloth before using the disc Improper di...

Страница 35: ......

Страница 36: ......

Отзывы: