background image

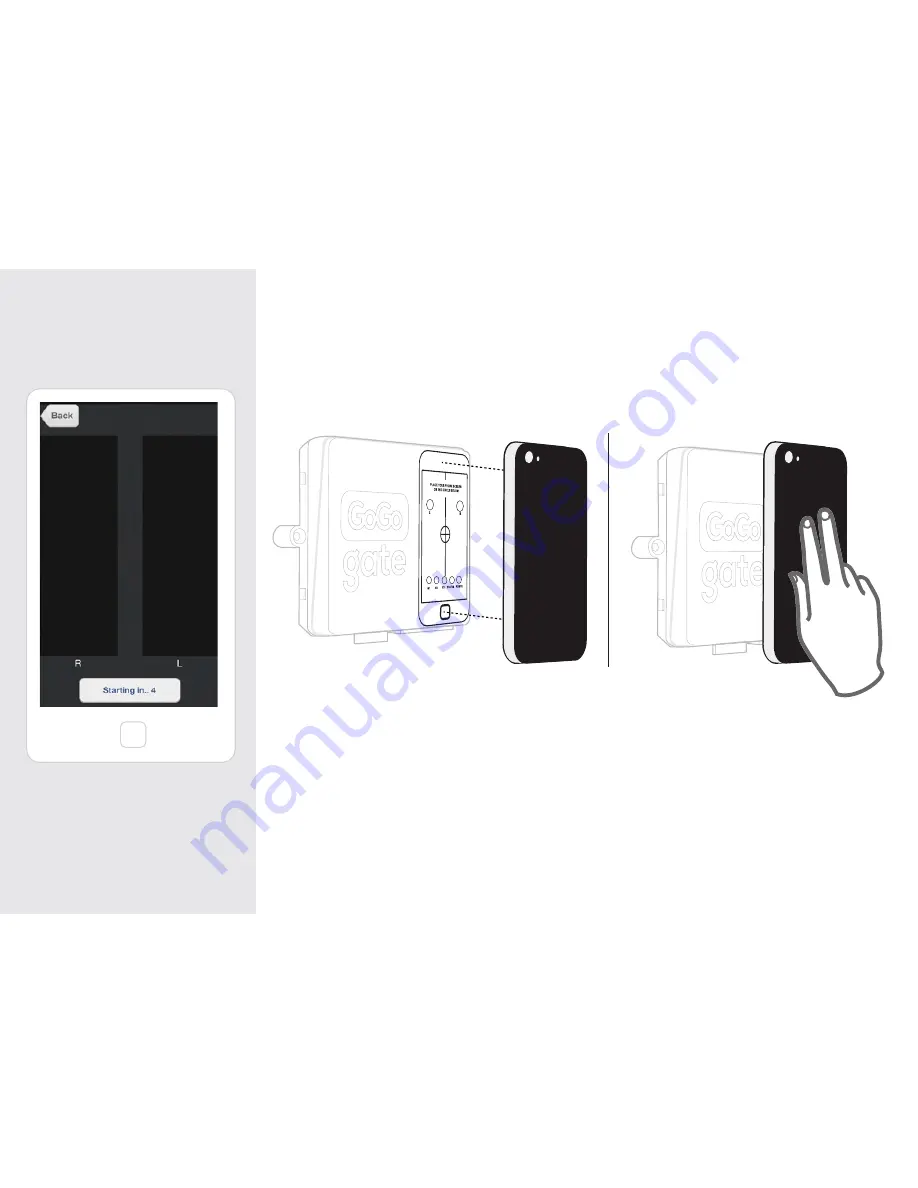
Press the start button when you 

have completed the above 

sections, and follow

 the instructions.

WARNING: You have 5 seconds to 

place your phone on the GOGO-

GATE device. This will start your 

programing sequence. 

KEEP YOUR PHONE PLACED ON THE GOGOGATE DEVICE 

UNTIL YOU HEAR 3 BEEPS

AT THAT POINT YOU MAY REMOVE YOUR PHONE. YOU ARE DONE.

During the programming of your GoGoGate you will hear an automated voice saying  “programming”, 

“programming “ until the sequence is completed. Upon successful completion of the programming sequence 

you will hear 3 beeps. 

If any problems occurred during the programming sequence you will hear 1 long beep. In this case start the 

programing sequence again.

MAKE SURE YOUR SMARTPHONE IS CONNECTED TO YOUR HOME NETWORK VIA WIFI.

Содержание Gate

Страница 1: ...USER MANUAL VERSION 7 25 07 2013...

Страница 2: ...in the Box POWER SUPPLY ONE WIRELES DOOR SENSOR 2 parts A B CABLE CONNECTOR x 3 NOTE Cables have been pre connected to the cable connector for your convenience CABLES Memory Card NOTE The memory card...

Страница 3: ...ecific door is activated The STATUS LED will blink green when the device is operating properly When connecting the wireless sensors to the GoGoGate the status LED will blink fast twice to indicate tha...

Страница 4: ...tion video at www gogogate com for more information Steps below are to connect 1 garage door Just repeat these steps to connect more garage doors Use a screw driver to open or unscrew your garage door...

Страница 5: ...crews to connect the cables Although these are low voltage connectors we always recommend turning off power to wall mounted buttons prior to installation 2 GOGOGATE CABLE GOGOGATE CABLE GOGOGATE CABLE...

Страница 6: ...Reconnect your wall mount button to the wall show photo 3 3 PUSH BUTTON GARAGE OPENER WALL BUTTON EXAMPLE 1 GARAGE OPENER WALL BUTTON EXAMPLE 2 PUSH BUTTON...

Страница 7: ...GOGATE cable slot NOTE IF YOU ARE CONNECTING MULTIPLE GARAGE DOOR WALL BUTTONS TO YOUR GOGOGATE COMPLETE STEP 2 WITH ALL WALL BUTTONS BEFORE INSERTING THE CABLE CONNECTOR INTO THE GOGOGATE DEVICE GOGO...

Страница 8: ...5 Plug your wireless adapter antenna in your gogogate and then connect your gogogate to the power supply outlet See drawing WIRELESS ADAPTER CABLE CONECTOR POWER SUPPLY G1 G2 G3...

Страница 9: ...llation Place on the wall with the double sided fastening strip 2 1 Remove Battery protector tape 4 DIGIT CODE NOTE WRITE DOWN AND STORE IN A SAFE LOCATION THE 4 DIGIT CODE LOCATED ON THE FRONT OF YOU...

Страница 10: ...r garage door via your existing pushbutton Make sure that when the garage door opens the STATUS light of your gogogate is blinking fast during 1 2 seconds The LED should also blink fast for 2 seconds...

Страница 11: ...on your smartphone or ipad You will find our APP at Apple products Look for the Apple store Icon on your phone and ipad and search for GOGOGATE On Android Look for the Google Play Icon on your android...

Страница 12: ...Installation STEP 3 Program your GOGOGATE in 3 simple steps Double click to open your app Press the settings button buttom right of screen Select BEGIN YOUR INSTALLATION...

Страница 13: ...in length We have pre selected WPA which is the most common used settings You may want to try WEP if your installation fails Select Open if your home network is not password protected There is a 4 dig...

Страница 14: ...EPS AT THAT POINT YOU MAY REMOVE YOUR PHONE YOU ARE DONE During the programming of your GoGoGate you will hear an automated voice saying programming programming until the sequence is completed Upon su...

Страница 15: ...hone to open close the garage If you have properly installed the wireless sensors on your garage door you should see a red locked sign if your garage is closed or green open sign if garage door is ope...

Страница 16: ...pressed For example If you press and hold the device 1 button to open your blinds the output relay G1 will remain closed and your blinds will continue to open until the button is released The same app...

Страница 17: ...e that if you had already programmed garage door 1 when you bought your GoGoGate and are now adding 1 or 2 more door sensors you will need to re enter the information 4 digit code and name of your doo...

Страница 18: ...TTINGS Change your device or door name You should use this option if you bought a 2nd GOGOGATE device and installed it in another location eg beach house This allows you to create another window to ac...

Страница 19: ...or relative SELECT GUEST ACCES STANDARD MODE NOTE To access your garage your friends will have to 1 Download the GOGOGATE app on the smartphone 2 They will need to have access to your home network vi...

Страница 20: ...pter is inserted properly on the gogogate cable slot I can not see if my garage door is open or closed make sure you have installed the garage door sensors properly and according to the drawings provi...

Страница 21: ...s for any reason for a full refund of the Product purchase price actually paid within 15 working days following the date you receive the Products subject to compliance with the following You must obta...

Страница 22: ...rother heat producing devices such as audio amplifiers or TVs Do not under any circumstance modify your products power supply if one has been included lf the plug does not fit into yourAC outlet have...

Страница 23: ...s for a Class B digital device pursuant to Part 15 of the FCC Rules These limits are designed to provide reasonable protection against harmful interference in a residential installation This equipment...

Страница 24: ...voquer un fonctionnement indesirable Safety Precautions This product has been designed with the highest concern for safety However any electrical device if used improperly has the potential for causin...

Страница 25: ...MORE INFO WWW GOGOGATE COM...

Отзывы: