28
Action
Description
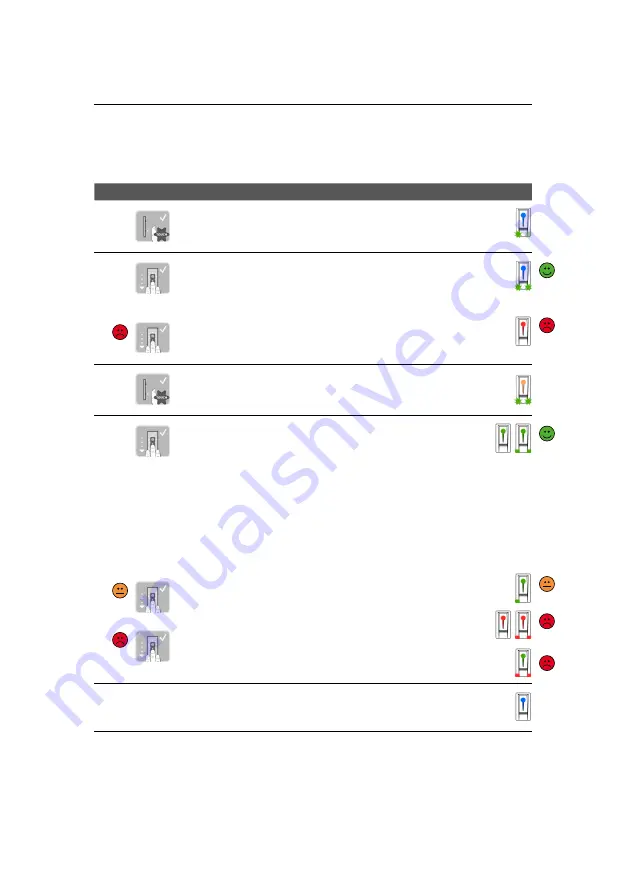
Display
1.
Perform three finger touches on the
sensor within 5 s. This opens the
admin menu.
Status LED illuminates blue,
Function LEDs illuminate
green alternatingly.
2.
Draw any admin finger over the
sensor.
The admin finger was not recognised.
Draw this finger over the sensor
again.
Status LED illuminates blue,
Function LEDs blink green.
Status LED illuminates red.
3.
Perform a finger touch on the sensor
within 5 s.
Status LED illuminates orange,
Function LEDs blink green.
4.
Draw the user finger over the sensor
to store it. Repeat this step at least 2
times. The finger scanner illumi-
nates orange between the individual
finger scans as long as the storing of
fingers is not finished. A maximum
of 10 s between the individual fingers
cans is permitted while the fingers
are being stored (the first finger
was already drawn over the sensor).
Otherwise, the storing of the finger
is cancelled.
The quality of the fingerprint is ade-
quate. However, it can be improved by
scanning your finger again.
The user finger was not stored.
Repeat the process starting with
step 1. The storage of the fingers is
cancelled after 10 scans.
Status LED illuminates green/
All LEDs illuminate green.
Status LED and left function
LED illuminate green.
Status LED illuminates red/
All LEDs illuminate red.
Status LED illuminates green/
Function LEDs illuminate red.
5.
No action
necessary.
Status LED illuminates blue.
8.2 Storing a user finger
The system allows for storage of up to 99 user fingers. A user finger is a finger that
triggers an action on the control unit, such as opening a door. We recommend
storing 2 fingers each.
Initial situation: The system is in normal operation.
Result: The user finger was stored. The system is in normal operation.
Содержание Home Biometrics
Страница 1: ...1 Glutz Home Biometrics Instruction manual...


