background image

SWG-125 Rev. G

June 2013

Globe

i

Fusion

®

User Guide for

i

500,

i

250,

i

S Rev. G

9-22

Registered

A green checkmark indicates that the

Globe

i

Fusion

®

has

connected to the satellite and has registered with the Inmarsat
shore system.

Data

Connection

Displays the connection address

Azimuth

Displays current

Azimuth

.

Elevation

Displays current

Elevation

.

9.4.2

VSAT ACU

In process

9.4.3

VSAT Log

In process

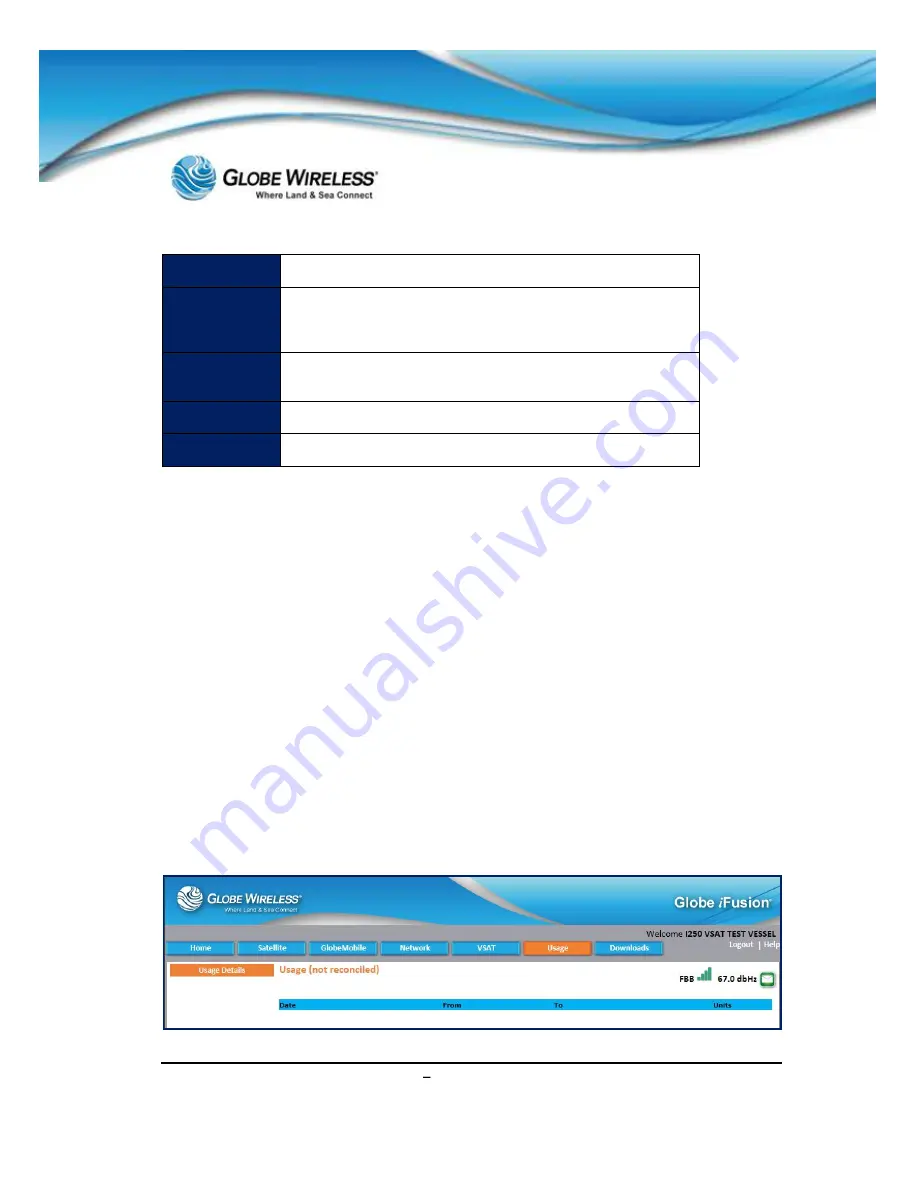
9.5

Usage Tab

Содержание iFusion i250

Страница 1: ...i i i i...

Страница 2: ...nless otherwise noted Microsoft Windows Word and Excel are registered trademarks of Microsoft Corporation Lotus and cc Mail are registered trademarks of IBM Corporation Other software programs mention...

Страница 3: ...tations xxi Customer Comments xxi 1 0 Introduction 1 1 1 1 Key Features 1 1 1 1 1 IP Router 1 1 1 1 2 GlobeVoice 1 2 1 1 3 Email 1 2 1 1 4 Web Browsing 1 2 1 2 Shore Control 1 3 1 3 Globe iFusion Over...

Страница 4: ...sion Rear panel for i250 and i500 2 6 2 4 The Globe iFusion Rear panel for iS 2 7 3 0 Fixed Multiple Lines 3 1 3 1 Introduction 3 1 3 2 Features 3 1 3 3 Features of the PolyCom Phone 3 2 3 4 Navigate...

Страница 5: ...when on another call 3 12 Phone configured for a Single Line Key 3 12 Phone configured for Shared Lines 3 12 3 7 3 Ending a Call 3 13 3 7 4 Placing a Call on Hold 3 13 3 7 5 Setting up Conference Cal...

Страница 6: ...one from Shore 4 2 4 2 Captain Override 4 2 5 0 Using the FBB Handset 5 1 5 1 FleetBroadband Handset Use 5 1 5 1 1 Connect the handset to the Globe iFusion 5 2 5 1 2 Making a Call 5 2 5 1 3 Receiving...

Страница 7: ...2 4 Placing and Receiving Calls 7 16 7 2 5 SMS Text messaging 7 16 7 2 6 Operation Entering and Exiting Shipping Ports 7 16 8 0 Web Based Software 8 1 8 1 Getting Connected 8 1 8 1 1 Configuring your...

Страница 8: ...de Sub tab 9 8 9 2 GlobeMobile Tab 9 9 9 2 1 Status Sub tab 9 9 9 2 2 Admin Sub tab 9 10 9 2 3 GlobeVoice Lines Sub tab 9 11 9 3 Network Tab 9 12 9 3 1 Users Sub tab 9 13 9 3 2 Gateways 9 14 9 3 3 Pro...

Страница 9: ...ress Book 10 4 10 2 2 1 Add a new Contact 10 4 10 2 2 2 Search for a contact 10 5 10 2 2 3 Edit or Delete a Contact 10 6 10 2 3 Options 10 8 10 2 3 1 Personal Information 10 8 10 2 3 2 Display Prefere...

Страница 10: ...5 Downloads Tab 10 30 11 0 Web Browsing Users 11 1 11 1 Start a Web Browsing Session 11 1 11 2 Stop or Extend a Web Browsing Session 11 2 12 0 Troubleshooting 12 1 12 1 Basic User Issues and Solutions...

Страница 11: ...on against harmful interference in a residential installation This equipment generates uses and can radiate radio frequency energy and if not installed and used in accordance with the instructions may...

Страница 12: ...FL 32905 declares under our sole responsibility that the Product brand name as Globe wireless and model Globe i250 S3 Maritime Satellite Voice and Data Router to which this declaration relates is in...

Страница 13: ...ev G xiii Identification mark 1177 Notified Body number The technical documentation relevant to the above equipment is held at Addvalue Communications Pte Ltd 28 Tai Seng Street 06 02 Singapore 534106...

Страница 14: ...SWG 125 Rev G June 2013 Globe iFusion User Guide for i500 i250 iS Rev G xiv This page intentionally left blank...

Страница 15: ...on against harmful interference in a residential installation This equipment generates uses and can radiate radio frequency energy and if not installed and used in accordance with the instructions may...

Страница 16: ...FL 32905 declares under our sole responsibility that the Product brand name as Globe wireless and model Globe i250 S3 Maritime Satellite Voice and Data Router to which this declaration relates is in...

Страница 17: ...ev G xvii Identification mark 1177 Notified Body number The technical documentation relevant to the above equipment is held at Addvalue Communications Pte Ltd 28 Tai Seng Street 06 02 Singapore 534106...

Страница 18: ...SWG 125 Rev G June 2013 Globe iFusion User Guide for i500 i250 iS Rev G xviii This page intentionally left blank...

Страница 19: ...SWG 125 Rev G June 2013 Globe iFusion User Guide for i500 i250 iS Rev G xix CE Certification Globe iS...

Страница 20: ...SWG 125 Rev G June 2013 Globe iFusion User Guide for i500 i250 iS Rev G xx FCC Certification Globe iS...

Страница 21: ...ms Note Provides supplementary information to emphasize a point or procedure or a tip for easier operation Customer Comments Globe Wireless is ISO Certified and is committed to quality and total custo...

Страница 22: ...SWG 125 Rev G June 2013 Globe iFusion User Guide for i500 i250 iS Rev G xxii This page intentionally left blank...

Страница 23: ...ighly integrated and function as a single system These include an Inmarsat FleetBroadband 250 terminal a GSM mobile phone call router an IP network router firewall proxy and email system Tying these s...

Страница 24: ...n be routed either over a standard satellite terminal or via the Voice over IP VOIP service A Globe Wireless SIM card and an unlocked mobile phone are all you need to get started 1 1 3 Email Users of...

Страница 25: ...rom shore using the Globe iPortal web application Changes made on the shore or the ship will be automatically shared and synchronized The system offers user based access control and shipboard users ca...

Страница 26: ...ver FleetBroadband Full duplex single or multi user up to 284kbps Support for streaming IP at 32 64 128 kbps Standard Voice AMBE 2 4 0 kbps Fax High Quality Voice 64kpbs A law PCM 1 4 Package Contents...

Страница 27: ...the wall shelf or table as described below 1 5 1 Installing the Globe iFusion The Globe iFusion is designed to be ins holes used to secure the enclosure case into the cabinet by means of two 2 M5x20mm...

Страница 28: ...500 i250 iS Rev G 1 6 1 5 2 Installing the Globe iFusion onto Wall Shelf or Table Four small mounting adaptors are attached at each corner of the enclosure case allowing them to be mounted onto a wall...

Страница 29: ...mponents on the and panels of the iFusion Technical specifications of the i system are located in Appendix D iFusion i i i The following three graphics depict the front panel of the iFusion i250 i500...

Страница 30: ...the following components Name Description On Off Switch Powers the Globe iFusion on off 2 USB Ports For use of USB flash drives which install and update the system software Power Ready Busy AC Termin...

Страница 31: ...l Operation Long GREEN followed by for each gateway Short GREEN if connected Short AMBER if disconnected Short RED if in Safe Mode During normal operating the Ready LED will give one long green flash...

Страница 32: ...AL lamp indicates the operational state of the FleetBroadband terminal and has the following indications Mode LED Description Power Up AMBER This indicates that the FleetBroadband terminal is powering...

Страница 33: ...inal has registered on the network and can make voice calls using the phone port or corded handset Data Ready Blinking GREEN The FleetBroadband terminal has been authenticated for voice and data commu...

Страница 34: ...hes routers and servers 6 WAN Ports For connecting to other IP gateways and satellite terminals GSM Antenna Connects the GSM Antenna 3 RS 232 Serial Ports For adding additional devices requiring seria...

Страница 35: ...to make voice calls without using the GSM subsystem For Shipboard PCs switches routers and servers For connecting to other IP gateways and satellite terminals Connects the Antenna For adding addition...

Страница 36: ...SWG 125 Rev G June 2013 Globe iFusion User Guide for i500 i250 iS Rev G 2 8 This page intentionally left blank...

Страница 37: ...IP phone extensions may be deployed throughout the ship Each extension may be reached from shore using a phone number with the country code prefix of choice A white list determines the phone numbers y...

Страница 38: ...therefore are not supplied with the phone 1 Message Waiting Indicator Light alerts you to incoming calls and new voicemail 2 Line Icons Visual displays let you know the status of the lines Registered...

Страница 39: ...Use to access the line on which you are receiving or making a call Only single line line 1 is supported at this time 6 Hold Button Push to put an active call on hold Push again to take the call off of...

Страница 40: ...e shortcuts do not work in the Contact Directory After 20 seconds of inactivity the menu system will automatically exit to the idle display unless an edit session is in progress Use the keypad to make...

Страница 41: ...ock Time Clock Order or Enable Disable Step 3 Press and to scroll through the options Step 4 Press to confirm your choice Step 5 Press or repeatedly to return to the idle display 3 5 2 Display Contras...

Страница 42: ...incoming ringing tones for contacts in your local directory Press Select Settings Basic Ring Type Step 1 Optional If multiple lines are configured on your phone first select the line to change from t...

Страница 43: ...4 Press or repeatedly to return to the idle display 3 5 5 Directory Search You can configure how the search of the local contact directory is performed The local contact directory can be searched by f...

Страница 44: ...added to the top of the list Step 1 Press the Dir soft key Step 2 Select the local contact directory by pressing if it does not appear automatically Step 3 Press The Directory screen displays New Ent...

Страница 45: ...unique not already in the directory Entry to this field is denoted by 1 2 3 Step 11 Press to end Step 12 Press the Yes or Cancel soft keys to accept or cancel Step 13 Press repeatedly to return to th...

Страница 46: ...ir soft key Step 2 Select the local contact directory by pressing if it does not appear automatically Step 3 Press and to scroll through the list to locate the contact you wish to call Step 4 Press or...

Страница 47: ...lace a call using the Handset Pick up the handset Dial the number using the dial pad Place a Hands Free call With the handset in the cradle press or to obtain a dial tone Dial the number using the dia...

Страница 48: ...all waiting tone to be played and the display of the call waiting prompt identifying the incoming callers for 10 seconds only You can choose to ignore the call answer the call or reject the call if a...

Страница 49: ...aphic display by the hold icon To resume the call press the Resume soft key or the hold button again Note Since using the Hold feature typically generates music or beeps avoid placing a conference cal...

Страница 50: ...the Conf soft key again to join all parties in the conference To Split a conference call Press the Split soft key This places both parties on hold Set up a Conference Call When you are in an active c...

Страница 51: ...e transfer Blind Transfer The call is automatically transferred after you dial the number of the party to whom you wish to transfer the call Attended Transfer The parties are automatically connected t...

Страница 52: ...cal contact directory Use and to access the contacts and then press Press the Callers soft key to access the Received Call List and use and to access the contact and then press Attended Transfer The p...

Страница 53: ...s section contains general troubleshooting information to help you solve any problems you might encounter with your phone The tables subsection list possible trouble symptoms the likely causes of thes...

Страница 54: ...the opening you need do nothing as it is already set up to hold the handset securely in place when resting in the cradle of the phone Changing the Phone Hook Tab From the front of the phone use a poi...

Страница 55: ...tive Action The dial pad does not work The dial pad on the phone does not respond Do one of the following Check for a response from other feature keys or from the dial pad Place a call to the phone fr...

Страница 56: ...n Menu for example To confirm that the line is active press the Menu key and then select Status Lines Line Information From the Line Information page verify your phone line is registered The screen sh...

Страница 57: ...udio modes If the dial tone exists on another audio mode connect a different handset to isolate the problem The phone does not ring Ring setting or volume is low Do one of the following Adjust the rin...

Страница 58: ...of the following Check that the screen is illuminated Ensure the LAN cable is inserted properly at the back of the phone by unplugging and re inserting the cable If using Power over Ethernet PoE have...

Страница 59: ...ymptom Problem Corrective Action causes the display to appear to flicker Move the phone away from the lights Replace the lights For further assistance contact the Globe Wireless Customer Support Cente...

Страница 60: ...SWG 125 Rev G June 2013 Globe iFusion User Guide for i500 i250 iS Rev G 3 24 This page intentionally left blank...

Страница 61: ...e SIM port on the back of the Globe iFusion With each Globe iFusion Globe Wireless includes a Product Registration Information Sheet containing all of the Globe iFusion identifying numbers as well as...

Страница 62: ...may be times when a ship has a higher priority call to place but the Globe iFusion voice line is currently in use by a low priority call typically a GSM call In such a case the lower priority call can...

Страница 63: ...ting the FBB250 corded handset to the iFusion Procedures for making a call Procedures for receiving a call The handset allows access to the majority of the FleetBroadband functions It provides a logic...

Страница 64: ...of the Globe iFusion 5 1 2 Making a Call Step 1 Using the alpha numeric keypad on the handset dial the number in the following format 00 country code area code number Step 2 Press Step 3 To end the ca...

Страница 65: ...umbers Please consult this sheet to determine your fax number 6 1 1 Sending a Fax from the Ship When audio equipment analog phone Fax or primary handset connected to their respective ports is off Note...

Страница 66: ...Globe iFusion dial the following fax MSISDN is a prefix used in front of the country code for international calls Fax MSISDN is the dedicated fax number for the SIM card in your Globe iFusion Note The...

Страница 67: ...h gives the user the credit necessary to talk or text To provide the shipboard GSM network the Globe iFusion has a GSM Globe Mobile antenna installed in a central location onboard your vessel It is us...

Страница 68: ...d to set up an account Downloads Click to display the page of available downloads Follow directions from there Login If you have your Userid and Password click this link to display the login screen He...

Страница 69: ...Rev G 7 3 Note GlobeMobile SIM cards will only work in unlocked mobile phones Some mobile devices are locked to a particular carrier If this is the case you will not be able to use the Globe Wireless...

Страница 70: ...sponsible for selling SIM cards and refresh cards on the vessel Step 2 Referring to the graphic above insert the SIM into your mobile phone by performing the following Power off the mobile phone Remov...

Страница 71: ...isplayed Carrier Name GWIRELESS or Carrier Code 310 720 Step 4 Referring to the above graphic wait to receive an SMS text message welcoming you to the GlobeMobile network once your phone has been regi...

Страница 72: ...e If for whatever reason you do not click on first option whether you do not have an unlocked mobile phone or do not wish to use a mobile phone you can still create an account without using a GlobeMob...

Страница 73: ...stion if desired If for some reason you forget your logon or password these questions will be asked to verify your identification before authorizing log on Step 3 Enter the GlobeMobile Credit Reload C...

Страница 74: ...or i500 i250 iS Rev G 7 8 Step 5 Click OK to display a Welcome Screen which displays your email address Step 6 Click the Continue to Globe iFusion button which will re display the opening page Step 7...

Страница 75: ...obe iFusion User Guide for i500 i250 iS Rev G 7 9 Step 8 Enter your User ID and Password and click the Login button 7 2 2 Downloads Step 1 Click the Downloads link located on the login page to display...

Страница 76: ...r Guide for i500 i250 iS Rev G 7 10 Step 2 Click the Download button below the item to be downloaded and follow the download instructions 7 2 3 Login Step 1 If you know your login and password click t...

Страница 77: ...display the 7 2 3 1 Forgot Password If you have forgotten your Password click on the Forgot UserID Password link on the Login pop up The Forgot Your UserID Password screen is displayed Receive passwo...

Страница 78: ...t button Your password will be sent to your phone via SMS message Step 1 Click the link to display the Forgot your Password screen Step 2 Type your User ID in the field as shown above and click the Pr...

Страница 79: ...and click the Continue button Step 4 The opening screen is once again displayed Step 5 Click on Login at the top right corner of the screen to display the Login pop up Step 6 Enter your User ID and th...

Страница 80: ...50 iS Rev G 7 14 7 2 3 2 Forgot User ID If you have forgotten your User ID click on the Forgot UserID Password link on the Login pop up to display the Forgot Your UserID Password screen Step 1 Click t...

Страница 81: ...the Forgot UserID screen Step 3 Populate the First name Last name Date of Birth and Home Country fields then click the Proceed button Your User ID will be displayed If you entered erroneous informati...

Страница 82: ...or email address refer to your phone user manual for instructions Step 3 Send the message Note Multimedia MMS messages are not currently supported 7 2 6 Operation Entering and Exiting Shipping Ports...

Страница 83: ...automatically configure your PC with the correct network settings To ensure your PC is configured to this setting go to Control Panel Network Settings Local Area Connection Click View Status Click the...

Страница 84: ...cation supports the most recent versions of all major web browsers to include Microsoft Internet Explorer version 8 Apple Safari version 5 recommended Google Chrome version 3 Mozilla Firefox version 3...

Страница 85: ...sub menu items displayed The following is an example of the Satellite menu as well as the associated sub menu In the above example the Menu button selected is Satellite The sub menu buttons associated...

Страница 86: ...f which satellite terminal the Globe iFusion currently prefers that phone It also displays the Gateway Selection Mode Manual or Automatic 8 2 4 Login To access the web application open your web browse...

Страница 87: ...een Component Description First Time User Button Click to set up a new account Using your own mobile phone Sign up for prepaid email service only Downloads Click to display a list of available downloa...

Страница 88: ...log off the system When you logout you will be returned to the Globe iFusion beginning screen 8 3 Users There are three types of users for the Globe iFusion Admin Prepaid_user Web Browser Each user ty...

Страница 89: ...he Admin user is used to view the current settings of the Globe iFusion The user has no email or web browsing ability Globe iFusion ID number and then the password The Admin User Globe iFusion screen...

Страница 90: ...Rev G June 2013 Globe iFusion User Guide for i500 i250 iS Rev G 9 2 9 1 Satellite Tab Click on the Satellite Tab to display the following sub tabs Status Call History Data History Logs Information Sa...

Страница 91: ...ength of the equipment Temperature Indicates if the equipment temperature is within the normal range GPS Displays the GPS coordinates GPS Date GPS Latitude GPS Longitude GPS Course and GPS Speed Regis...

Страница 92: ...e call The user has the following options Display the log for a specific day by clicking the Prev Day or Next Day button Viewing account code information Editing account code information less than 24...

Страница 93: ...gabytes You can display the log for a specific day by clicking the Prev Day or Next Day button As with Call History the Data History sub tab screen shows only data connections made by the internal Fle...

Страница 94: ...1 4 Logs Sub tab Click on the Logs sub tab to display the Globe iFusion System Logs Click the dropdown arrow in the Choose a log field and select the Error Log or the Event Log which displays the Date...

Страница 95: ...Manufacturer name i e Globe Wireless Addvalue etc Model Lists the Model i e Globe iFusion Software Version Displays the current version of the software being used IMEI Displays the International Mobi...

Страница 96: ...ptime and recovery in the case of hardware malfunction However this also poses some risks when upgrading the firmware of the FleetBroadband Safe Mode is an administrative function used to prevent the...

Страница 97: ...eVoice Lines 9 2 1 Status Sub tab The default sub tab Status displays the GlobeMobile System Health screen with the following information The GSM System ID This is used to uniquely identify your GSM n...

Страница 98: ...Functions Current FBB Calls in Progress Displays the number of FBB calls currently in progress Clear Phone Line The Administrator can end all of the current calls with the Clear Phone Line button Thi...

Страница 99: ...g an 8Kbps Streaming connection This setting includes the number of lines available for GlobeMobile using this technique FBB Voice In this setting the Internal FleetBroadband voice line and or any oth...

Страница 100: ...lowing sub tabs The Users sub tab is the default Users default Gateways Proxy Server Firewall IP Configuration Diagnostics Routes SNAP UPS Reboot The Network tab is used to display the configuration o...

Страница 101: ...ently registered on the vessel and what type of user they are Prepaid users who use their phone number as their username are listed only when they have activated a GSM phone with a Globe Wireless SIM...

Страница 102: ...less Network via communications devices such as satellite terminals UMTS devices 803 11 wireless connections and any other TCP IP device These devices are managed via the Globe iPortal and are read on...

Страница 103: ...are three different modes used by the proxy server the selected mode is displayed in the Filter Mode field These modes are No Filtering all websites are accessible Block Selected Sites Domains listed...

Страница 104: ...lick on the IP Configuration tab to display the Globe iFusion LAN Settings and Globe iFusion DHCP Settings screen which displays the current settings These settings are read only and reflect the setti...

Страница 105: ...y the Network Diagnostics screen The Administrator can perform the following actions on this screen Step 1 Click the Command drop down arrow and make a selection from the drop down list Step 2 Type an...

Страница 106: ...une 2013 Globe iFusion User Guide for i500 i250 iS Rev G 9 18 9 3 7 Routes Click on the Routes tab to display the Static Routes screen which displays the currently configured Static Routes and Current...

Страница 107: ...e cause Refresh the current routing table by clicking 9 3 8 SNAP Click on the SNAP tab to display the Port Forwarding screen which displays the read only Ports table The Local Port Target Host Target...

Страница 108: ...3 10 Reboot Click on the Reboot tab to display the Administrative Function Restart Shut Down screen From here the Administrator can click on the Restart button to Reboot or the Shut Down button to tur...

Страница 109: ...he VSAT screen contains the following sub tabs Status default VSAT ACU VSAT Log 9 4 1 VSAT Status default screen The Status tab is the default tab when VSAT is selected In process Click on the Status...

Страница 110: ...ark indicates that the Globe iFusion has connected to the satellite and has registered with the Inmarsat shore system Data Connection Displays the connection address Azimuth Displays current Azimuth E...

Страница 111: ...ev G 9 23 9 5 1 Usage Details Sub Tab In process 9 6 Downloads Tab Step 1 Click on the Downloads tab to display all downloadable data Step 2 Select a download you wish to perform and press the downloa...

Страница 112: ...SWG 125 Rev G June 2013 Globe iFusion User Guide for i500 i250 iS Rev G 9 24 Step 4 If there are additional downloads you wish to perform repeat the above steps...

Страница 113: ...00 i250 iS Rev G 10 1 10 0Prepaid Users When the Prepaid User logs in to the Globe iFusion the default Email Inbox screen is displayed The Prepaid User screen contains the following tabs Home Tab Emai...

Страница 114: ...prepaid GSM 10 2 Email Tab default Click the Email tab to display the prepaid user email inbox is the default The left pane of the Inbox is where the user will perform such tasks as Compose new email...

Страница 115: ...email screen Step 2 Populate the To and Subject fields then type your message in the message body area Step 3 Click Send Step 4 If you wish to attach a file to the message click on the Browse button a...

Страница 116: ...your Draft folder Check Spelling Click to run the spell check application in the message prior to sending Priority High Normal Low self explanatory Receipt options If you the sender would like confirm...

Страница 117: ...itional information such as phone numbers home work information and notes Click on Show to display the populated field s and Hide to hide the fields thus not displaying any information Step 3 Click th...

Страница 118: ...criteria entered Note You may also search for a contact by clicking on a letter i e to display all contacts beginning with the letter pressed Press to display a list of all contacts in the address boo...

Страница 119: ...for i500 i250 iS Rev G 10 7 Step 4 Make desired changes and click the Save button Note You can also edit additional information such as phone numbers home work address and notes as well Click on Show...

Страница 120: ...addressed on the Personal Information screen Field Description Full Name The entire name of the user for example John Doe This is displayed to the recipients of a message When this is not populated t...

Страница 121: ...d Note For User Defined Citation enter the Citation Start and Citation End in the applicable fields Signature Options Click to place a checkmark in the checkbox for one or both options if desired A bl...

Страница 122: ...before wrapping the text This prevents messages from scrolling way off the screen 86 is a common value but it can be changed as desired by the user Show HTML Version by Default If a message received i...

Страница 123: ...ton when complete 10 2 3 3 Message Highlighting If the user is subscribed to many mailing lists it can be difficult to distinguish which messages came from where while reading through the list of mess...

Страница 124: ...Customer Support Color The actual color of the background You can choose between pre defined colors or you can enter the HEX code for the color that you desire i e a6b492 If you choose to enter your o...

Страница 125: ...ge the background color and select the new color Step 3 When complete click the Submit button 10 2 3 4 Folder Preferences In Folder Preferences the user can change the settings as to how folders are d...

Страница 126: ...inutes Enable Unread Message Notification Specifies how to display unseen messages in the folder listing When set to No Notification the user will not be notified of unseen messages Set it to INBOX an...

Страница 127: ...folder from which to perform the search Step 2 Type search criteria in the Search field Step 3 Click the drop down arrow and select the area to be searched i e only the body of the email or everywhere...

Страница 128: ...Sent items folder etc In the example the email message entitled Test message was located in the search Step 5 To save the message click to place a checkmark in the checkbox next to the message you wis...

Страница 129: ...r of file Step 7 Click the Save button to save the message or if you wish to save it into a different area or folder click the Browse Folders button to navigate to a folder to which you wish to save t...

Страница 130: ...e folder to create in the field Click Create Note In the above example a folder named Private Emails was previously created the folder Family becomes a child folder of the previously created parent fo...

Страница 131: ...k the Submit button Note As shown in the following graphic the parent folder has been renamed from Private Emails to Private The child folder Family is displayed beneath the renamed parent folder 10 2...

Страница 132: ...ide in the Deleted Items Folder above graphic Step 3 To delete the folders from the Deleted Items folder click on the Empty link The deleted Parent and subsequent Child folders are removed 10 2 5 4 Un...

Страница 133: ...unsubscribe to from a folder click to select the folder from the list Step 2 Click the Unsubscribe or Subscribe button Note Prior to unsubscribing from a parent folder you must first unsubscribe from...

Страница 134: ...e action Step 3 To delete a message click the Delete button to place the message into the Deleted Items folder Step 4 To mark a read message as unread or an unread message as read click the appropriat...

Страница 135: ...10 23 10 2 5 6 Deleted Items Folder Step 1 To delete items from the Deleted Items folder click on empty to display the following message Step 2 Click the OK button to complete the action 10 2 5 7 Dra...

Страница 136: ...action Step 3 To delete a draft message click the Delete button to place the message into the Deleted Items folder Step 4 To mark a read message as unread or an unread message as read click the appro...

Страница 137: ...to delete a sent message mark as read unread or move one or more sent items to another folder Step 2 Click to place a checkmark into the checkbox next to the sent message to which you wish to take som...

Страница 138: ...tings for the currently logged in user Each user may configure their individual preferences Click the Preferences Tab to display the following screen To keep mail costs down the Inbound Email Filters...

Страница 139: ...senders For example setting the Unknown Senders value to 0 will block all email from people not in your address book The Outbound Email Filter is also provided to help you protect yourself from accide...

Страница 140: ...de for i500 i250 iS Rev G 10 28 10 4 1 Account Details default Sub Tab 10 4 2 Change Password Sub Tab Click the Change Password Sub tab to display the Password Change screen Step 1 Type your existing...

Страница 141: ...Change Password button 10 4 3 Add Alias Sub Tab Step 1 Click the Add Alias Sub Tab to display the Email Account Aliases screen Step 2 Type your Preferred and candidate Alias in the fields All Alias fi...

Страница 142: ...eld Step 3 Click the Apply button 10 5 Downloads Tab Click on the Downloads Tab to display the Free Downloads screen Step 1 Select a download you wish to perform from the Free Downloads list and press...

Страница 143: ...hen the Web Browsing user logs in the following screen is displayed Note As noted on the screen it is recommended that the user download the free Safari Browser by clicking the link on the Web Browsin...

Страница 144: ...ng as there is time left and the web browsing page is left open If you leave the web browsing page on this browser window the session will be dropped For that reason it is recommended that you open an...

Страница 145: ...Globe iFusion User Guide for i500 i250 iS Rev G 11 3 Click the Extend Session button to extend the browsing session Note Each time the Extend Session button is pressed the browsing time is increased...

Страница 146: ...SWG 125 Rev G June 2013 Globe iFusion User Guide for i500 i250 iS Rev G 11 4 This page intentionally left blank...

Страница 147: ...ORANGE A call is in progress Wait until the telephone LED displays GREEN Note A maximum of two simultaneous calls can be handled by the Globe iFusion system GCC Cannot Make Data IP Calls GlobeMobile S...

Страница 148: ...this and connect If connection cannot be made see your mobile phone User Guide for information to perform the necessary steps manually How do I receive calls or SMS messages You will have a standard...

Страница 149: ...z frequency range and the cell mobile phone must be able to use this range This is the same frequency used in most European countries Note GlobeMobile SIM cards will only work in unlocked mobile phone...

Страница 150: ...SWG 125 Rev G June 2013 Globe iFusion User Guide for i500 i250 iS Rev G 12 4 This page intentionally left blank...

Страница 151: ...Step 2 Power on the Globe iFusion from the front panel Step 3 The system will reboot using the front panel Globe iFusion USB drive and start an install update automatically Step 4 Once the software i...

Страница 152: ...SWG 125 Rev G June 2013 Globe iFusion User Guide for i500 i250 iS Rev G A 2 This page intentionally left blank...

Страница 153: ...in the address field The Globe iFusion FBB Web Interface login screen will appear Step 5 Enter the following into the username and password fields Username service_rep Password eb0lg Step 6 Click the...

Страница 154: ...terface click the Reboot Terminal link to exit safe mode and monitor the unit through the complete rebooting sequences Step 16 Using the Globe iFusion console again type the command bgan_safe_mode The...

Страница 155: ...USB Installer to appear Step 4 Immediately arrow down to the Extras Menu and press Enter Step 5 Watch for the Force Globe iFusion Rebuild Warning to appear and press Enter Step 6 Watch for the p Are y...

Страница 156: ...SWG 125 Rev G June 2013 Globe iFusion User Guide for i500 i250 iS Rev G C 2 This page intentionally left blank...

Страница 157: ...SWG 125 Rev G June 2013 Globe iFusion User Guide for i500 i250 iS Rev G D 1 APPENDIX D Technical Specifications...

Страница 158: ...SWG 125 Rev G June 2013 Globe iFusion User Guide for i500 i250 iS Rev G D 2 Globe iFusion Front Panel Dimensions and Description...

Страница 159: ...i i i i i iFusion i i iFusion i...

Страница 160: ...SWG 125 Rev G June 2013 Globe iFusion User Guide for i500 i250 iS Rev G D 4 This page intentionally left blank...

Страница 161: ...contact the Globe Wireless Customer Service Center at Within the United States or Canada 1 877 535 0653 Overseas 1 321 308 0112 Email customersupport globewireless com Globe Wireless also encourages...

Страница 162: ...SWG 125 Rev G June 2013 Globe iFusion User Guide for i500 i250 iS Rev G E 2 This page intentionally left blank...

Отзывы: