7
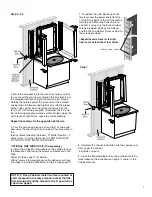
4. Move the wire bushing to the wire entry holes you plan
to use. Insert the service wire through the wire bushing at
the selected locations and pull the service wire through.
Holding the fixture against the outer wall of the installed
cabinet align the two connecting brackets with the proper
holes in the cabinet wall and attach the fixture with the
four (4) #10-32 screws supplied. (Reminder: the 30” and
36” Vertical lights come marked as left and right. Keep the
parts for each light fixture separate until reassembly.
Repeat these steps for the opposite light fixture.
5. Trim the service wire leaving at least 6-8” of cable and
peel away the sheathing. Strip and insert the three wires in
the
terminal Block following the labels ”N” White (Neutral), “L”
Black (Live), ”G” Green (Ground). DO NOT ALTER ANY
OF THE FACTORY INSTALLED WIRING.
OPTIONAL SIDE MIRROR KIT (Pre-assembly)
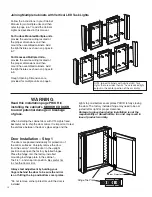
6. Install the 2 Side Mirror Brackets on the outside face of
the Mounting Panel using the screws and Brackets in the
Side
Mirror Kit. (See page 11 for details.)
(Do not remove the paper covering the adhesive until you
are ready to install the Side Mirror in Step 9 (see page 11).
NOTE: 6” Deep Cabinets install surface mounted or
semi-recessed in the same manner except that the
Screw Guide should be moved to the 6” position as
shown on page 9.
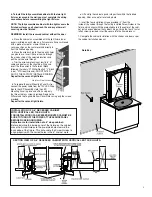
7. To replace the LED Mounting Panel,
first reconnect the power cable from the
12V LED Drive Box to the LED Assembly.
Hold the LED Mounting Panel in place
and affix it using only the three stainless
screws provided. Replace the Diffuser
and the Top and Bottom Plates using only
the screws provided.
--Repeat the same steps for the light
fixture on the other side of the cabinet.
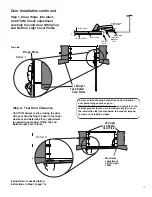
8. Complete the cabinet installation with the shelves and
door as per the cabinet
installation manual.
9. Install the Mirrored Side Kits on the outside of both fix-
tures following the instructions on page 11 and/or in the
Cabinet Manual.
Step 2, 3, 4
Stainless Steel Screws
Step 7


