background image

77

2. 

Pass the locking end through the loop.

3. 

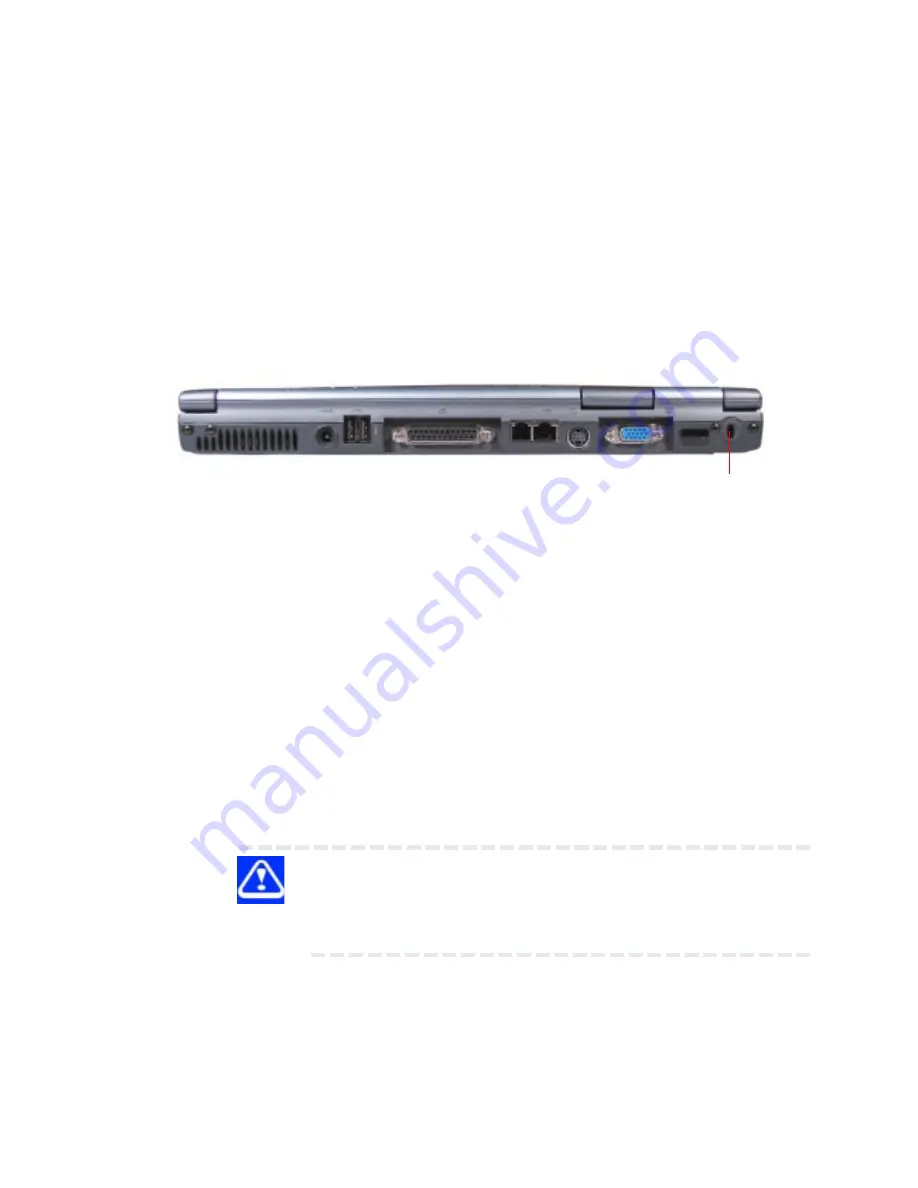
Insert the cable’s locking end into the security lock slot, then

    rotate the key a quarter turn and remove it.

Setting Up Communications

To connect to the Internet, use an online service, or communicate
across the telephone lines with another computer, you need:

•  A modem (supplied with your notebook computer)

•  A telephone line

•  A browser or communications program

•  An Internet Service Provider (ISP) or online service if you plan
   to use the Internet

CAUTION: Never connect the Modular jack to a digital
line. Digital line’s high current can damage the mo-
dem.

Security Lock Slot

Содержание SilverSeraph CL10

Страница 1: ...User s Manual User s Manual...

Страница 2: ...ti norme Intygar att produkten verensst mmer med f ijande normer Supplementary Information The product complies with the requirements of the Low Voltage Directive 73 23 EEC and the EMC Directive 89336...

Страница 3: ...are information Produkten uppfyller kraven enligt l gsp nningsdirektiver73 23EEC och EMC direktiv 89 336 EEC Working environment This product was designed to fulfil the EMC electromagnetic compatibili...

Страница 4: ...r surrounding area Malfunction of or data loss from this product caused by disturbances generated by other devices or machines in the near surrounding area Therefore strongly recommend that the electr...

Страница 5: ...ible for any ensuing interference CE compliance This product and the original options are designed to observe the related EMC Electromagnetic compatibility and safety standards However shouldnotguaran...

Страница 6: ...rt 68 When you are ready to install or use the modem call your local telephone company and give them the following information The telephone number of the line to which you will connect the modem The...

Страница 7: ...nges might affect your service or the operation of your equipment the telephone company will give you notice in writing to allow you to make any changes necessary to maintain uninterrupted service If...

Страница 8: ...r IC CS 03 certified equipment 1 NOTICE The Industry Canada label identifies certified equipment This certification means that the equipment meets certain telecommunications network protective operati...

Страница 9: ...equipment must contain the equipment sRingerEquivalenceNumber REN andanexplanation notice similar to the following The Ringer Equivalence Number REN of this device is 0 3B NOTICE TheRingerEquivalence...

Страница 10: ...alian PSTN would result in you modem being operated in a non compliant manner To verify that the country is correctly set enterthecommandATI9thatdisplaysthecurrentlyactivesetting To set the country pe...

Страница 11: ...r end of the call and b The application using the modem is compatible with the application at the other end of the call e g accessing the Internet requires suitable software in addition to a modem Thi...

Страница 12: ...but not U S A call progress detect When used in theAutoAnswer mode the S0 register must be set with a value of 3 or 4 This ensures a a person calling your modem will hear a short burst of ringing befo...

Страница 13: ...nnection before the power connection and reconnect the power first ThisequipmentmaynotbecompatiblewithTelecomDistinctive Alert cadences and services such as FaxAbility NOTETHATFAULTCALLOUTSCAUSEDBYANY...

Страница 14: ...may also be shown on the packaging of the product and in the sales literature as required in PTC 100 ThechargeforaTelepermitassessmentis 337 50 Anadditional charge of 337 50 is payable where an asses...

Страница 15: ...f and on the user is encouraged to try to correct the interference by one or more of the following measures Reorient or relocate the receiving antenna Increase the separation between the equipment and...

Страница 16: ...r radio noise emissions from digital apparatus as set out in the Radio Interference Regulation of the Canadian Department of Communications Note that Canadian Department of Communications DOC regulati...

Страница 17: ...Short Range Devices Application document 1 DGT short range type approval documentation 4 copies of product and color photos larger than 4x6 inches 1 copy of user manual with instructions and technical...

Страница 18: ...18 2 DGT Label illustrstion 3 The following is the statement that should be printed in user manual...

Страница 19: ...s equipment generates uses and can radiate radio frequency energy and if not installed and used in accordance with the instructions may cause harmful interference to radio communications However there...

Страница 20: ...A Warning This device and its antenna s must operate with a separation distance of at least 5 cm from all persons and must not be co located or operating in conjunction with any other antenna or trans...

Страница 21: ...lt from deliberations of panels and committees of scientists who continually review and interpret the extensive research literature In some situations or environments the use of Wireless LAN may be re...

Страница 22: ...2 l utilsateur du dispositif doit tre pr t accepter tout brouillage radio lectrique re u m me si ce brouillage est susceptible de compromettre le fonctionnement du dispositif Europe EU Declaration of...

Страница 23: ...van BIPT IBPT verplicht Voor registratie of licentie kunt u contact opnemen met BIPT L utilsation en ext rieur est autoris sur le canal 10 2457 MHz et 11 2462 MHz Dans le cas d une utilization priv e...

Страница 24: ...s Please contactART for procedure to follow Bande de fr quence restreinte seuls les canaux 10 11 2457 et 2462 MHz respectivement doivent tre utilis s en France Toute utilisation qu elle soit int rieur...

Страница 25: ...r below the FCC radio frequency exposure limits Nevertheless the Wireless LAN Mini PCI Card shall be used in such a manner that the potential for human contact during normal operation is minimized Whe...

Страница 26: ...ption which can be determined by turning the equipment off and on the user is encouraged to try and correct the interference by one or more of the following measures Reorient or relocate the receiving...

Страница 27: ...RANYOTHERINFORMATIONCONTAINEDHEREIN ORTHEUSETHEREOF Trademarks Intel Pentium III is a registered trademark Microsoft Windows MS DOS NetMeeting Outlook and Media Player are registered trademarks of Mic...

Страница 28: ...an be resumed until no interference occurs after improvement The legal communications mentioned in the above item refer to radio communications operated in accordance with telecommunication laws and r...

Страница 29: ...29 Chapter1 Front with the Display Closed Left side Right side Bottom Front with the Display Open System Status Indicators Controls...

Страница 30: ...lay panel closed and locked To open the display panel press the latch up and raise the panel The Modular bay comes with a CD or DVD drive installed This bay can accommodate a CD ROM CD RW DVD ROM or m...

Страница 31: ...esorother audio output devices such as external speakers Connecting headphones or other devices to this jack automatically disables the internal speakers The SmartMediaTM slot is for digital SmartMedi...

Страница 32: ...foreign objects out of the PC Card slots A staple or similar object that accidentally gets into a slot can damage the computer s circuitry The 1394 port is a 4 pin port for IEEE 1394 connecting i Lin...

Страница 33: ...nect USB peripherals to your computer such as a printer pointing device DEFINITION USB is a peripheral expansion standard that supports a data transfer rate of up to 12 Mbps USB peripherals has a sing...

Страница 34: ...r with an S video cable The VGA port is a standard 15 pin VGA port for connecting an analog display such as a desktop computer monitor The IR port is a fast infrared communication port that allows the...

Страница 35: ...attery bay and prevents it from falling out To release the battery slide the latch in the direction the arrow indicates The Modular Bay Release latch locks a device in the modular bay To release the d...

Страница 36: ...SXGA 1400 x 1050 resolution 14 1 TFT with XGA 1024 x 768 resolution 13 3 TFT with XGA 1024 x 768 resolution DEFINITION TFT Thin Film Transistor is a type of LCD flat panel display screen in which eac...

Страница 37: ...all the functionality of a full size keyboard The front panel provides a palm rest to assist you in maintaining proper posture while using the computer The keyboard function keys when used with the F...

Страница 38: ...nthecomputeristurnedofforinhibernation mode The Battery LED indicates the main battery s current charge or discharge status 1 It light blue and solid on when the battery is fully charged 2 It lights b...

Страница 39: ...uate it Set modes as follows CD Mode Slide the switch button to the left to set the system in CD mode Computer Power Off state You can use the CD controls to play an audio CD without turning on the co...

Страница 40: ...se the disc if it is currently playing Next Fast Forward Skips to the following track on the disc If a track is playing it fast forwards through the track while the button is pressed Stop Stops a disc...

Страница 41: ...eft front of the key instead of the letter printed on the key The Num Lock LED lights when the numeric keypad overlay is turned on When this light is on pressing this hot key can enable disable the em...

Страница 42: ...42 Chapter2 Getting Started Setting Up Your Computer Connecting a Printer Connecting An Alternate Pointing Device Using the Computer for the First Time Registering Your Computer...

Страница 43: ...you use your notebook computer Making Sure You Have Everything Before doing anything else consult the Quick Start card to make sure you received everything If any items are missing or damaged notify...

Страница 44: ...If you spill liquid into the computer turn it off unplug it from the AC power source and let it dry out completely before turning it on again If the com puter does not operate correctly after you turn...

Страница 45: ...aldevicesisimportant to avoid stress related injuries Place the computer on a flat surface at a comfortable height and distance You should be able to type without twisting your torso or neck and look...

Страница 46: ...to raise your knees for eas the preasure on back of your thighs Make your spine be well support by the chair back If need you can adjust the chair back or use a lower back supported cushion which are...

Страница 47: ...ry from strain is to vary your activities If possible schedule a variety of tasks into your working day Finding ways to break up the routine can reduce stress and improve your efficiency Take frequent...

Страница 48: ...he touch if you maintain physical contact with the computer for a long time if you rest the computer on your lap for ex ample your skin might suffer low heat injury CAUTION Never apply heavy pressure...

Страница 49: ...connectAC power to the computer 1 Connect the power cable to theAC adapter Setting Up Your Computer Setting up your computer may include Connecting theAC adapter Charging the battery Connecting a pri...

Страница 50: ...lue DANGER To avoid electric shock do not modify forc ibly bend damage place heavy objects on top of or apply treat to the power cable If the power cable be comes damaged or the plug overheats discont...

Страница 51: ...a power outlet you can charge the battery with the computer turned off or on When the computer is turned off the battery charges in about 3 0 hours NOTE When the computer is turned on and is not con s...

Страница 52: ...computer or electronics store CAUTION Connecting the printer cable while the computer is on may damage the printer the com puter or both NOTE If your printer is ECP or IEEE compliant make sure your p...

Страница 53: ...ing Device 1 Plug the USB pointing device cable into one of the USB ports We recommend the USB port on the right side of the computer For left handded user s use one of the rear USB ports 2 Refer to y...

Страница 54: ...lip the display panel latch up to release it and then lift the display panel to open the computer CAUTION Don t force the display panel open be yond the point where it moves easily Never lift or move...

Страница 55: ...m indicator Hinge Bar comes on NOTE When turning on the computer for the first time Don t turn it off until the operating system has loaded completely Turning off the computer during its initial start...

Страница 56: ...ric lock state is logically disabled Fn F11 Numeric keypad on off Pressing this hot key can enable disable the embedded numeric keypad It depends on keypad on off state if keypad enable the Numeric lo...

Страница 57: ...ions are usually made by double clicking the mouse s left button The Touch Pad also supports this feature It is described in detail below If you are familiar with the operations of a mouse you may onl...

Страница 58: ...e tap theTouch Pad itself The double tapping will select the desired item and prompt the software to perform the related operation ManyofthefunctionswithinMicrosoft Windows seriesoperating system can...

Страница 59: ...sing the keyboard Starting a Program Saving Your Work Printing Your Work Backing Up Your Files Using Compact Discs Using PC Cards Using Your Computer at the Office Setting Up Communications Turning Of...

Страница 60: ...ght indicates a drive is active Turning off the computer while it is reading from or writing to a disc may damage the disk the drive or both Keep the computer and disks away from objects that generate...

Страница 61: ...hift while you use the cursor control keys To return to the numeric overlay release Shift Using the Cursor Control Overlay To turn the cursor control overlay on and off press Fn and F10 simultaneously...

Страница 62: ...r instead of just passing over an area of the page The lowercase letter I and the number 1 are not interchange able The uppercase letter O and the number 0 are not interchange able The Caps Lock key s...

Страница 63: ...ard Through F1 to F12 are called function keys because they perform programmed functions when pressed Used in combination with the Fn key function keys marked with icons execute specific functions on...

Страница 64: ...while you type the letters For uppercase letters hold down both Fn and shift while you type the letters To use the cursor control keys when the numeric overlay is on press and hold down Shift while y...

Страница 65: ...erlay release Shift Starting a Program There are three ways to start a program in Microsoft Windows series operating system which are from the Start menu from the Windows Explorer or from the Run menu...

Страница 66: ...s Windows Explorer The left side of the window displays the disk drives and folders on your computer The right side of the window displays the contents of the item you click on the left 2 To open a do...

Страница 67: ...you are cur rently working with choose Save As from the File menu and give the new file a different name File Names Microsoft Windows series operating system supports file names of up to 255 characte...

Страница 68: ...nnect it If you use more than one printer or are changing printers you will need to setup your Microsoft Windows operating system to run with the additional printer s 1 If your printer is not on turn...

Страница 69: ...y Computer icon on the Windows desktop 3 Double click the drive that contains the file you want to copy 4 Double click the folder containing the file then click the file you want to copy HINT Use the...

Страница 70: ...ray when the computer is off The manual eject button accessed through the small hole just to the right of the eject button allows you to open the disc tray when the computer is off Inserting compact d...

Страница 71: ...en the disc tray wait for it to stop before you remove it 2 Pull the disc tray until it is fully open remove the CD and place it in its protective cover 3 Close the disc tray Removing a CD with the Co...

Страница 72: ...circular motion If necessary moisten the cloth with water or a neutral cleaner not benzene or rubbing alcohol Let the CD dry completely before inserting it in the drive Using PC Cards PC Cards expand...

Страница 73: ...PC Card comes with its own version of Card and Socket Services you should use the files included in Microsoft Windows series operating system Some PC Cards do not support Hot swapping Refer to your PC...

Страница 74: ...ion including slower transmission speeds and dialing errors CAUTION To avoid damaging the computer or the PC Card don t force the card into the slot Removing PC Cards 1 Click the PC Card button on the...

Страница 75: ...it Don t remove a hard disk card while the system is accessing it Don t remove a network card while you are connected to a network PC Card Slots CAUTION If your PC Card supports hot swapping you can...

Страница 76: ...u may want to secure your computer to a heavy object such as your desk The easiest way to do this is to purchase a computer cable lock 1 Loop the cable through or around some part of a heavy object Ma...

Страница 77: ...net use an online service or communicate across the telephone lines with another computer you need Amodem supplied with your notebook computer Atelephone line Abrowser or communications program An Int...

Страница 78: ...s data transmission NOTE If you use a storage device such as a CD ROM drive or HDD connected to a 16 bit PC card modem speed might be slow or communication might be interrupted 1 Plug one end of a sta...

Страница 79: ...h the modem transfers information Speeds are measured in bits per second Data bits The number of bits in one character This number is usually seven or eight Stop bit Indicates the end of a character T...

Страница 80: ...s a good idea to turn off your computer when you are not using it for a while If you have work in progress and expect to resume shortly use your Microsoft Windows operating system Standby command to s...

Страница 81: ...ealer for suggestions for appropriate cleaning products CAUTION Keep liquid including cleaning fluid out of the computer s keyboard speaker grille and other openings Never spray cleaner directly onto...

Страница 82: ...ter4 Energy Saving Design Managing Power Usage Charging Batteries Monitoring Battery Power Conserving Battery Power Battery Alarms Changing the Main Battery Disposing of Used Batteries Safely Travelin...

Страница 83: ...when it is not being used thereby conserving energy and saving money in the process It has a number of other features that enhance its energy efficiency Many of these energy saving features We recomm...

Страница 84: ...PowerOptionPropertieswindowwillmodifythecurrentlyselected scheme Consult your Microsoft Windows operating system documentation for more information on the Power Option utility Running the Computer on...

Страница 85: ...ing Battery Life A main battery can be recharged many times Gradually over time it will lose its ability to hold a charge To maximize the life of your main battery Don t leave the computer plugged in...

Страница 86: ...ttery only can charge a small current while the computer Is consuming full power The battery may not start charging immediately if The battery is extremely hot or cold To ensure that the battery charg...

Страница 87: ...le the computer is on However if the RTC battery is low the real time clock and calendar may display the incorrect time and date or stop working TorechargetheRTCbattery plugtheACadapterintothecomputer...

Страница 88: ...click the Control Panel 2 Double click the Power Options icon 3 Choose the Power Meter tab to show the current battery status The meter displays a percentage of a full battery charge remains TECHNICAL...

Страница 89: ...ower to such as a PC Card What is your working condition operating time decreases at lowtemperatures What To Do When the Battery Runs Low When the battery runs low you have these options Plug the comp...

Страница 90: ...curs sound an alarm display a message both or none You can also set the computer to enter Standby when the alarm goes off To set the alarm levels 1 Click the Start button point to Settings and then cl...

Страница 91: ...Shut down the computer Never removes the battery while the computer is on 3 Close the display panel ensuring that it snaps in to place 4 Turn the computer upside down with the front of the computer f...

Страница 92: ...r it click into place NOTE The release latch is spring loaded and clicks as it latches the battery in place when you insert it 3 Turn the computer bottom side up and ensure the battery is fully insert...

Страница 93: ...usehold waste Tomakesurethattheyareforwardedtorecyclingorproperdisposal they may be returned free of charge to an authorized dealer distributor Only use replacement batteries recommended CAUTION The c...

Страница 94: ...th the computer in a carrying case offers a choice of carrying cases for the computer They all provide plenty of extra space for manuals power cables CD ROM discs and floppy disks etc See your dealer...

Страница 95: ...tures Using the Modular Bay Using the CD Digital Switch to Play MP3 Tracks Audio CD Player Feature Using i Link Port IEEE1394 Using the SmartMediaTM Cards Using the IR Port Using Wireless LAN Using th...

Страница 96: ...p by step panels you will find the following settings 1 nView The nView allows you connect two separate output devices which includes analog monitor digital flat panel or TV You can connect to aTV thr...

Страница 97: ...drives separately as accessories Device Swapping You can swap devices in the device bay when the computer is turned off The Microsoft Windows 2000 and XP operating system support native driver utilit...

Страница 98: ...h either the CD RW or DVD ROM CD RW drive you can write to either CD R or CD RW media There is a disc called Easy CD Creator software that comes with the drive You have to installed the software by yo...

Страница 99: ...nctions MostofthebuttonfunctionsarefixedwhichincludeVolumeControl CD Digital Switch and CD Control Buttons There are another two programmable buttons on the Base Panel They are theApplication button a...

Страница 100: ...o 63 external devices to this port In addition to its high speed it supports isochronous data the delivery of data at a guaranteed rate This makes it ideal for devices that transfer high levels of dat...

Страница 101: ...PC Cards CAUTION The computer supports 3 3V SmartMediaTM card only It is prohibited to use other votage SmartMediaTM card Inserting the SmartMediaTM Card 1 Turn the card face down 2 Push the card int...

Страница 102: ...om the pop up menu 2 Push the card and release it The card will pop out slightly 3 Lift the left side of the computer slightly and grasp the card Pull it straight out NOTE Please format SmartMediaTM c...

Страница 103: ...k connection uses two way radio transmission to communicate with an Access Point transceiver that is physically connected to the network by cable The Wireless Networking driver utility has been preins...

Страница 104: ...your computer is running battery power you can choose either Battery optimized performance or Maximum performance The battery optimized performance is recommended It is set Battery optimized performan...

Страница 105: ...tive Portable Laptop Adaptive Adaptive Minimal Power Management Adaptive Adaptive Maximize Battery Life Adaptive Degrade Presentation Contant Degrade Always On None None Policy Description None Highes...

Страница 106: ...ternal Peripherals Connecting a USB Keyboard Connecting an External USB Pointing Device Connecting an External Monitor Connecting Audio Devices Connecting A Microphone Additional Disk Drive Options Up...

Страница 107: ...buying additional disk drives to use in the device bay and installing more system memory Using External Peripherals Your computer s numerous ports allow you to connect all sorts of peripheral devices...

Страница 108: ...uter We recommend one of the rear ports if you will also connect an external pointing device for left handed users Use the USB port on the right hand side of the computer for right handed users 2 If t...

Страница 109: ...tall an external USB pointing device do as follows 1 Plug the device into one of the USB ports on the computer We recommend the USB port on the right hand side of the computer For left handed users us...

Страница 110: ...itor to the VGA port do as follows 1 Turn off the computer 2 Check the instructions that come with the monitor 3 Plug the VGA connector from the monitor onto the VGA port of the computer 4 Tighten the...

Страница 111: ...speakers do as follows 1 Turn off the computer 2 Position the speakers where you want them 3 PlugtheminiplugconnectorfromthespeakersintotheHeadphone jack on the left side of the computer 4 Plug the s...

Страница 112: ...ne with a miniplug connector 2 PlugthemicrophoneintotheMicrophonejackonthecomputer 3 Adjust the microphone volume in the Windows Sounds and Multimedia control panel sAudio panel section by clicking on...

Страница 113: ...ng audio cable into the Line In jack on the left side of the computer 2 Adjust the Line In volume in the Windows Sounds and Multimedia control panel sAudio panel section by clicking on the Volume butt...

Страница 114: ...ely The drives available include CD ROM CD RW DVD DVD CD RW You will have received at least one of these with your computer If for example your model came with a CD ROM drive you might want to get eit...

Страница 115: ...The basic specifications of the memory used are 200 pin DDR module 2 5 Volt DDR PC 133 128MB 256MB or 512MB capacity Installing a Memory Upgrade Unless you are familiar with computer upgrades and com...

Страница 116: ...Computer with the right Mouse button clicking on the Properties item in the menu that appears and display the memorysizeintheGeneralpaneloftheSystemPropertiescontrol panel CAUTION If you install a mem...

Страница 117: ...rn On the Computer Fixing Device Related Problems Power Problems Keyboard Problems Display Problems DiskDrive Problems CD ROM Drive Problems Sound System Problems PC Card Problems Resolving PC Card Pr...

Страница 118: ...identify and solve Others may require helps from your dealer or the manufacturer of a software program This chapter aims to help you solving many problems by yourself without additional helps It cover...

Страница 119: ...a program has stopped responding the words not responding appear beside its name in the list 2 Select the program you want to close then click End Task Closing the failed program should allow you to...

Страница 120: ...ys The Details button displays information that the software manufacturer needs to help you solve your problem 2 Press Ctrl and c simultaneously to copy the text to the clipboard 3 Open Notepad click...

Страница 121: ...responding appear beside it 2 Click End Task 3 When the dialog box appears click End Task again Problems When You Turn On the Computer These problems may occur when you turn on the power The computer...

Страница 122: ...snapshot of your system whenever a system fault occurs System Information Collects your system configurationinformation and provides a menu for displaying the associated system topics After diagnosing...

Страница 123: ...t causing the error Power Problems Your computer receives power through the AC adapter or from the main battery Power problems are interrelated For example a faultyAC adapter or power cable will neith...

Страница 124: ...wer cable connected wait 20 minutes and see whether the battery is charging If the battery light is glowing after 20 minutes let the computer continue charging the battery for at least another 20 minu...

Страница 125: ...eanings to any of the keys You have connected an external keyboard and operating system displays one or more keyboard error messages If you have a second keyboard try it If it works the first keyboard...

Страница 126: ...its previous setting If you are using an external monitor Check that the monitor is turned on Check that the monitor s power cable is firmly plugged into a working power outlet Check that the cable c...

Страница 127: ...ick with the secondary button 2 Click Properties and then Settings 3 Change the Colors option and click OK For more information see Windows Help A message indicates a problem with your display setting...

Страница 128: ...lyzes the directories files and File Allocation Table FAT on the disk and repairs any damage it finds To run ScanDisk 1 Click Start point to Programs Accessories System Tools and click ScanDisk 2 Clic...

Страница 129: ...kette drive You may already have a diskette in the drive Make sure the drive is empty You may be inserting the diskette incorrectly Hold the label of the disk with the hub side facing down and insert...

Страница 130: ...e whether it is dirty If necessary wipe it with a soft clean cloth dipped in water or a neutral cleaner Replace the CD in the drawer Make sure it is laying flat label side uppermost Press down until t...

Страница 131: ...r Adjust the volume control If you are using an external headphone or speakers check that they are securely connected to your computer In SETUP check that the sound function is enabled The computer em...

Страница 132: ...ns in this chapter may apply Resource conflicts can cause problems when using PC Cards If the device is a modem see Modem problems PC Card Checklist Make sure the card is inserted properly into the sl...

Страница 133: ...ager tab 3 Double click the device listed as your PC Card Windows operating system displays your PC Card s Properties dialog box This dialog box contains information about your PC Card configuration a...

Страница 134: ...m may be caused by a low battery Replace the battery with a fully charged one or charge the battery fully as follows 1 Make sure the computer is not in Standby 2 Turn off the computer 3 Connect theAC...

Страница 135: ...s firmly attached to the computer and the printer If your printer is ECP or IEEE 1284 compliant make sure you have an IEEE 1284 printer cable Check that the printer has plenty of paper Some printers w...

Страница 136: ...ephone line socket Check the serial port settings to make sure the hardware and software are referring to the same COM port look in Device Manager under Modems for the PC Card modem Check the communic...

Страница 137: ...ized software to copy everything on the hard disk to a backup device Some people use a combination of these methods backing up all files to backup device weekly and copying critical files to diskette...

Страница 138: ...roblem just by stepping away from it for a few moments If You Need Further Assistance If you have followed the recommendations in this chapter and are still having problems you may need additional tec...

Страница 139: ...Contact the software company s technical support group for their assistance Consult the dealer from whom you purchased your computer and or program Your dealer is your best source for current informa...

Страница 140: ...140 AppendixA...

Страница 141: ...Keys Keypad on off pressing this hot key can enble disable the embedded keypad In this mode the keypad is coursor function Numeric keypad on off pressing this hot key can enable disable the emdedded...

Страница 142: ...142 AppendixB...

Страница 143: ...el Pentium 4 1 4GHz 1 5GHz 1 6GHz 1 7GHzHz FCPGA Socket CPU 512KB L2 Cache on CPU Designed for Intel SpeedStep 133MHz FSB Chip Set Intel MCH M 845MP 625BGA for system controller Intel ICH3 M for PCI t...

Страница 144: ...ler Memory No onboard memory Supports200 266MDDRRAMmodul128MB 256MB 512MB Twoslotsupported Maximumcapacity1GBifbuild2modules BIOS 512KB Flash ROM for system BIOS Password protection System Microsoft W...

Страница 145: ...H Li Ion Battery System off or Suspend One 2 5 9 5mm Hard Disk Up to 30GB Bus Master IDE 9 5m m 2 5 HDD Support Support Ultra 66 100 synchronous DMA Modular BAY 12 7mm 1 44MB FDD device 3 Mode 5 25 12...

Страница 146: ...s CRT port Support DDC 2B One 7 pins TV out port One MIC In port One Line In port One headphone out Port One 2pins AC Adapter Jack One type III or two type II PCMCIA Card Bus slot Three USB ports One...

Страница 147: ...removableATADevice Card bus card ACPI 1 0 Compliant Power Management Function Standby mode Suspend to RAM or Suspend to Disk mode by time out or by hot Key HDD Local Stand By mode by time out LCD Loca...

Страница 148: ...Volume Up Button Internet Button Application Button AC Adapter UniversalAC adapter module 90 264VAC 47 63HZ 60W Dimension 12 28 L x 10 48 W x 1 43 H 312mmm x 266mm x 33mm Front 36 5mm Rear Weight App...

Страница 149: ...149 AppendixC...

Страница 150: ...power supply you can use worldwide This appendix shows the configuration of typicalAC power cord plugs and sockets in various parts of the world USA and Canada ULapprovedCSAapproved UnitedKingdom BS a...

Отзывы: