


Getting Started
13
2
Chapter 2 Getting Started
This section provides basic information to get the GV-Video Server working on the network.
2.1 Installing on a Network
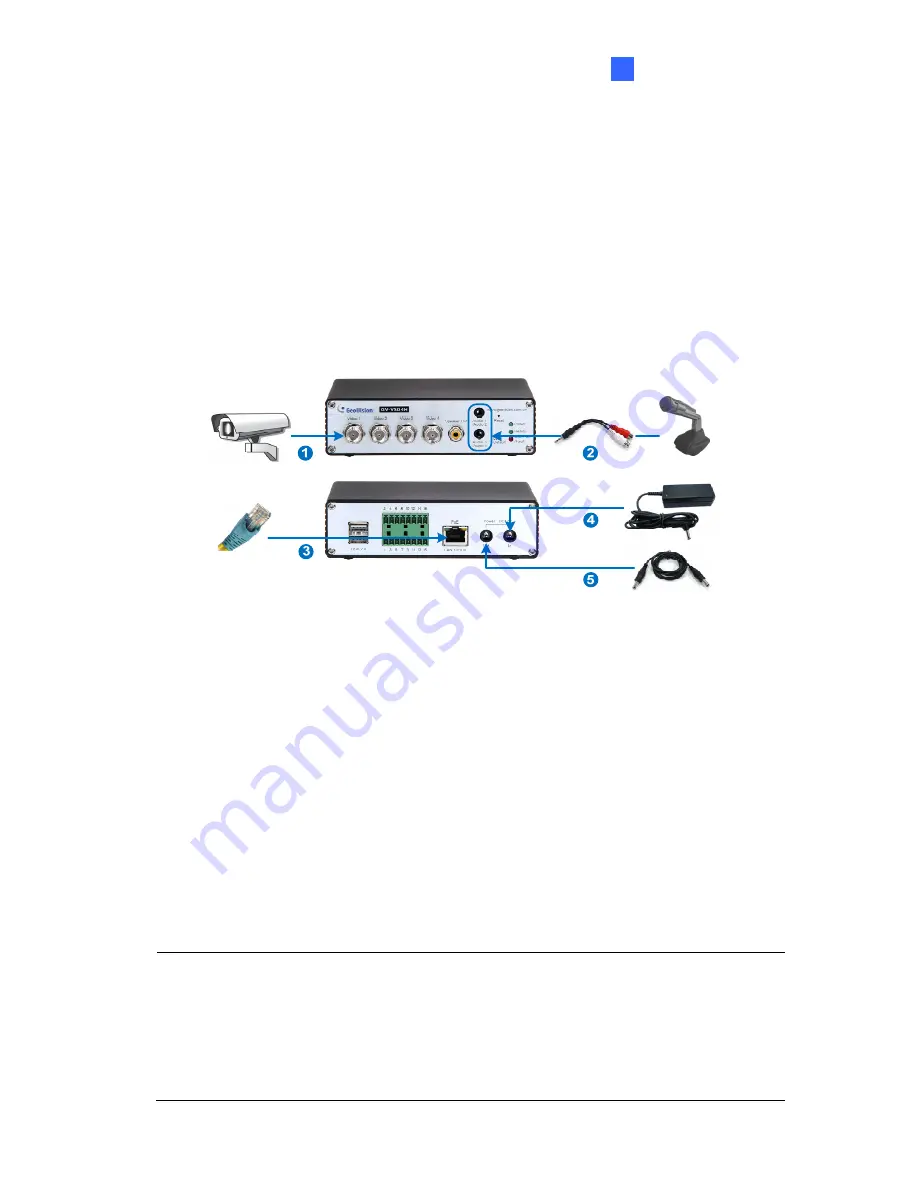
These instructions describe the basic connections to install the GV-Video Server on the
network. Here we use GV-VS04H as the example to demonstrate the steps.
Figure 2-1
1. Connect your camera’s video output to the BNC video input.
2. Connect the microphone to the RCA audio input using the 3.5 mm Stereo to RCA
Cable.
3. Connect the hub or switch on the LAN to the unit’s 10/100 Mbps port.
4. Connect the power using one of the following methods:
z
Use the supplied power adapter, connect to power.
z
Use the Power over Ethernet (PoE) function. The power will be provided over the
network cable.
5. Optionally connect the DC Male-to-Male Cable to power on the camera through the
GV-Video Server.
6. Wait until both Power and Ready LEDs are on and then you can set the IP address for
the unit. See
3. Accessing the GV-Video Server
.
Note:
1. The GV-VS11 does not support PoE function.
2. The DC Male-to-Male Cable and 3.5 mm Stereo to RCA Cable are only available for
GV-VS04A and GV-VS04H.
3. The GV-Video Server cannot work with the microphone requiring power from the unit.
Use the microphone that has external power supply.
Содержание GV-Video Server
Страница 43: ...Administrator Mode 35 4 Figure 4 3 ...
Страница 103: ...Administrator Mode 95 4 4 Click Query The filtering results may look like the figure below Figure 4 44 ...
Страница 104: ...96 4 8 7 Tools This section allows you to execute certain system operations and view the firmware version Figure 4 45 ...


