


116
7.1 Setting Up GV-Video Server
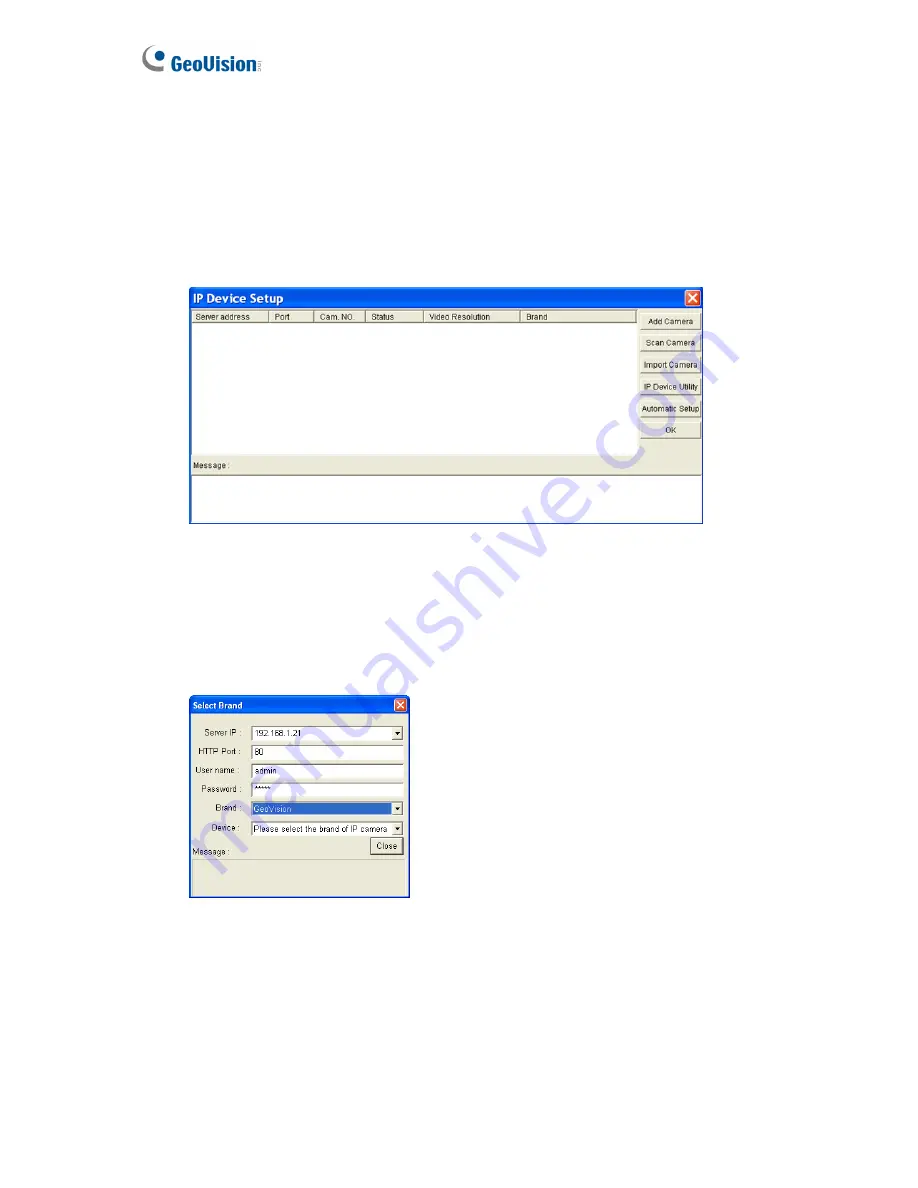
To set up the cameras from the GV-Video Server on the GV-System, follow these steps:
1. On the main screen, click the
Configure
button, select
System Configure
, select
Camera Install
and click
IP Camera Install
. This dialog box appears.
Figure 7-2
•
To add an IP camera from a list of the IP cameras on the LAN, click
Scan
Camera
.
•
To manually set up an IP camera, follow steps 2 to 7.
2. Click
Add Camera
. This dialog box appears.
Figure 7-3
3. Type the IP address, username and password of the GV-Video Server. Modify the
default HTTP port if necessary. Select
GeoVision
from the
Brand
drop-down list and
select the GV-Video Server
model from the
Device
drop-down list. The following
dialog box appears.
Содержание GV-Video Server
Страница 43: ...Administrator Mode 35 4 Figure 4 3 ...
Страница 103: ...Administrator Mode 95 4 4 Click Query The filtering results may look like the figure below Figure 4 44 ...
Страница 104: ...96 4 8 7 Tools This section allows you to execute certain system operations and view the firmware version Figure 4 45 ...


