Model IR5500
10
3.4 Installation
1.
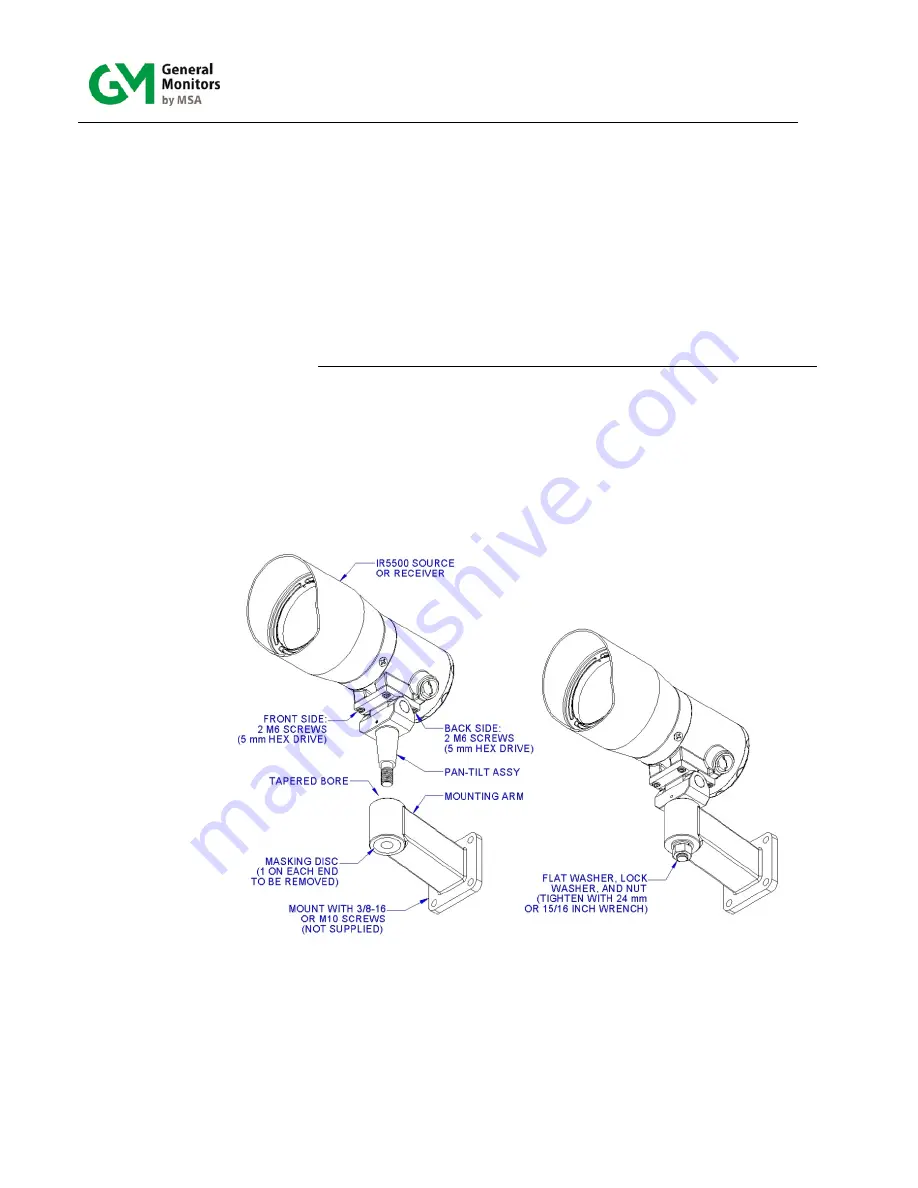
If necessary, remove the pan-tilt assembly from the arm. To do so, unscrew the 24 mm
nut from the bottom of the pan-tilt. Remove the lock washer and flat washer. Put the
washers and the nut in a secure place.
2. Put the source or the receiver unit on a work surface with the 4 mounting holes facing
up. Align the 4 mounting holes of the pan-tilt assembly with those on the unit. Verify
that the gap in the mounting surface of the pan-tilt assembly is across the unit rather
than from front to back. Apply a small amount of anti-seize lubricant (p/n 2421) to the
first few threads of each M6 screw. A packet of lubricant is included with the pan/tilt
assembly. Without lubricant, alignment will be more difficult, and bolts may seize.
Install the 4 screws without tightening the front two. Hand-tighten the back two screws.
3. Mount the unit and pan-tilt assembly on the arm. Install the washer, the lock washer,
and the 24mm nut to the bottom of the pan-tilt assembly, without tightening the nut.
4. Verify that the front and back fine adjust screws for tilt are flush with the assembly
surface, to allow full movement of tilt. If necessary, use a 2.5 mm hex wrench to adjust
the screws.
Figure 5: Installation onto Mounting Arm


