Component/FRU Removal and Replacement
154
T2100-ST1 Treadmill, 110V / T2100-ST2 Treadmill, 220V
2097937-002 Rev G
11 March 2019
Removing and Reinstalling the Handrails for Moving
Tools Required
o
1/4” Hex Socket or Flat Blade Screw Driver
o
5/16” Allen Wrench
o
Flat head screw driver
o
Grounding Wrist Strap
Approximate time to complete: 45 min
NOTE:
This task is required only when you need to pass through a
door opening less than the standard 36”. It will be
necessary to remove the handrail assembly if the door is
not capable of being opened fully parallel to the door
opening and clearance is less than 35 ½”.
1.
Turn the treadmill’s power switch to the OFF position.
2.
Unplug the treadmill from the wall receptacle.
3.
Allow the treadmill to discharge for 1 minute.
4.
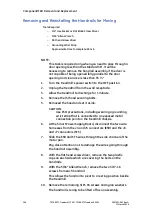
Remove the (5) hood securing bolts.
5.
Removed the hood and set it aside.
CAUTION:
Use ESD precautions, including wearing a grounding
wrist strap that is connected to an exposed metal
connection point on the treadmill chassis.
6.
At the Smart Power Supply Board, disconnect the two wire
harnesses from the J4 and J5 connectors (ESB) and the J6
and J7 connectors (STS).
7.
Slide the ESB and STS wires through the side channel of the
motor pan.
Pay close attention not to damage the wires going through
the handrail assembly.
8.
With the flat head screw driver, remove the two plastic
caps on each side which are covering the bolts on the
handrails.
9.
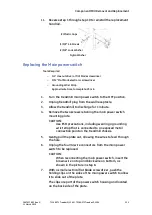
With the 5/16” Allen Wrench, remove the two 3/8”-16
screws from each handrail.
This allows the handrail to pivot to a resting position beside
the treadmill.
10.
Remove the remaining 3/8”-16 screws and nylon washers.
The handrail is ready to be lifted off as an assembly.

