25
Installation Instructions
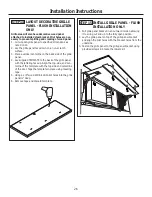
STEP 13 HANG DECORATIVE DOOR PANELS - FLUSH INSTALLATION ONLY
Panel with attached brackets will mate with steel
brackets already attached to top, sides, and bottom of
the door. Each bracket attached to the door will have
two machined screws recessed inside the door to provide
anchoring points for wood panel brackets to install onto
the doors.
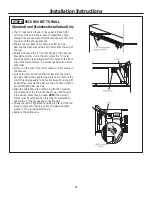
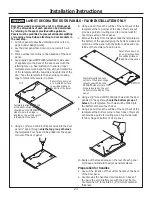
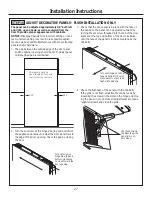
1. Lift the decorative panel to hang the panel on the door.
Angle the bottom of the panel slightly away from the
door. The brackets mounted at the top of the door panel
will lay over the top of the brackets mounted at the top
of the door. Allow the flanges of the door brackets to
slide into the slot at the top of the panel brackets and
gently allow the bottom edge of the panel to lay against
the door as it hangs freely.
2. Adjust the panel by pushing it flush against the door.
3. Using supplied washer-head screws, secure panel
brackets mounted to the rear of the wooden panels to
the door; top, side and bottom.
Each screw should be tightened until snug, and then
backed off 2-3 turns to allow for fine tuning adjustment.
NOTE: If screws are fully tightened at this stage, fur-
ther panel adjustment will not be possible.
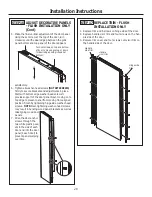
4. Thread set screws into each of the panel brackets
attached to the door. Hinge side brackets will have 2
set screws each, going into the door. The handle side
brackets will each have 1 set screw going into the door.
Each panel bracket has a tab that is aligned with a tab
on the door bracket. Each of these will have a set screw
threaded into them (see illustration).
Содержание Monogram ZIRS360NNLH
Страница 30: ...Notes 30...
Страница 31: ...Notes 31...


