64 2042376-001 Rev G ©2012 General Electric Company. All rights reserved. Lullaby
TM
Warmer
Description
Remove the Hood assembly (refer to 6.3 Dismantling Hood) before you proceed with replacing
the hood spacer, hood top plate and observation lamp plate.
Instructions to replace the Hood Spacer:
1.
Remove the front cover and front bracket. Refer to section 7.1.4, Replacing the Front
Bracket and 7.1.5 Replacing the Front and Rear Covers.
2.
Slide out the heater and the hood spacer.
3.
Slide the new hood spacer and then the heater from front through bottom recess of
extrusions until it connects with rear bracket.
4.
Slide out the hood top plate from the front.
5.
Slide in the new hood top plate from the front through the top recess of both extrusions
until it connects with the rear bracket.
6.
Unscrew the observation lamp plate.
7.
Replace the old observation lamp plate with a new one and fasten it on to the top plate
with M3 pan screws (Qty 2).
8.
Fasten the front bracket and front cover to the hood.
Note: Ensure that the Observation lamp cable runs through hood pillar before the
Observation lamp plate is fixed.
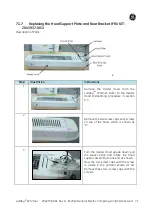
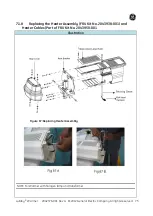
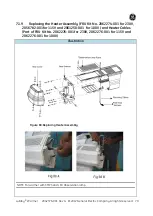
7.1.4
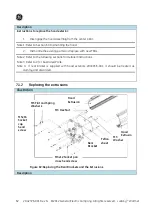
Replacing the Front Bracket
Illustration
Figure 84:
Bracket and Extrusions
M3 Hex Nut
Front Bracket
M5x16 Skt cap head
screw
M3x12 Pan Cross
Head Screw
Washers
Washers
Teflon Sheet
M3 Washers
Hood
Extrusi
ons
Содержание Lullaby Warmer
Страница 12: ...This page is left blank intentionally ...
Страница 138: ...112 2042376 001 Rev G 2012 General Electric Company All rights reserved LullabyTM Warmer Hood Assembly Continued ...
Страница 139: ...LullabyTM Warmer 2042376 001 Rev G 2012 General Electric Company All rights reserved 113 ...
Страница 140: ...114 2042376 001 Rev G 2012 General Electric Company All rights reserved LullabyTM Warmer ...
Страница 150: ...124 2042376 001 Rev G 2012 General Electric Company All rights reserved LullabyTM Warmer ...

