9.
Rotate the retaining spring clips to the locked
position, making sure that each clip is
in
its
proper recess, and replace the device cover.
"Y" RELAY
As described under "Operation", the "Y" relay
is a permissive relay which limits to one the number
of breaker closures possible on one closing signal.
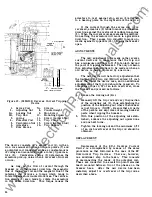
On drawout breakers, the "Y" relay mounting
bracket is fastened to the right hand side member
of the breaker frame by two mounting screws. On
terminal board breakers, it is fastened to the rear
side of the terminal board support. The t-elay
itself is fastened to an intermediate bracket which
is detachable from the main support. The junctures
between the relay and the intermediate bracket
and between the two brackets are rubber cushioned
against vibration and shock.
REPLACEMENT
If
replacement of the "Y" relay becomes
necessary, it may be detached from its supporting
brackets by removfl,l of the fastening hardware.
The leads to the relay should be cut off as closely
as possible to the soldered connections so that
enough wire will remain for connection to the
new relay.
Sufficient original wire is allowed
for this purpose.
2
3
4
After the old relay has been removed, the
wire leads to the relay should be stripped of
insulation to about 1/4 of an inch from the ends.
A good mechanical connection should be made
before soldering.
After all connections are completed, the relay
may should again be mounted to the breaker by
means of its supporting brackets and hardware.
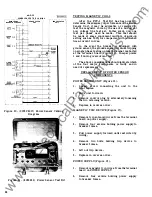
After replacement has been completed, the
relay may be checked electrically in the following
manner:
1. Apply closing voltage to terminal board or
secondary disconnects.
2 . Push button of closing switch and hold closed.
3.
Continuing to hold push button in closed posi
tion, manually trip the breaker open.
4.
If
the breaker stays open, and makes no
attempt to close, the "Y" relay is functioning
properly.
5. While releasing the close button, observe
the "Y" relay.
It
should open as the closing
switch is released.
-6
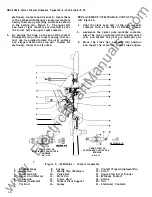
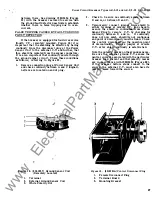
Figure 7. (695C 1 62 ) Cut-Off Switch
1 . Screw
2 . Washer
5. Spring
6. Actuator
9. Contact
(AA)
10. Support
3.
Spring
4.
Movable Contact Assembly
7. Pivot Pin
8.
Contact
(BB)
17
www
. ElectricalPartManuals
. com

