PAGE 6
PAGE 7
To the left side of each sensor row is an indicator to help you understand the current
status of the sensor.
Sensor is checking in and within user defined safe parameters.
Sensor has met or exceeded a user defined threshold or triggered event.
Sensor has not checked in (inactivity alert sent).
No sensor readings will be recorded (Inactive)
Sensor Details View
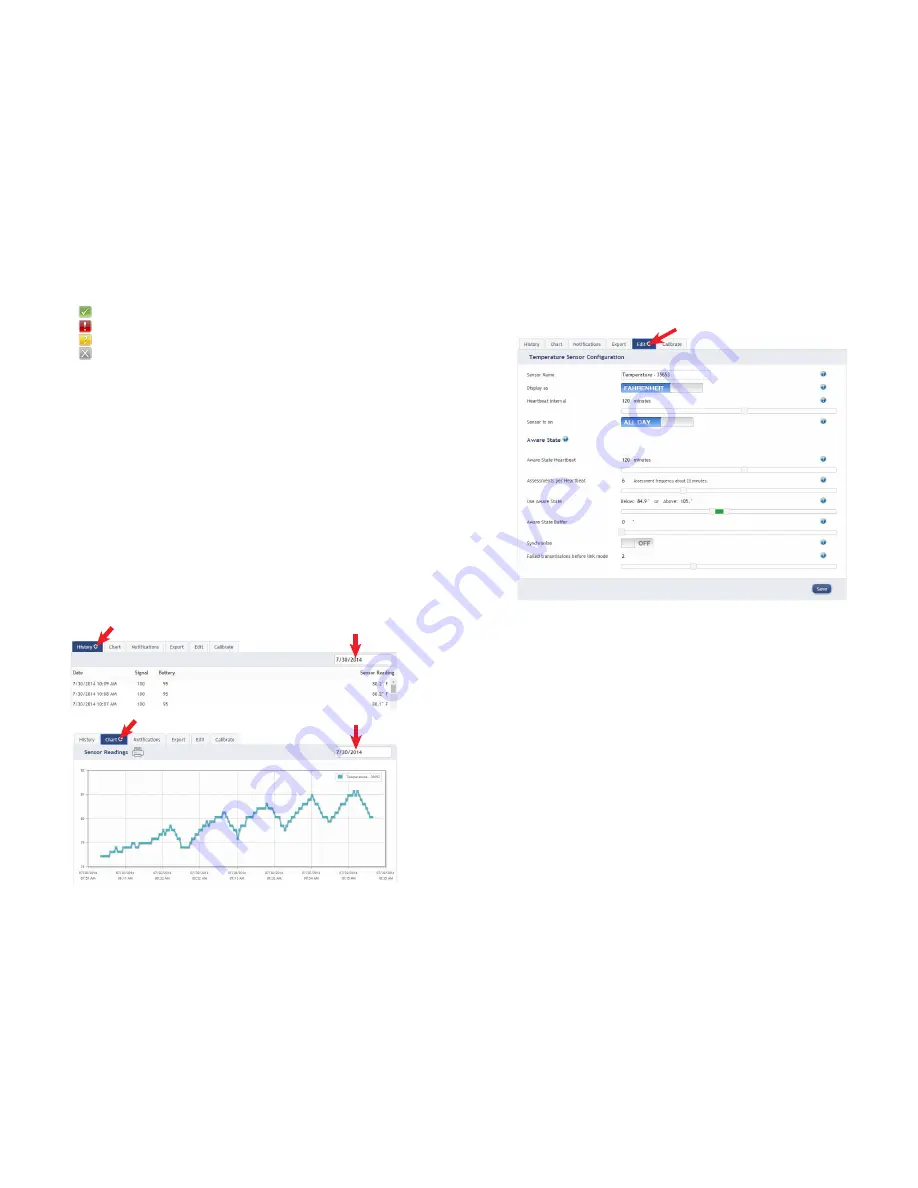
Clicking on a sensor row on the “Overview” page expands the row to include a detailed
sensor view for the selected sensor.
Select a tab to change between:
History - Displays a history of the selected sensor’s data.
Chart
- Displays a graphical view of the selected sensor’s data.
Notifications - Allows you to manage notifications for the sensor.
Export - Allows you to archive data by exporting as a .csv file.
Edit
- Allows you to manage sensor settings.
Calibrate - Available on certain sensor types to provide more accurate data.
Note: The data shown on the chart, notification, history and export tabs is based on the date
range indicated on the upper right side of the sensor detail information. To change the date
range, click inside the date box.
2. History and Chart Views.
Clicking on the “History” or “Chart” tabs within the sensor detail panel allows you to view
the sensor’s data history as time stamped data or in a graphical chart format.
Note: To change the date range of the viewable information, click on
the date range box at the top right of the sensor detail panel.
3. Configuring Sensor Settings
To edit a sensors operation settings, click on the sensor overview row to display the details
view. Click on the “Edit” tab to access the sensor configuration panel.
The sensor edit panel allows you to set the primary configurations for the sensor. Mousing
over the question mark icon by each setting will provide an explanation of that setting. When
you have finished making changes, press the “Save” button at the
bottom of this section.
Note: Be sure to click the “Save” button anytime you make a change to any of the sensor parameters.
All changes made to the sensor settings will be downloaded to the sensor on the next sensor heartbeat
(check-in). Once a change has been made and “Saved,” you will not be able to edit that sensor’s configu-
rations again until the sensor has downloaded the new setting.


