6-4
3.
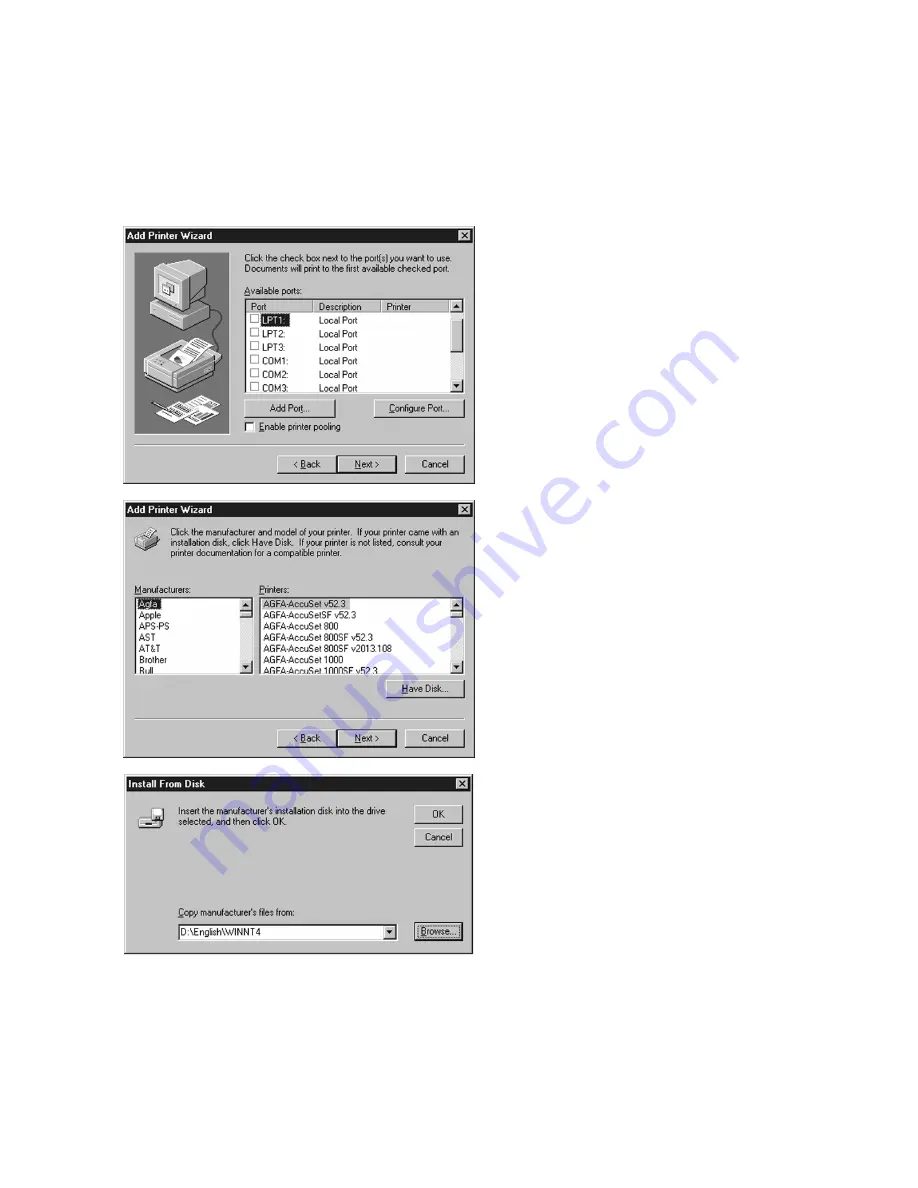
A list of ports will appear. Select the
appropriate local parallel port for the
printer and click Next.
If installing as a TCP/IP network printer,
select “LPT1:” at this point. After the
installation, refer to the
Windows NT 4.0
section
in Chapter 8 of this Manual
(Networking the Elite 21 Series Printer) for
instructions on configuring the printer as a
network device.
4.
A list of manufacturers and printer models
will appear. Insert the Elite 21 Series CD-
ROM in the CD drive of your computer
and click Have Disk.
5.
This will bring up the Install From Disk
window. Use the Browse button to select
your Elite 21 Series CD-ROM. Open the
folder on the CD that corresponds to the
language being used (English, French,
German, Italian or Spanish.) Open the
WinNT4 folder within this folder. Select
the GCCE21.INF item in this folder. Click
Open, then click OK.
Содержание Elite 21 Series
Страница 1: ...GCC Elite 21 Series User s Manual Elite 21N Elite 21DN...
Страница 14: ...1 6 Step 4 Remove Tape 1 Remove packaging tape from the front and rear covers of the printer...
Страница 17: ...1 9 6 Close the front cover Press on the center part of the front cover until the cover locks securely...
Страница 143: ...5 20 Clicking on Device Settings brings up the following window...
Страница 159: ...6 13...
Страница 163: ...6 17 Clicking on Device Settings brings up the following window...


