


AFJ-24S User Manual
97
Chapter 6 Maintenance
This chapter explains the basic maintenance (i.e. cleaning the cutting plotter) required for the cutting
plotter. Except for the procedures mentioned below, all other maintenance must be performed by a
qualified service technician.
6.1
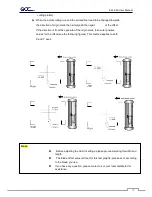
Cleaning the Cutting Plotter
Cleaning the machine properly and regularly will ensure optimal performance out of your machine.
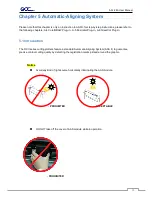
Cleaning Precaution !
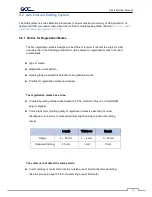
Recommended Methods:
● Gently wipe the cutting plotter surface with a lint-free cloth. If necessary, with a damp
cloth immersed in water or alcohol. Dry and wipe any remaining residue off a soft,
lint-free cloth.
● Wipe all dust and dirt from the tool carriage rails.
● Use a vacuum cleaner to empty any accumulated dirt and media residue beneath the
pinch roller housing.
● Clean the platen, paper sensors and pinch rollers with a damp cloth immersed in water or
alcohol, and dry with a soft, lint-free cloth.
● Wipe dust and dirt from the stand.
Unplug the cutting plotter before cleaning it
in order to prevent electrical shock.
Never use solvents, abrasive cleaners or
strong detergents for cleaning. They may
damage the surface of the cutting plotter and
the moving parts.
Содержание AFJ-24S
Страница 1: ...V 2 2022 Aug http www GCCworld com AFJ 24S User Manual...
Страница 12: ...AFJ 24S User Manual 12 RS232 cable 1 pc Installation guide 1 copy Media blocks 2 pcs...
Страница 19: ...AFJ 24S User Manual 19 Download the driver according to the type of connection...
Страница 44: ...AFJ 24S User Manual 44...
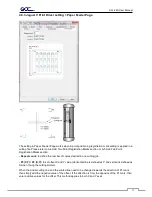
Страница 128: ...Appendix Illustrator Plug In A 5 Step 8 Hit Edit Artboards Step 9 Click on Presets Fit Artboard to Artwork bounds...
Страница 131: ...Appendix Illustrator Plug In A 5 Step 15 Select the cutter model position the object in the bottom left corner...
Страница 132: ...Appendix Illustrator Plug In A 5 Step 16 Your job is now completed Add Registration Mark by page size...
Страница 142: ...Appendix GreatCut Plug In A 6...
Страница 148: ...Appendix GreatCut Plug In A 6 The system will create the 4 marks as shown in the picture below Note...
Страница 152: ...Appendix GreatCut Plug In A 6 Step 5 Click output and the object will be sent to GCC Cutting Plotter...
Страница 166: ...Appendix GreatCut Plug In A 6 Step 5 Press the button on the right of Jog marks...
Страница 171: ...Appendix GreatCut Plug In A 6 Step 5 Click output and the object will be sent to GCC Cutting Plotter...
Страница 182: ...Appendix GreatCut Plug In A 6 Step 11 Go to GreatCut window press Output button...
Страница 183: ...Appendix GreatCut Plug In A 6...
Страница 185: ...Appendix SignPal 12 Instruction A 7...
Страница 198: ...Appendix SignPal Instruction A 6...
Страница 199: ...Appendix SignPal Instruction A 6 3 Select File Print Setup in SignPal Software and select the printer...
Страница 200: ...Appendix SignPal Instruction A 6 4 Select File Document Setup in SignPal and select paper size...
Страница 205: ...Appendix SignPal Instruction A 6...
Страница 209: ...Appendix SignPal Instruction A 6 8 Set parameter in Before Job tab Note Set Tool 0 to perform cutting...
Страница 210: ...Appendix SignPal Instruction A 6 9 Enter a value in Passes column to define the repeat times 10 The setting is complete...


