


AFJ-24S User Manual
77
4.3
Cutting Force and Offset Adjustment
Before sending your designs for cutting, you may perform a “cut test” to generate satisfactory cutting
results. The “Cut Test” should be repeated until the appropriate cutting conditions for the media are
discovered.
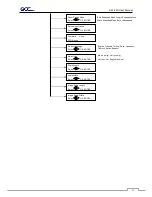
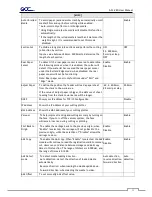
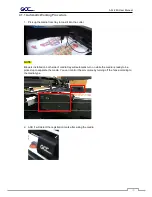
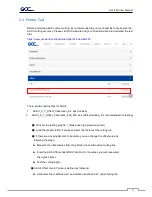
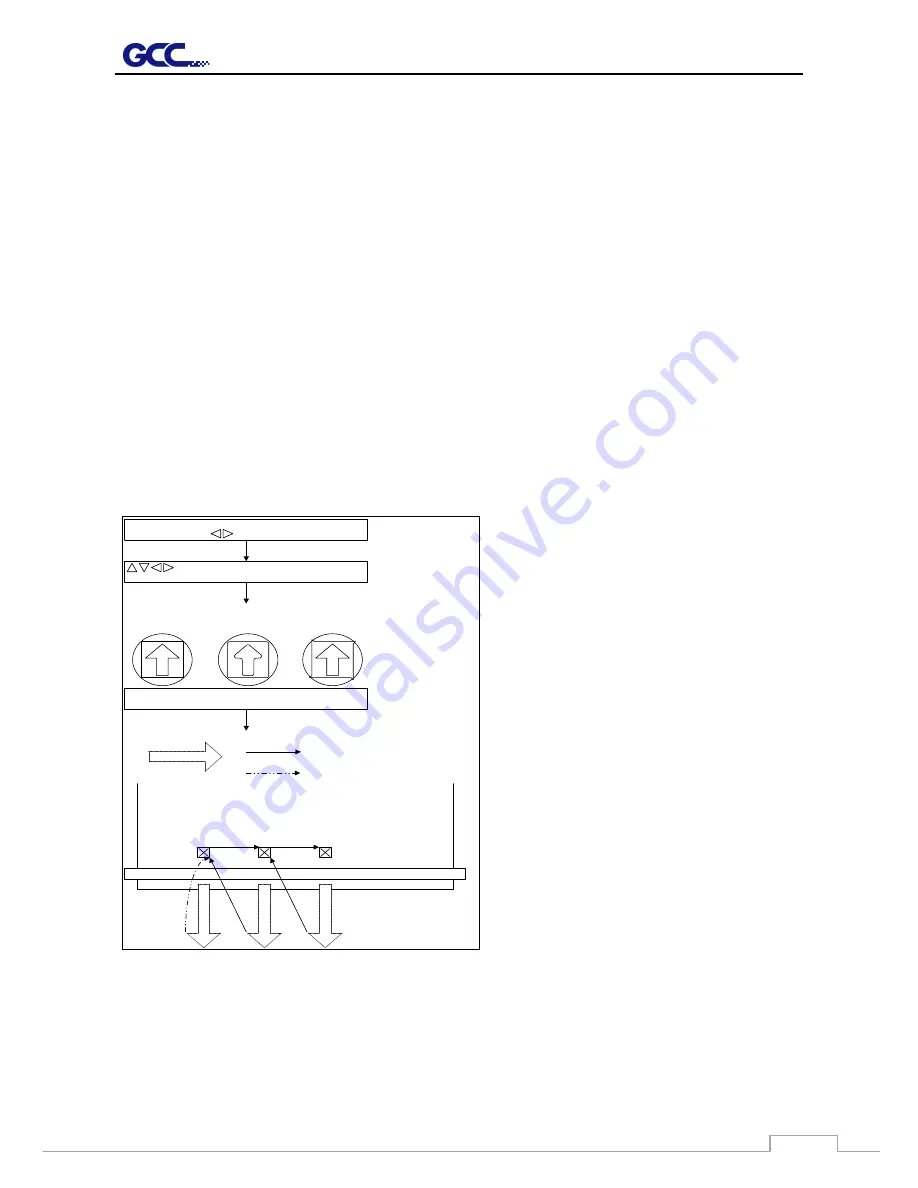
After sizing the media, press [CUT TEST] button to select the “square cut”, and press [ENTER KEY] to
confirm.
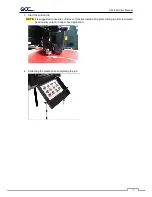
The default cutting force and offset value of the cutting test are 80gf and 0.275mm respectively. Press
[ARROW KEY] to move the tool carriage to the position where you like. Then, press the [ENTER KEY] to
perform Cut Test.
Note: At the same time, the new origin is also set at the cutting test position.
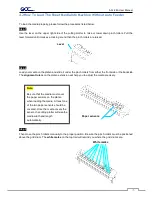
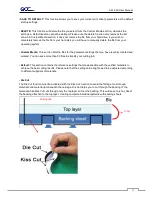
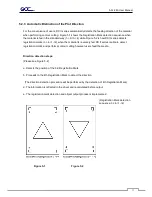
When the cutting test is completed, a pattern appears. Peel off the pattern to see if it can be easily
separated from the media base. If yes, the setup tool force is appropriate. If not or cut through the back
paper, press [FORCE KEY] to adjust the tool force until an optimum force is obtained.
If the pattern appears to be BB or CC layout,
press [OFFSET KEY] to adjust the offset value
until AA pattern discovered.
S q u a
r e
C u
t
Press EN TER_K EY
A A
CC
BB
Press EN TER_K EY
E n
t
e
r
:
O K
S e
l
e c
t
:
M o v e
t
t e
c u
X
Y
:
:
M
s
t
S q u a
r e
C u
t
Press SPEED _K EY ,
FO RC E_K EY ,
O FFSET_K EY to setup
or
Press arrow keys to
desired position for next
square cut
E n
t
e
r
:
O K
C o n
t
/
N : O
O F F
N
M achine
3m m
80
m
m
3m m
80
m
m
Press EN TER_K EY
80
m
m
Finish square cut
Press
ENTER _K EY
Press O N /O FF
line_K EY
i n o u s
L N
I E
Содержание AFJ-24S
Страница 1: ...V 2 2022 Aug http www GCCworld com AFJ 24S User Manual...
Страница 12: ...AFJ 24S User Manual 12 RS232 cable 1 pc Installation guide 1 copy Media blocks 2 pcs...
Страница 19: ...AFJ 24S User Manual 19 Download the driver according to the type of connection...
Страница 44: ...AFJ 24S User Manual 44...
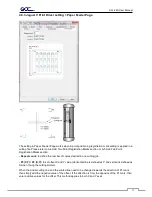
Страница 128: ...Appendix Illustrator Plug In A 5 Step 8 Hit Edit Artboards Step 9 Click on Presets Fit Artboard to Artwork bounds...
Страница 131: ...Appendix Illustrator Plug In A 5 Step 15 Select the cutter model position the object in the bottom left corner...
Страница 132: ...Appendix Illustrator Plug In A 5 Step 16 Your job is now completed Add Registration Mark by page size...
Страница 142: ...Appendix GreatCut Plug In A 6...
Страница 148: ...Appendix GreatCut Plug In A 6 The system will create the 4 marks as shown in the picture below Note...
Страница 152: ...Appendix GreatCut Plug In A 6 Step 5 Click output and the object will be sent to GCC Cutting Plotter...
Страница 166: ...Appendix GreatCut Plug In A 6 Step 5 Press the button on the right of Jog marks...
Страница 171: ...Appendix GreatCut Plug In A 6 Step 5 Click output and the object will be sent to GCC Cutting Plotter...
Страница 182: ...Appendix GreatCut Plug In A 6 Step 11 Go to GreatCut window press Output button...
Страница 183: ...Appendix GreatCut Plug In A 6...
Страница 185: ...Appendix SignPal 12 Instruction A 7...
Страница 198: ...Appendix SignPal Instruction A 6...
Страница 199: ...Appendix SignPal Instruction A 6 3 Select File Print Setup in SignPal Software and select the printer...
Страница 200: ...Appendix SignPal Instruction A 6 4 Select File Document Setup in SignPal and select paper size...
Страница 205: ...Appendix SignPal Instruction A 6...
Страница 209: ...Appendix SignPal Instruction A 6 8 Set parameter in Before Job tab Note Set Tool 0 to perform cutting...
Страница 210: ...Appendix SignPal Instruction A 6 9 Enter a value in Passes column to define the repeat times 10 The setting is complete...


