Appendix
CorelDRAW Plug-In A-4
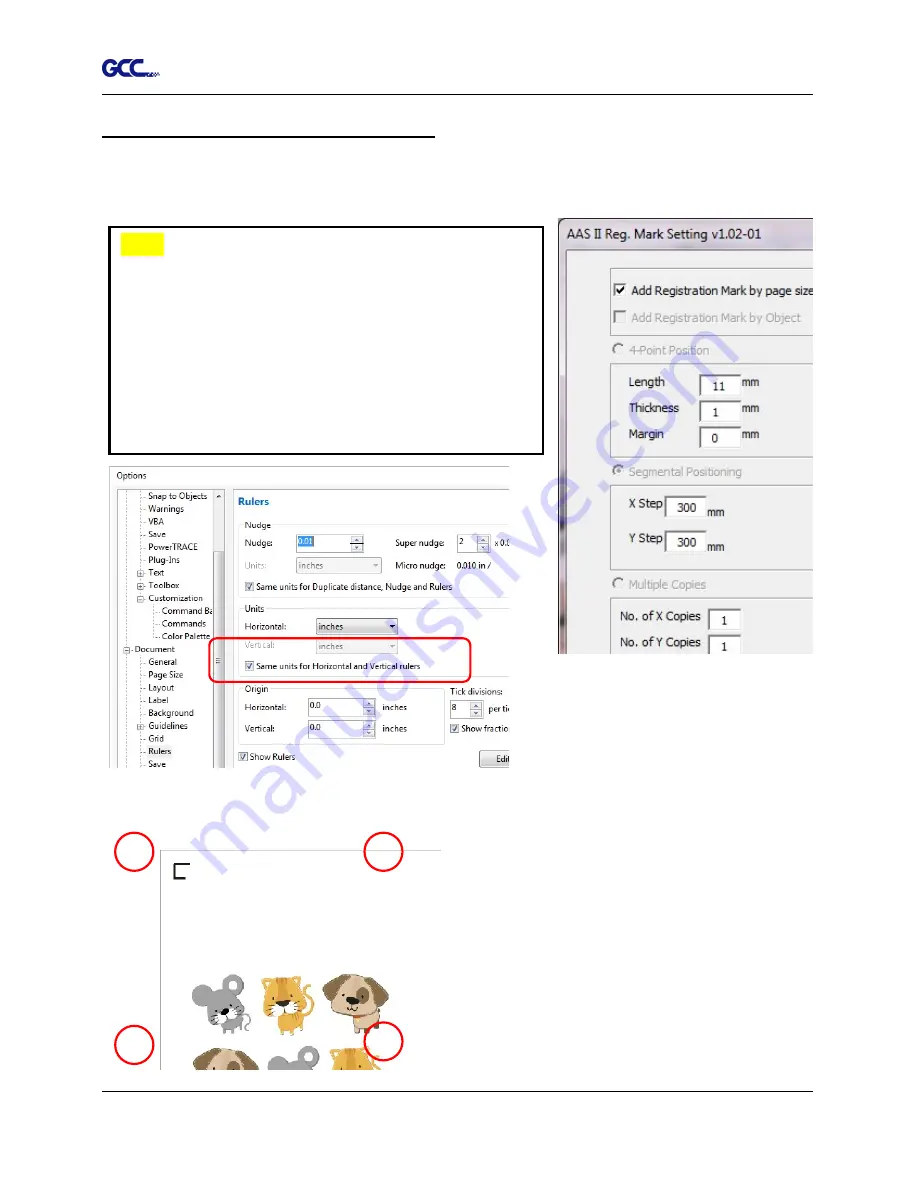
Add Registration Mark by page size
If you tick “Add Registration Mark by page size” as shown in the figure below and click “Apply”,
your registration marks will be created automatically (please see Figure A3-1).
The system will create the 4 marks on the 4 corners of the page as shown in the picture below
wherever you move your image.
Figure A3-1
Figure A3-2
Figure A3-3
Note:
1. The length setting will be in the range of 5-25mm
according to your page size.
2. Please
DO NOT
make any changes to the “Origin”
section when you choose to add registration marks by
page size as indicated below otherwise the position of
the marks will be changed (please see Figure A3-2).
Содержание AFJ-24S
Страница 1: ...V 2 2022 Aug http www GCCworld com AFJ 24S User Manual...
Страница 12: ...AFJ 24S User Manual 12 RS232 cable 1 pc Installation guide 1 copy Media blocks 2 pcs...
Страница 19: ...AFJ 24S User Manual 19 Download the driver according to the type of connection...
Страница 44: ...AFJ 24S User Manual 44...
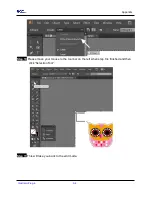
Страница 128: ...Appendix Illustrator Plug In A 5 Step 8 Hit Edit Artboards Step 9 Click on Presets Fit Artboard to Artwork bounds...
Страница 131: ...Appendix Illustrator Plug In A 5 Step 15 Select the cutter model position the object in the bottom left corner...
Страница 132: ...Appendix Illustrator Plug In A 5 Step 16 Your job is now completed Add Registration Mark by page size...
Страница 142: ...Appendix GreatCut Plug In A 6...
Страница 148: ...Appendix GreatCut Plug In A 6 The system will create the 4 marks as shown in the picture below Note...
Страница 152: ...Appendix GreatCut Plug In A 6 Step 5 Click output and the object will be sent to GCC Cutting Plotter...
Страница 166: ...Appendix GreatCut Plug In A 6 Step 5 Press the button on the right of Jog marks...
Страница 171: ...Appendix GreatCut Plug In A 6 Step 5 Click output and the object will be sent to GCC Cutting Plotter...
Страница 182: ...Appendix GreatCut Plug In A 6 Step 11 Go to GreatCut window press Output button...
Страница 183: ...Appendix GreatCut Plug In A 6...
Страница 185: ...Appendix SignPal 12 Instruction A 7...
Страница 198: ...Appendix SignPal Instruction A 6...
Страница 199: ...Appendix SignPal Instruction A 6 3 Select File Print Setup in SignPal Software and select the printer...
Страница 200: ...Appendix SignPal Instruction A 6 4 Select File Document Setup in SignPal and select paper size...
Страница 205: ...Appendix SignPal Instruction A 6...
Страница 209: ...Appendix SignPal Instruction A 6 8 Set parameter in Before Job tab Note Set Tool 0 to perform cutting...
Страница 210: ...Appendix SignPal Instruction A 6 9 Enter a value in Passes column to define the repeat times 10 The setting is complete...


