background image

124

www.gateway.com

Chapter 6: Configuring your RAID solutions

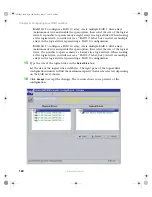
RAID 10

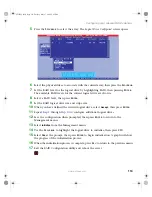
: To configure a RAID 10 array, create multiple RAID 1 drive arrays 

(minimum of two) and enable the span option, then select the size of the logical 
drive. It is possible to span as many as eight arrays in a logical drive. When looking 
at the logical drive, you will not see a “RAID 10” label, but you will see multiple 
arrays in the logical drive representing a RAID 10 configuration.

RAID 50

: To configure a RAID 50 array, create multiple RAID 5 drive arrays 

(minimum of two) and enable the span option, then select the size of the logical 
drive. It is possible to span as many as 8 arrays in a logical drive. When looking 
at the logical drive, you will not see a “RAID 50” label, but you will see multiple 
arrays in the logical drive representing a RAID 50 configuration.

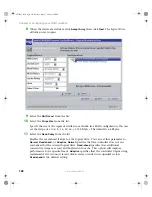
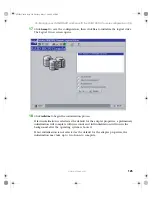
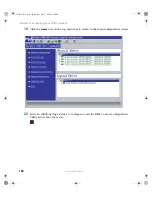
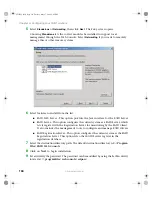
15

Type the size of the logical drive in the 

Select Size

 box.

Set the size of the logical drive in Mbytes. The right pane of the logical drive 
configuration window will list the maximum capacity that can be selected, depending 
on the RAID level chosen.

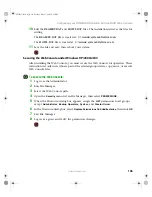
16

Click 

Accept

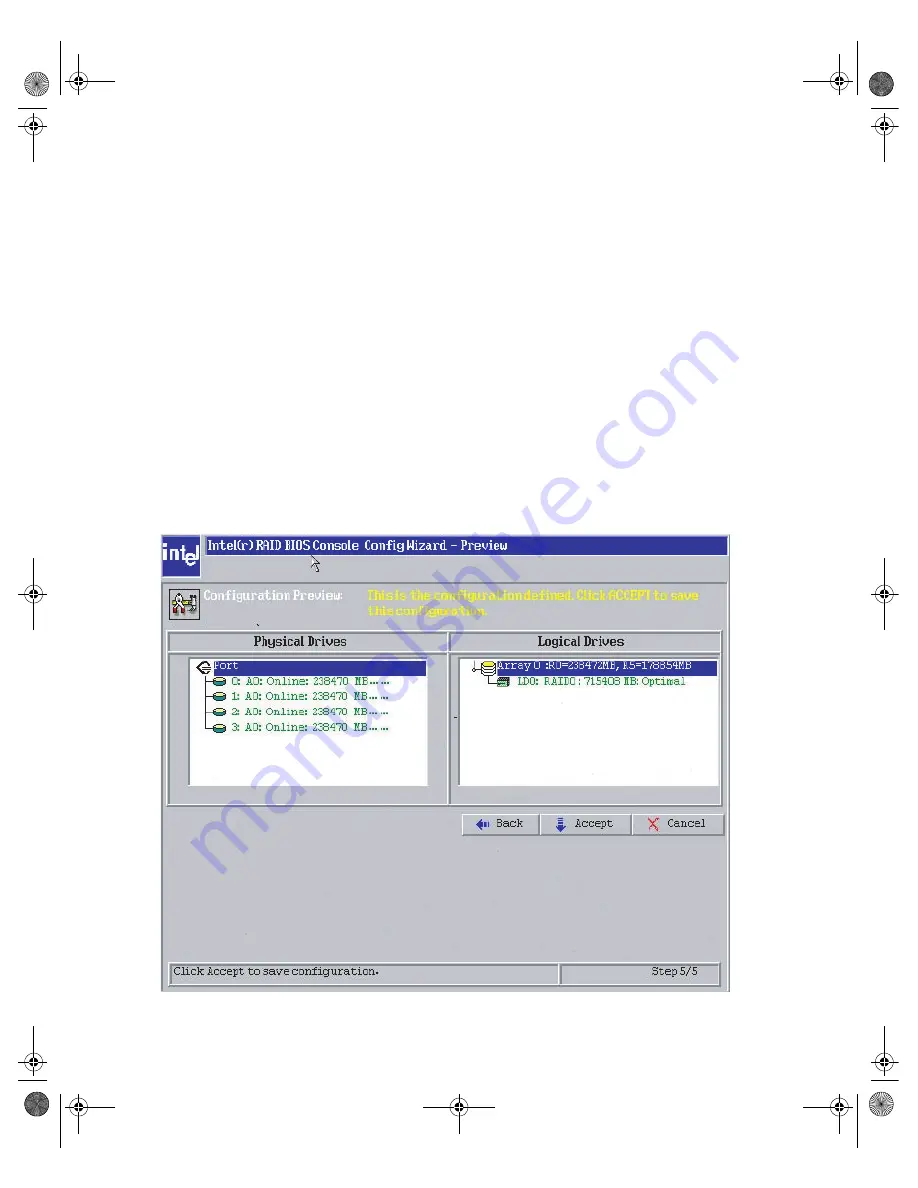
 to accept the changes. The console shows you a preview of the 

configuration.

8510725.book  Page 124  Tuesday, May 17, 2005  5:45 PM

Содержание 9510

Страница 1: ...Gateway 9510 Server User Guide ...

Страница 2: ...our server 21 Setting up the operating system 22 Initial hardware settings 23 3 Maintaining Your Server 25 Caring for your server 26 Cleaning your server 26 Preparing for system recovery 28 Recording the BIOS configuration 28 System administration 29 Gateway Server Manager 29 Local control panel 29 Server security 33 Identifying your server 34 Updating the baseboard management controller firmware ...

Страница 3: ...ion module 83 Replacing the hot swap backplane 86 Replacing the front panel board 90 Replacing a hot swap fan 92 Replacing the CMOS battery 93 Replacing the system board 95 5 Using the BIOS Setup Utility 99 Opening the BIOS Setup utility 100 Updating the BIOS 101 Rolling BIOS 101 Recovering the BIOS 102 Resetting the BIOS 105 Resetting BIOS passwords 107 6 Configuring your RAID solutions 109 Confi...

Страница 4: ... 161 Diskette drive 161 Expansion cards 162 Hard drive 162 Internet 164 Keyboard 164 Memory 164 Modem telephone dial up 164 Monitor 166 Power 167 Processor 167 Telephone support 168 Before calling Gateway Customer Care 168 Telephone support 169 Tutoring and training 169 A Server Specifications 171 System specifications 172 System board specifications 173 Environmental specifications 175 Video spec...

Страница 5: ...iv www gateway com B BIOS Settings 183 C Safety Regulatory and Legal Information 199 Index 209 8510725 book Page iv Tuesday May 17 2005 5 45 PM ...

Страница 6: ...Chapter 1 1 Checking Out Your Gateway Server Locating drives ports jacks and controls Locating system board components Getting help 8510725 book Page 1 Tuesday May 17 2005 5 45 PM ...

Страница 7: ...g Out Your Gateway Server Front CD or DVD drive USB ports Additional drive bay Cover release button Cover release latch Serial port B Control panel Local control panel LCP optional Key lock 8510725 book Page 2 Tuesday May 17 2005 5 45 PM ...

Страница 8: ...ontrol panel ID button Reset button NIC 1 activity LED NIC 2 activity LED ID LED Reserved for future use Power button Hard drive activity LED Power sleep LED Status LED NMI button 8510725 book Page 3 Tuesday May 17 2005 5 45 PM ...

Страница 9: ...4 www gateway com Chapter 1 Checking Out Your Gateway Server Hard drive bays Hot swap drive bays 6 Optional hot swap drive bays 4 8510725 book Page 4 Tuesday May 17 2005 5 45 PM ...

Страница 10: ... module PCI slots shown with EMI shields Kensington lock slot Power connector NIC 2 RJ 45 USB ports Keyboard port NIC 1 RJ 45 Power supply module Power supply LEDs Power supply LEDs Power supply module latch Power supply module latch Diagnostic LEDS Status LED ID LED 8510725 book Page 5 Tuesday May 17 2005 5 45 PM ...

Страница 11: ...er supply module Card retention clips Cable clip Hot swap fans 5 25 inch drive bay Front panel board Processor air duct Power distribution module Hot swap drive bay backplane Hot swap drive bay release latch Hot swap drive bay release latch 8510725 book Page 6 Tuesday May 17 2005 5 45 PM ...

Страница 12: ...LEDS NIC 1 and NIC 2 connectors Status LED ID LED PCI slot 6 PCI X 64 100 PCI slot 5 PCI X 64 133 PCI slot 4 PCI Express x8 PCI slot 3 PCI Express x4 ICMB connector Serial B connector OEM RMC connector Chassis intrusion connector Front panel connector Jumper block HDD LED connector Memory banks PCI slot 1 PCI X 64 133 Slot 2 RAID DIMM slot do not install PCI card RAID activation key 8510725 book P...

Страница 13: ...Intel Management Module IMM connector Front panel control LED connector CMOS battery CPU 2 socket CPU 1 fault LED CPU 2 fault LED USB 3 5 connector SATA A1 connector SATA A2 connector HSBP B connector HSBP A connector IPMB connector SCSI channel B connector SCSI channel A connector 8510725 book Page 8 Tuesday May 17 2005 5 45 PM ...

Страница 14: ...er drivers and documentation for your server and its components For more information see Using Your System Companion CD Gateway Web site Gateway provides a variety of information on its Web site to help you use your server Visit the Gateway Web site at support gateway com for Technical documentation and product guides Technical tips and support Updated hardware drivers Order status Frequently aske...

Страница 15: ...10 www gateway com Chapter 1 Checking Out Your Gateway Server 8510725 book Page 10 Tuesday May 17 2005 5 45 PM ...

Страница 16: ...er 2 11 Setting Up Your Server Using your server safely Starting and turning off your server Restarting rebooting your server Setting up the operating system 8510725 book Page 11 Tuesday May 17 2005 5 45 PM ...

Страница 17: ...netic fields such as unshielded stereo speakers Strong magnetic fields can erase data on both diskettes and hard drives Even a telephone placed too close to the server may cause interference Converting to a rackmount server To convert your server to a rackmount configuration a rackmount conversion kit is required To obtain the conversion kit contact Gateway Customer Care Gateway Sales or visit acc...

Страница 18: ... Opening the server case on page 42 3 Follow the instructions in Removing the bezel assembly on page 44 4 Remove the two screws on the back of the chassis that secure the top cover to the chassis 5 Slide the top cover back about two inches then remove it from the chassis 6 Remove the chassis feet from the bottom of the server Warning Lifting the server and attaching it to the rack is a two person ...

Страница 19: ...ette CD and DVD drives and filler panels from the server by following the instructions in Installing or replacing a fixed removable media drive on page 54 8 Re orient the Serial USB port front panel on the front of the server a Remove any USB or serial cables from the Serial USB port front panel b Loosen the captive thumbscrew securing the Serial USB port front panel to the server then remove the ...

Страница 20: ...inserting the tab on the right side of the Serial USB port front panel into the slot on the right side of the opening and tightening the captive thumbscrew 9 Reinstall the diskette CD or DVD drives and filler panels in the horizontal orientation and reconnect the data and power cables to the drives 8510725 book Page 15 Tuesday May 17 2005 5 45 PM ...

Страница 21: ...11 Install the suitcase jumper included with the rack conversion kit on the chassis intrusion switch header on the front panel control board 12 Install the handles on each side of the server with the three screws provided in the kit for that purpose Handles should face outwards 8510725 book Page 16 Tuesday May 17 2005 5 45 PM ...

Страница 22: ...OR Install the optional metal security bezel by following the instructions in To install the optional metal security bezel for rackmount configuration on page 51 15 If necessary re orient the plastic filler panels in the plastic bezel 16 Affix the new LED and Button label readable from the horizontal over the LEDs and buttons on the bezel 17 Reinstall the cover by following the instructions in Clo...

Страница 23: ...auses electromagnetic interference such as a television or a motor Some uninterruptible power supplies include simple line conditioning capabilities Uninterruptible power supplies Use an uninterruptible power supply UPS to protect your server from data loss during a total power failure A UPS uses a battery to keep your server running temporarily during a power failure and lets you save your work a...

Страница 24: ...cted securely to the correct ports and jacks on the back of the server To start the server 1 Press the power button Caution When you connect peripheral devices to the server make sure that your server and devices are turned off and the power cords are unplugged When the power sleep LED is It means Green The server is turned on Off The server is turned off Slowly blinking Low power state S1 S3 Powe...

Страница 25: ...mentation for instructions on configuring advanced settings for your specific network Selecting the boot device To select which device your server boots from 1 During server startup press F10 The Boot menu opens 2 Select the device you want to boot from Common choices include Removable Dev Removable device ATAPI CDROM CD or DVD drive Hard Drive IBA GE NIC Network boot Understanding the power on se...

Страница 26: ...rn off automatically press the power button If nothing happens when you press the power button press and hold it for five seconds and the server will turn off Warning The power button on the server does not turn off server AC power To remove AC power from the server you must unplug both AC power cords from the wall outlet or power source The power cords are considered the disconnect device to the ...

Страница 27: ...ndows Small Business Server operating system may require additional installation depending on the version you ordered See your operating system s documentation for instructions on completing the installation or configuring advanced settings for your specific network If you are installing an operating system because it was not already installed by Gateway see the appropriate installation guide for ...

Страница 28: ... Setup utility and advanced RAID settings for the Intel ROMB RAID solution can be changed by using the RAID BIOS Console or Web Console or the specific RAID console which accompanied a customized add in RAID solution For information on the BIOS Setup utility see Using the BIOS Setup Utility on page 99 For information on BIOS settings see BIOS Settings on page 183 For information on the RAID BIOS C...

Страница 29: ...24 www gateway com Chapter 2 Setting Up Your Server 8510725 book Page 24 Tuesday May 17 2005 5 45 PM ...

Страница 30: ...Chapter 3 25 Maintaining Your Server Caring for your server Recording the BIOS configuration Managing your server and network 8510725 book Page 25 Tuesday May 17 2005 5 45 PM ...

Страница 31: ... safest at temperatures that are comfortable for you Keep all liquids away from your server When spilled onto server components almost any liquid can result in expensive repairs that are not covered under your warranty Avoid dusty or dirty work environments Dust and dirt can clog the internal mechanisms and can cause the server to overheat Cleaning your server Keeping your server clean and the ven...

Страница 32: ... Keyboard damage resulting from spilled liquids is not covered by your warranty Cleaning the screen If your computer screen is a flat panel display use only a damp soft cloth to clean it Never spray water directly onto the screen OR If your computer screen is not a flat panel display use a soft cloth dampened with glass cleaner to clean the screen Never spray cleaner directly onto the screen Clean...

Страница 33: ...p critical operating system files See your operating system s documentation or online help for instructions on using an emergency repair diskette Recording the BIOS configuration To help keep track of your custom changes to BIOS settings and to prepare for system recovery you should record your BIOS configuration after you have your server set up and working To record your BIOS configuration 1 Pri...

Страница 34: ...stem status and control the server from the panel The LCD panel has its own microcontroller and is independent of the operating system Its 4 20 display provides information directly from the Baseboard Management Controller BMC using the IPMB bus Interactions The local control panel can Poll the BMC to determine alert conditions Query the BMC for system event log entries Display and control the pow...

Страница 35: ...s Description Configure the server Network LAN channel 1 to 3 IP address BMC Netmask Gateway address Enable LAN channel Configure TCO NIC Inventory CPUs DIMMs Drives Power supplies System fans View system inventory Scroll up button one item up Scroll down button one item down Scroll left button previous option Scroll right button previous menu 8510725 book Page 30 Tuesday May 17 2005 5 45 PM ...

Страница 36: ...tor the server POST progress codes View POST progress codes Server health drill down to subsystem s at fault View the health of the system System event log View the system event log CPU sensors CPU 1 to n Presence Over temperature On off line View CPU related status Chassis status Intrusion status Power supply 1 to n Presence Status Fan 1 to n Presence Status Speed HSC 1 to 2 Presence Status View ...

Страница 37: ...ipset a power control command The same functionality as if done over LAN or by GSM IPMI command screen Issue an IPMI command text or hex Issue an IPMI command Set up the server Language selection display loaded language files Select the LCP display language Status setup Interval timing set time to retrieve status Subsystem mask mask off subsystems Set sensor refresh interval Password setup Passwor...

Страница 38: ... table 4 Type the password and press ENTER then type it again and press ENTER 5 Save your changes and exit the BIOS Setup utility Option Description Supervisor password To control access to system configuration set a supervisor password Using a supervisor password lets you make changes to any setting in the BIOS Passwords can be cleared To clear the passwords see Resetting BIOS passwords on page 1...

Страница 39: ...e server does not need to be turned on but it does need to be plugged in To turn on the System ID indicator 1 Press the System ID button The two blue System ID indicators turn on 2 To turn off the indicator press the System ID button Important If your server has an Intel IMM module installed the system ID LED will turn on or off when the System ID button is pressed If no IMM Module is installed th...

Страница 40: ...ble USB Disk on key device or DOS bootable CD 2 Download the BMC update file from support gateway com 3 Follow the instructions included with the update file 4 Turn off the server then disconnect the power cord and wait for the Standby power LED to turn off To update the BMC firmware with Boot Block and Force Firmware updates 1 Follow the instructions in Preventing static electricity discharge on ...

Страница 41: ...to pins 2 3 on the Force Update jumper J2B1 on the IMM module 6 Follow the instructions in Installing the air ducts on page 47 7 Follow the instructions in Closing the server case on page 52 then reconnect the power cord Caution If you do not disconnect the power cords when instructed to in this procedure the BMC firmware will not update 3 1 2 1 2 Default No forced update 1 2 3 2 3 Force update 1 ...

Страница 42: ...DR must be updated whenever you add additional hardware to your server that must be monitored by the BMC This includes adding a redundant power supply module adding redundant hot swap fans or adding an Intel Management Module IMM The FRU SDR must also be updated whenever you update the BIOS Each time you update the FRU SDR we recommend that you check support gateway com for the most current versio...

Страница 43: ...xample a redundant power supply or system fans or additional memory 5 When you are asked if you have an optional cooling kit installed type Y if your system has redundant fans installed or N if you system has only the basic fans installed 6 Exit the utility remove the System Companion CD and reboot your server Using your System Companion CD You can use your System Companion CD to Install hardware ...

Страница 44: ...replacing major components You must open your server case to install components If you are not comfortable with these procedures get help from a more experienced computer user or computer service technician or contact Gateway Customer Care 8510725 book Page 39 Tuesday May 17 2005 5 45 PM ...

Страница 45: ... you can test your server after installation Is near a telephone in case you need help from Gateway Customer Care The telephone must be directly connected to a telephone jack and cannot be connected to your server Gathering the tools you need Some tools and supplies that you may need to work on your server are A notebook to take notes A Phillips screwdriver A small flat blade screwdriver Small con...

Страница 46: ... area is extremely humid Remove components from their antistatic bags only when you are ready to use them Do not lay components on the outside of antistatic bags because only the inside of the bags provide electrostatic protection Always hold expansion cards by their edges or their metal mounting brackets Avoid touching the edge connectors and components on the cards Never slide expansion cards or...

Страница 47: ...rn off the server then unplug the power cords and all other cables connected to the server 3 For more stability place the server on its side 4 If the shipping screw is installed remove it Caution For correct cooling and air flow always reinstall the side panel and the air duct if included before you turn on the server Operating the server without the cover in place can damage server components War...

Страница 48: ...Opening the server case 5 Press the latch then slide the side panel toward the back of the case about inch 6 Lift the panel away from the server and place it out of the way 8510725 book Page 43 Tuesday May 17 2005 5 45 PM ...

Страница 49: ...g Components Removing the bezel assembly To remove the bezel assembly 1 Follow the instructions in Opening the server case on page 42 2 Unlock the bezel assembly Release tab Lock Release tab 8510725 book Page 44 Tuesday May 17 2005 5 45 PM ...

Страница 50: ...y from the chassis to disengage the retention hooks on the right side of the chassis Caution If you rotate the bezel assembly away from the chassis more than 40 degrees you may damage or break off the retention hooks on the right side of the assembly Tips Tricks If the bezel assembly does not immediately disengage from the chassis tap the left side of the assembly lightly to help disengage the ret...

Страница 51: ...tatic electricity discharge on page 41 2 Follow the instructions in Opening the server case on page 42 3 Press the latch and remove the PCI air duct from the chassis 4 Press the latch and remove the processor air duct from the chassis Air duct release buttons Processor air duct PCI air duct 8510725 book Page 46 Tuesday May 17 2005 5 45 PM ...

Страница 52: ...essor into your server remove the plastic air baffle from the inside of the of the processor air duct Caution If you have installed a second processor in your server and do not remove the plastic air baffle in the processor air duct the new processor could overheat causing loss of data or damage to the processor Plastic air baffle 8510725 book Page 47 Tuesday May 17 2005 5 45 PM ...

Страница 53: ...talling Components 2 Press the PCI air duct into place until the latch clicks Important The PCI air duct interlocks with the processor air duct in two places before latching into place 8510725 book Page 48 Tuesday May 17 2005 5 45 PM ...

Страница 54: ...mbly To install the standard plastic bezel assembly 1 Open the outer bezel door of the bezel assembly If you have installed any new drives in the 5 25 drive bays make sure to remove the corresponding filler panels in the bezel 8510725 book Page 49 Tuesday May 17 2005 5 45 PM ...

Страница 55: ...metal slots in the right front edge of the chassis 4 Rotate the bezel assembly toward the chassis until the two plastic tabs on the left side of the bezel assembly snap into place 5 Relock the bezel if required Caution If the bezel assembly is angled at more than 40 degrees from the chassis you may damage or break off the retention hooks on the right side of the bezel assembly 40 Max 8510725 book ...

Страница 56: ...ing the instructions in To convert your server to rackmount configuration on page 13 2 Engage the two tabs on the left side of the metal security bezel with the slots in the left handle 3 Swing the metal security bezel to the right snapping it into place on the front of the server then use the lock on the right side of the bezel to secure it 8510725 book Page 51 Tuesday May 17 2005 5 45 PM ...

Страница 57: ... of the internal cables are arranged inside the case so they will not be pinched when you close the case 3 Align the side panel s top and bottom tabs into the case notches then slide the side panel toward the front of the case until the latch engages 4 Set the case upright 5 Reconnect the power cords and all other cables 8510725 book Page 52 Tuesday May 17 2005 5 45 PM ...

Страница 58: ...ndard or SCSI optional drives in one drive bay As many as four hot swap SCSI drives in an optional second drive bay with SCSI option As you prepare to install drives remember Do not use the top 5 25 inch drive bay for drives which have electronic components exposed on the top Drive mounting rails at the top of the bay may damage any exposed electronic components Before you install a drive see the ...

Страница 59: ...l using the BIOS Setup utility Press F2 at startup to open the BIOS Setup utility Installing or replacing a fixed removable media drive Use these instructions to install or replace a diskette CD DVD or tape drive To install a 5 25 inch drive 1 Follow the instructions in Preventing static electricity discharge on page 41 2 Follow the instructions in Opening the server case on page 42 3 Follow the i...

Страница 60: ... dimples on each side of the tray OR If you are adding a new 5 25 inch drive attach the rails to the sides of your new drive by pressing the rails firmly into the side dimples on the CD or DVD drive 7 Go to Step 11 8 If you are replacing a drive disconnect the old drive s cables from the back of the drive 9 Press the old drive s release latches against the drive then pull the drive out of the bay ...

Страница 61: ...ctions in Routing power and data cables to fixed drives on page 56 For more information see the drive s documentation 14 Follow the instructions on Installing the bezel assembly on page 49 15 Follow the instructions in Closing the server case on page 52 Routing power and data cables to fixed drives To route power and data cables to fixed drives 1 Follow the instructions in Preventing static electr...

Страница 62: ...icated power cables by Routing the P1 P2 and P14 cables identified on the cables to the server board Routing the longest power cables P8 P9 P10 and P11 to the six drive bay Routing the P6 and P7 power cables to the four drive bay Routing the SATA drive power cables to whichever bay is using SATA fixed drives if necessary Front PCI card retainer 8510725 book Page 57 Tuesday May 17 2005 5 45 PM ...

Страница 63: ... through the chassis openings located near the bottom of the drive cages 7 Connect the data cables to the appropriate connector on the system board then to the corresponding fixed drives To system board To upper drive bay To 6 drive bay 8510725 book Page 58 Tuesday May 17 2005 5 45 PM ...

Страница 64: ...cage You can purchase additional drives through your Gateway sales representative To install a hot swap hard drive 1 Unlock the bezel door lock then swing the door open Important The numbers on the left side of the hot swap bay identify the SCSI ID of each drive SCSI hot swap drives only Install the topmost drives first Gateway tests and verifies the operation and compatibility of the drives it se...

Страница 65: ...d or connector as well as the connector and cables on the back of the drive cage to determine which drive has failed See the system label inside your server for information on identifying the SATA connector and the corresponding drive Caution Before you remove a failed drive use the appropriate software and utilities installed on the server to stop all activity on the failed drive Instructions for...

Страница 66: ...om the server then pull the assembly straight out of the server 4 If you are replacing a hard drive remove the four screws that secure the hard drive to the drive tray then remove the drive from the tray OR Screw Screw Screw Screw 8510725 book Page 61 Tuesday May 17 2005 5 45 PM ...

Страница 67: ... the drive tray then remove the plastic retention device from the drive tray 5 Line up the screw holes in the new drive with the holes in the side of the drive tray then secure the drive to the tray with the four screws you removed in Step 4 Screw Plastic retention tray shown installed Screw Screw Screw 8510725 book Page 62 Tuesday May 17 2005 5 45 PM ...

Страница 68: ...ase lever is open then slide the new drive into the empty hot swap bay 7 Close the drive s release lever by rotating the lever upwards to latch the drive carrier into position 8 Close and relock the bezel door if required 8510725 book Page 63 Tuesday May 17 2005 5 45 PM ...

Страница 69: ...e 42 3 Follow the instructions in Removing the bezel assembly on page 44 4 Remove the filler panel from an empty 5 25 inch drive bay by pressing and holding the two locking clips inward then pulling the filler panel assembly out of the bay 5 Remove the drive rails from the filler panel assembly 6 Attach the drive rails to the LCP panel tray by pressing the rails firmly into the dimples on each sid...

Страница 70: ...rive bay until the drive rails snap into place 8 Connect the other end of the cable to the IPMB header on the system board See System board on page 7 for the location of the header 9 Follow the instructions on Installing the bezel assembly on page 49 10 Follow the instructions in Closing the server case on page 52 8510725 book Page 65 Tuesday May 17 2005 5 45 PM ...

Страница 71: ...populated using the following guidelines DIMM banks must be populated in order starting with Bank 1 Dual rank DIMMs must be populated before single rank DIMMs When using Dual Rank double row DIMMs a maximum of four loads per memory channel is supported therefore a maximum of four dual rank DIMMs can be populated on this system board Caution Memory modules must be identical in each bank Use only DD...

Страница 72: ... on the new module with the notch in the memory module slot and press the module firmly into the slot The tabs on the sides of the memory slot should secure the memory module automatically 6 Follow the instructions in Installing the air ducts on page 47 7 Follow the instructions in Closing the server case on page 52 8 Restart your server and open the BIOS Setup utility Verify the System Memory lis...

Страница 73: ...line sparing one DIMM per channel selectable in the BIOS setup utility is used as a memory spare the spare DIMM must be equal to or larger than the largest DIMM in that channel If a DIMM begins to fail the contents of the failing DIMM is copied to the spare DIMM in that channel When all of the data is copied the primary DIMM is automatically removed from service Since one DIMM per channel is alway...

Страница 74: ...ove a PCI card without turning off your server and disconnecting it from the AC power source PCI slot Description 1 PCI X Runs at 64 bit 133MHz 2 This is an ROMB RAID DIMM slot Do not attempt to install a PCI card in this slot 3 PCI Express x4 4 PCI Express x8 5 PCI X Runs at 64 bit 133 MHz 6 PCI X Runs at 64 bit 100 MHz PCI slot 6 PCI slot 5 PCI slot 4 PCI slot 3 PCI slot 1 Slot 2 ROMB RAID DIMM ...

Страница 75: ... 2 Follow the instructions in Opening the server case on page 42 3 Follow the instructions in Removing the air ducts on page 46 4 If you are replacing a card disconnect any cables that are attached to the old card 5 Push the top of the card retention clip down slightly then rotate it out the back of the case Card retention clip 8510725 book Page 70 Tuesday May 17 2005 5 45 PM ...

Страница 76: ...sen the card you can slightly rock the card end to end but do not bend the card sideways 8 Press the new card into the expansion slot To help insert the card you can slightly rock the card end to end but do not bend the card sideways Caution Do not touch the contacts on the bottom part of the expansion card Touching the contacts can cause electrostatic damage to the card Front PCI card retainer 85...

Страница 77: ... front PCI card retainer 11 Connect any cables to the card For more information see the instructions in the card s documentation 12 Follow the instructions in Installing the air ducts on page 47 13 Follow the instructions in Closing the server case on page 52 14 See the card s documentation for software installation instructions Card retention clip from outside the case 8510725 book Page 72 Tuesda...

Страница 78: ...ic electricity discharge on page 41 3 Follow the instructions in Opening the server case on page 42 4 Follow the instructions in Removing the air ducts on page 46 Warning Processors and heat sinks may be hot if the computer has been running Also there may be sharp edges on the heat sinks Consider wearing protective gloves Caution A heat sink must be installed on the processor Installing a processo...

Страница 79: ...om the processor then rotate the lever a full 135 to release the processor 8 Remove the old processor Caution The heat sink has Thermal Interface Material TIM on the bottom Be careful not to damage this material when you remove the heat sink from the processor If removing the heat sink also pulls the processor out of the processor socket the processor could be damaged Check the pins on the process...

Страница 80: ...terial TIM is aligned between the heat sink and the processor 12 Line up the four captive screws with the four posts surrounding the processor then gradually and evenly tighten the four captive screws to secure the heat sink to the system board 13 Follow the instructions in Installing the air ducts on page 47 14 Follow the instructions in Closing the server case on page 52 Important If you install...

Страница 81: ...c electricity discharge on page 41 3 Follow the instructions in Opening the server case on page 42 4 Follow the instructions in Removing the air ducts on page 46 Important When the IMM module is initially installed in your server the server will not boot correctly To correct this situation you must force a BMC firmware update A boot block firmware update must also be done For more information see ...

Страница 82: ...ration on page 77 6 Find the IMM connector on the lower front portion of the system board Important The snap fit ends of the standoffs go into the holes in the IMM module board The snap lock ends of the standoffs go into holes in the system board Snap fit end goes into IMM board Snap lock end goes into system board IMM connector Standoff hole 8510725 book Page 77 Tuesday May 17 2005 5 45 PM ...

Страница 83: ...ted into the corresponding holes in the system board 8 Update the base management controller firmware by following the instructions in Updating the baseboard management controller firmware on page 35 9 Update the FRU SDR by following the instructions in Updating the FRU SDR on page 37 10 Reinstall the GSM software from a CD which accompanied your server When you subsequently reboot your server the...

Страница 84: ... 512 MB DDR333 un buffered ECC DIMM enabling higher performance operation write back cache For enhanced data protection and maximum performance the ROMB functionality in your server the system board also supports the Intel Portable Cache Module accessory used in place of the RAID DIMM which provides up to 72 hours of battery back up To install the RAID activation key and RAID memory 1 Follow the i...

Страница 85: ...e with battery by the edges align the notch on the bottom edge of the DIMM with the notch in the DIMM socket and press it firmly into the socket The tabs on the sides of the DIMM socket should secure the DIMM automatically 9 Replace the PCI expansion card in PCI slot 1 if removed by following the instructions in Installing PCI expansion cards on page 69 10 Follow the instructions in Installing the...

Страница 86: ...dicators on the back of each power supply module to identify the failed module The power supply module has failed if the orange right LED indicator is on 2 Unplug the power cord from the failed power supply module 3 Remove the shipping screw if installed Warning The power supply modules in this server contain no user serviceable parts Only a qualified computer technician should service the power s...

Страница 87: ...dule straight out from the server 5 Slide the new power supply module into the power supply bay until the green latch snaps into place 6 Replace the shipping screw if necessary 7 Plug the power cord into the new power supply module The new power supply module is ready if the left green LED is on 8510725 book Page 82 Tuesday May 17 2005 5 45 PM ...

Страница 88: ...n page 42 3 Remove the power supply module remove both if two are installed by following the instructions in Replacing a power supply module on page 81 4 Follow the instructions in Removing the air ducts on page 46 5 Disconnect all power cables from chassis components and the system board noting their locations and orientation You will reconnect the cables after you install the new module 6 Remove...

Страница 89: ...e 11 Place the power distribution module on the mounting standoffs and secure with the thumbscrew you previously loosened 12 Reinstall the center divider into the power supply cage by engaging the mounting tabs into the chassis slots 13 Reinstall the screw securing the center divider into the power supply cage Caution Be careful not to damage the power distribution module cables or connectors whil...

Страница 90: ...ap drive bay and connect one cable to the drive back plane Route the shorter power cables P3 P4 and P5 to the upper drive bay and connect to any installed devices 15 Follow the instructions in Installing the air ducts on page 47 16 Reinstall the power supply module s by following the instructions in Replacing a power supply module on page 81 17 Follow the instructions in Closing the server case on...

Страница 91: ...c electricity discharge on page 41 2 Follow the instructions in Opening the server case on page 42 3 Follow the instructions in Removing the bezel assembly on page 44 4 Remove the fan nearest the backplane if installed For instructions see Replacing a hot swap fan on page 92 5 Remove each of the drives from the hot swap cage and note the location of each drive For instructions see Installing a hot...

Страница 92: ... 7 Slide the hot swap cage out about two inches from the case 8 From inside the case remove the power data and manageability cables from the backplane 9 Remove the hot swap cage completely from the server 8510725 book Page 87 Tuesday May 17 2005 5 45 PM ...

Страница 93: ...e cage 14 Slide the hot swap cage part way into the hot swap bay Make sure that the side of the cage marked Top is oriented toward the top of the server case 15 Connect the power data and manageability cables to the backplane 16 Slide the hot swap cage all the way into the hot swap bay until the hot swap bay latch clicks into place 17 Replace the hot swap fan if removed For instructions see Replac...

Страница 94: ...m Replacing the hot swap backplane 19 Follow the instructions in Installing the bezel assembly on page 49 20 Follow the instructions in Closing the server case on page 52 8510725 book Page 89 Tuesday May 17 2005 5 45 PM ...

Страница 95: ...able from the front panel board if connected OR If your server is rack mounted and has the suitcase jumper on the chassis intrusion switch header on the front panel board remove and retain the jumper 6 Remove and retain the three screws securing the board to the chassis 7 Remove the front panel board from the chassis 8 Attach the front panel cable to the new front panel board Important Make sure t...

Страница 96: ...front panel board OR If your server is rack mounted install the previously removed suitcase jumper on the chassis intrusion switch header on the front panel board 10 Follow the instructions in Installing the bezel assembly on page 49 11 Follow the instructions in Closing the server case on page 52 8510725 book Page 91 Tuesday May 17 2005 5 45 PM ...

Страница 97: ...ructions in Preventing static electricity discharge on page 41 2 Follow the instructions in Opening the server case on page 42 3 While pressing the locking clip slide the fan out of the case 4 Insert the new fan into the fan slot until it snaps into place 5 Follow the instructions in Closing the server case on page 52 Important Make sure that you replace a fan with an identical replacement fan Fan...

Страница 98: ...ening the BIOS Setup utility on page 100 3 Record the BIOS settings on your printout then close the utility 4 Turn off your server then follow the instructions in Preventing static electricity discharge on page 41 5 Follow the instructions in Opening the server case on page 42 Warning There is a danger of explosion if battery is incorrectly replaced Replace only with the same or equivalent type of...

Страница 99: ...ake sure that the positive side of the new battery is facing correctly then press the new battery into the socket until it snaps into place 10 Follow the instructions in Closing the server case on page 52 11 Turn on the server 12 Press F2 when the Gateway logo screen appears during startup The BIOS Setup utility opens 13 Restore any BIOS settings that you wrote down in Step 3 14 Save all your sett...

Страница 100: ...ules For more information see Installing memory on page 66 4 Remove all of the expansion cards For more information see Installing PCI expansion cards on page 69 5 Remove the heat sinks and processors For more information see Installing a processor on page 73 6 Disconnect the power and data cables from the system board noting their locations and orientation You will reconnect the cables after you ...

Страница 101: ...www gateway com Chapter 4 Installing Components 7 Remove the seven 7 screws securing the system board to the case Screw Screw Screw Screw Screw Screw Screw 8510725 book Page 96 Tuesday May 17 2005 5 45 PM ...

Страница 102: ...ase with the seven 7 screws you removed previously 11 Reinstall the memory by following the instructions in Installing memory on page 66 12 Reinstall the processors by following the instructions in Installing a processor on page 73 13 Connect the power and data cables 14 Reinstall the expansion cards by following the instructions in Installing PCI expansion cards on page 69 15 Follow the instructi...

Страница 103: ...n the Gateway logo screen appears during startup The BIOS Setup utility opens 18 Check BIOS settings to make sure that they detect the server s new hardware then save your changes if any and close the BIOS Setup utility 8510725 book Page 98 Tuesday May 17 2005 5 45 PM ...

Страница 104: ...99 Using the BIOS Setup Utility Opening the BIOS Setup utility Updating the BIOS Resetting the BIOS settings to their factory defaults Resetting the BIOS passwords 8510725 book Page 99 Tuesday May 17 2005 5 45 PM ...

Страница 105: ...n page 183 Main gives you access to basic information and settings related to your server s hardware and configuration Advanced gives you access to information and settings for system resources hardware and server s configuration Boot gives you access to information and settings for startup features and startup sequences Security gives you access to settings related to system access passwords For ...

Страница 106: ...BIOS flash memory of this server is divided into two partitions a primary active partition from which the server boots and a secondary partition to which BIOS updates are diverted When a BIOS update occurs the existing BIOS image is preserved on the primary partition and the system is automatically prompted to attempt to boot from the new BIOS on the secondary partition If a boot failure occurs wi...

Страница 107: ... case on page 42 8 Place the jumper back onto pins 1 2 9 Follow the instructions in Closing the server case on page 52 Recovering the BIOS If you encounter a problem while you are updating the BIOS such as a power outage the BIOS update may not be successful If the system continues to try to boot from the new corrupted BIOS you can manually recover the old BIOS so you can try another update To rec...

Страница 108: ...he BIOS is being recovered the monitor displays a blue screen and the server will beep continually The process is complete when the server stops beeping 7 Remove the bootable USB disk on key or CD Caution Moving the jumper while the power is on can damage your server Always turn off the server and unplug the power cords and all other cables before changing the jumper Important The new flash BIOS i...

Страница 109: ...nnected to the server 9 Follow the instructions in Opening the server case on page 42 10 Place the jumper back onto pins 9 10 11 Follow the instructions in Closing the server case on page 52 12 Plug in the AC power cords and turn on the server then verify that the recovery was successful 8510725 book Page 104 Tuesday May 17 2005 5 45 PM ...

Страница 110: ...ity opens 4 Record any custom BIOS settings on your printout 5 Follow the instructions in Preventing static electricity discharge on page 41 6 Turn off the server then disconnect the power cords and all other cables connected to the server 7 Follow the instructions in Opening the server case on page 42 Important Check to make sure that the custom settings previously recorded and entered are not ca...

Страница 111: ...ords and all other cables connected to the server 12 Follow the instructions in Opening the server case on page 42 13 Place the jumper back onto pins 1 2 14 Follow the instructions in Closing the server case on page 52 15 Turn on the server A message appears saying that the CMOS Date and Time are not set 16 Press F1 to reset the BIOS to factory default settings J1D1 CMOS CLEAR BMC Control Force Er...

Страница 112: ...ing the server case on page 42 3 Remove the jumper across pins 5 6 of header J1D1 then place the jumper across pins 6 7 4 Follow the instructions in Closing the server case on page 52 5 Reconnect the power cords and turn on the server The BIOS password s is cleared Caution Moving the jumper while the power is on can damage your server Always turn off the server and unplug the power cords and all o...

Страница 113: ...disconnect the power cords and all other cables connected to the server 7 Follow the instructions in Opening the server case on page 42 8 Place the jumper back onto pins 5 6 9 Follow the instructions in Closing the server case on page 52 8510725 book Page 108 Tuesday May 17 2005 5 45 PM ...

Страница 114: ...Chapter 6 109 Configuring your RAID solutions Configuring the onboard RAID solutions Configuring the ROMB RAID solution 8510725 book Page 109 Tuesday May 17 2005 5 45 PM ...

Страница 115: ... solution can be configured by using either the RAID BIOS Console text based configuration utility or by using the RAID Web Console a GUI based console available with your browser Depending on how your server is equipped and the configuration options you prefer see one of the following sections Configuring your onboard RAID solutions on page 111 Configuring your ROMB RAID solution with the RAID BI...

Страница 116: ...r the Configure S ATA as RAID option click Enabled 6 Exit the BIOS Setup utility 7 Restart your server 8 During the boot process you will see the following message Press Ctrl E for BIOS Console Press and hold the CTRL key then press the E key The RAID BIOS console will open Level Description and use Pros Cons Numberof drives Fault Tolerant 0 Data divided into blocks and distributed sequentially pu...

Страница 117: ... indicator changes from READY to ONLINE 4 Press Enter when you finish creating the current array then press F10 to select configurable arrays Important When you press CTRL E to configure the SATA RAID controller the error message Error 0146 Insufficient Memory to Shadow PCI ROM may appear This error message is produced because the BIOS does not have sufficient memory to load the SATA RAID option R...

Страница 118: ...ave defined the current logical drive select Accept then press ENTER 11 Repeat Step 7 through Step 10 to configure additional logical drives 12 Save the configuration when prompted then press ENTER to return to the Management menu 13 Select Initialize from the Management menu 14 Use the SPACEBAR to highlight the logical drive to initialize then press F10 15 Select Yes at the prompt then press ENTE...

Страница 119: ...ns then exit the RAID BIOS console 11 Reboot the server Integrated Mirroring configuration The following must be considered when configuring the onboard SCSI RAID solution for Integrated Mirroring The BIOS based configuration utility lets you create one mirrored volume per Fusion MPT controller The mirrored volume can have two to six disks or two to five disks if an optional hot spare disk is used...

Страница 120: ...select Yes as the value c When the Keep Data Erase Disk message appears press F3 to keep the data that is currently on this disk The value in the Array Disk column changes to Primary d Use the arrow keys to select the secondary mirrored disk for the IM volume then select Yes as the value for the Array Disk column If partitions are defined on this disk a message warns you that data on the disk will...

Страница 121: ...uring the onboard SCSI RAID solution for Integrated Striping The BIOS based configuration utility lets you create one Integrated Striped volume per controller An IS volume can have from two to six disks Disks in an IS volume must be non removable single LUN disks that support 512 byte sectors wide synchronous transfers Qtag d I Os and a unit serial number The disks must support SMART and they must...

Страница 122: ...e selected disk a message appears warning you that data on the disk will be lost when the striped volume is created You can then deselect that disk or erase the disk and continue 5 Repeat the previous step to select as many as five more disks for the striped volume If partitions are defined on the selected disks a message appears warning you that data on the disk will be lost when the striped volu...

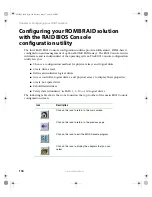
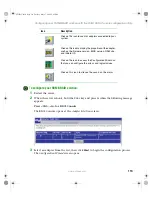
Страница 123: ...cal arrays and logical disks Create drive arrays Define and initialize logical drives Access controller logical drives and physical arrays to display their properties Create hot spare drives Rebuild failed drives Verify data redundancy in RAID 1 5 10 or 50 logical drives The following table shows the icons found on the top toolbar of the main BIOS Console configuration screen Icon Description Clic...

Страница 124: ...Select an adapter from the list then click Start to begin the configuration process The Configuration Wizard screen opens Click on this icon to scan for adapters connected to your system Click on this icon to display the properties of the adapter such as the firmware version BIOS version RAM size and initiator ID Click on the icon to access the Configuration Wizard so that you can configure the ar...

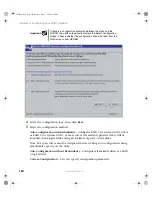
Страница 125: ...n the disks Note Hot spare drives must be designated before starting auto configuration using all available capacity on the disks Auto Configuration without Redundancy Configures all available drives as a RAID 0 logical drive Custom Configuration Lets you specify configuration parameters Important If there is a configuration mismatch between the disks and the NVRAM the utility automatically displa...

Страница 126: ...OS Console configuration utility 6 Select Custom Configuration then click Next The Array Definition screen opens 7 Hold down the CTRL key and click each drive you want included in the array To undo the changes click Reclaim 8510725 book Page 121 Tuesday May 17 2005 5 45 PM ...

Страница 127: ...s 11 Select the Read Policy from the list Enables the read ahead feature for the logical drive You can set this parameter to Normal Read ahead or Adaptive Normal specifies that the controller does not use read ahead for the current logical drive Read ahead specifies that additional consecutive stripes are read and buffered into cache This option will improve performance for sequential reads Adapti...

Страница 128: ...y from the list The cache policy applies to I O on a specific logical drive It does not affect the read ahead cache The options are Cached I O or Direct I O Cached I O buffers all reads in cache memory Direct I O does not buffer reads in cache memory When possible Direct I O does not override the cache policy settings Direct I O transfers data to cache and the host concurrently If the same data bl...

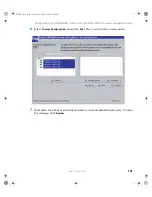
Страница 129: ...rive arrays minimum of two and enable the span option then select the size of the logical drive It is possible to span as many as 8 arrays in a logical drive When looking at the logical drive you will not see a RAID 50 label but you will see multiple arrays in the logical drive representing a RAID 50 configuration 15 Type the size of the logical drive in the Select Size box Set the size of the log...

Страница 130: ... to begin the initialization process If fast initialization is selected as the default for the adapter properties a preliminary initialization will complete within seconds and full initialization will run in the background after the operating system is booted If fast initialization is not selected as the default for the adapter properties the initialization may take up to two hours to complete 851...

Страница 131: ...ons 19 Click the Home icon on the top menu bar to return to the main configuration screen 20 Select an additional logical drive to configure or exit the BIOS Console Configuration Utility and reboot the server 8510725 book Page 126 Tuesday May 17 2005 5 45 PM ...

Страница 132: ...al drives before their removal The ability to view the current data transfer rate Complete system monitoring capabilities A RAID event tag Web Console components Web Console includes the following software components RAID Web Server is the client support module running on a RAID server that lets you manage a RAID server remotely from a browser on a client system It does not require a locally insta...

Страница 133: ... a browser that supports Java scripting Use a Pentium grade processor or higher CPU Have at least 8 Mbytes of system memory Have a network interface Have at least 5 Mbytes of free hard disk drive space Use the TCP IP protocol Quick configuration steps This section provides quick installation steps for users that are familiar with RAID utilities and tools See Configuring arrays and logical drives o...

Страница 134: ...ers through a single point of access Only RAID servers can be designated as a registration server Each RAID server should be registered with only one registration server Important To enable the registration server feature ensure that the networking option is selected during RAID Web Console installation on each RAID server Registration servers must have a static IP address RAID servers that are no...

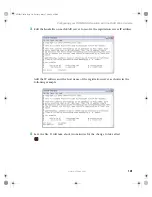
Страница 135: ... for the registration server 2 On each RAID server to be managed edit the regserv dat file located in the etc directory Change the localhost entry to the host name of the registration server The following edited file shows the localhost entry changed to intel as an example 8510725 book Page 130 Tuesday May 17 2005 5 45 PM ...

Страница 136: ...ts file on each RAID server to resolve the registration server IP address Add the IP address and the host name of the registration server as shown in the following example 4 Save the file It will take about two minutes for the change to take effect 8510725 book Page 131 Tuesday May 17 2005 5 45 PM ...

Страница 137: ...that is registered with the registration server will display on the Web Console screen A RAID server or a client system that does not have a RAID controller installed can be used to remotely manage a RAID server through a standard Web browser interface To do this point the browser at the registration server using either the host name or the IP address of the registration server such as http w2k 35...

Страница 138: ...nd README screens appear 3 Click Next to accept the license agreement and proceed 4 The installation program will first check to verify that the JRE is installed and which version is installed If it is not installed or not of the correct version the installation program will install the required version of the JRE and then reboot the system After reboot the installation process will continue autom...

Страница 139: ...t system as a RAID Server which lets it register with the Registration Server for monitoring by the RAID Client It also includes the management tools to configure and manage RAID drivers RAID Registration Server This option configures the current system as the RAID Registration Server This option lets other RAID Servers register in the registration database 7 Select the destination directory path ...

Страница 140: ...le for operation These instructions let only users who are part of the selected groups delete copy move or execute Web Console files To secure the Web Console 1 Log in as the Administrator 2 Run File Manager 3 Select the Web Console path 4 Open the Security menu list in File Manager then select PERMISSIONS 5 When the Permission dialog box appears assign the LIST permission to all groups except Adm...

Страница 141: ...registration server after the registration server is online RAID servers can register into the registration servers without resetting To de register or re register in Windows 1 In Windows XP Windows 2000 and Windows 2003 open the control panel 2 Click Administrative Tools then click Services 3 Click Stop RAID_Server to de register OR Click Start RAID_Server to re register 8510725 book Page 136 Tue...

Страница 142: ... launch the Web Console 1 Launch your Web browser and access the RAID controller through port address 3570 The RAID Web Console initial screen opens For Example for a remote system http 192 168 0 1 3570 For local RAID management http localhost 3570 For access to RAID servers listed in the Registration Server Database use the registration server s host name or IP address 8510725 book Page 137 Tuesd...

Страница 143: ...the window MCC IN in this example The Login screen opens You will be presented with an option to control read only functions of the RAID controller or full access to the RAID controllers configuration options You must have the correct rights to manage the RAID controller s configuration options 8510725 book Page 138 Tuesday May 17 2005 5 45 PM ...

Страница 144: ...139 www gateway com Launching the Web Console 3 Select Full Access enter you password then click Submit The Management Options screen opens 8510725 book Page 139 Tuesday May 17 2005 5 45 PM ...

Страница 145: ...perties Config Wizard This option provides a series of options to let you create new drive arrays add capacity to existing arrays or modify existing arrays Channel Properties This option lets you configure the properties of the available SCSI channels on the RAID controller Config View This options lets you switch between the Logical and Physical drive views Device Progress Shows progress of an op...

Страница 146: ...splays all the arrays on the current adapter and the global hot spare drive pool Web Console labels logical drives as New or LD0 LD1 LD2 and so forth You must define all the logical drives to be configured in the new array Do not create drives that span the current array and another array Uncheck the Span Array box To define logical drives 1 Click the RAID Level from the list The Wizard does not p...

Страница 147: ...nt adapter in the logical devices screen The Physical Devices window displays the status of the physical drives 7 Click Finish to accept the displayed configuration A dialog box prompts you to initialize We recommend initializing all newly created logical drives Initialize logical drives Select the adapter from the Adapter box Select the logical drives you plan to initialize Select Initialize from...

Страница 148: ...m the right pane The Web Console changes the state of the selected drives to the READY state Reconfiguring Existing Arrays This section provides instructions for adding and removing physical drives from existing arrays Adding a Physical Drive to an Existing Array To add a physical drive to an array 1 Go to the Config View screen 2 Highlight the logical drive and select properties from the left pan...

Страница 149: ...144 www gateway com Chapter 6 Configuring your RAID solutions 8510725 book Page 144 Tuesday May 17 2005 5 45 PM ...

Страница 150: ...es and codes Troubleshooting Getting telephone support and training If the suggestions in this chapter do not correct the problem see Telephone support on page 168 for more information about how to get help 8510725 book Page 145 Tuesday May 17 2005 5 45 PM ...

Страница 151: ... For more information about preventing damage from static electricity see Preventing static electricity discharge on page 41 After you complete any maintenance task where you have to open the server case make sure that you close the case tighten any screws then reconnect all cables before you restart your server Warning To avoid bodily injury do not attempt to troubleshoot your server problem if P...

Страница 152: ...sing and holding F2 while your server restarts Make sure that the correct drive type is selected Hard disk controller failure press F1 to try reboot The drive controller may be defective Press F1 to try to restart the server For more information about running diagnostics on your hard drive see your operating system s documentation Insert bootable media device Restart your server then open the BIOS...

Страница 153: ... started up See Memory errors were detected during server start up on page 164 for a possible solution Memory size error Restart your server then open the BIOS Setup utility by pressing and holding F2 while your server restarts Save the memory configuration Missing operating system The master boot record may be corrupt For troubleshooting information see The master boot record is corrupted on page...

Страница 154: ...ings If an error occurs in a program see its documentation or online help Battery replacement If you have problems after installing a new CMOS battery try each of the following items closing the case and restarting the server after each try Restart your server then open the BIOS Setup utility by pressing and holding F2 while your server restarts Correct any discrepancies Remove the side panel by f...

Страница 155: ...followed by a series of short tones For more information on the beep codes issued check the documentation for that device The following table shows POST error beep codes Prior to system video initialization BIOS uses these codes to inform users of error conditions Warning To avoid bodily injury do not attempt to troubleshoot your server problem if Power cords or plugs are damaged Liquid has been s...

Страница 156: ...od processor in the first socket Same as for 4 beeps 6 The keyboard controller 8042 may be defective The BIOS cannot switch to Protected mode Remove the keyboard to see if the error goes away If it does try a known good keyboard Same as for 4 beeps 7 General exception error processor exception error Same as for 4 beeps Same as for 5 beeps 8 Display memory error system video adapter If the system v...

Страница 157: ...place the failed processor 1 5 2 3 Processor configuration error or CPU 1 socket is empty Reseat or replace the failed processor In a two processor system make sure the processors are identical 1 5 2 4 Front side bus select configuration error 1 5 4 2 DC power unexpectedly lost 1 5 4 3 Chipset control failure 1 5 4 4 Power control failure LED Name Function Location Color Description ID Aid in serv...

Страница 158: ...stem board Orange On Fault CPU 1 and 2 Fan Fault Identify fan failure At the front center of the system board Orange On Fault CPU 1 and 2 Fault Identify processor failure On the system board 1 behind the processor socket Orange On Fault 5v Standby Identify 5v standby power on state At the front left of the system board Orange On 5v standby power on Power LED Identify the power state of the system ...

Страница 159: ...Verify CMOS checksum manually by reading storage area If the CMOS checksum is bad update CMOS with power on default values and clear passwords Initialize status register A Initializes data variables that are based on CMOS setup questions Initializes both the 8259 compatible PICs in the system 05 Off G Off G Initialize the interrupt controller in hardware generally PIC and interrupt vector table 06...

Страница 160: ...es Detects and initializes the video adapter installed in the system that has optional ROMs 2E G G O Off Initializes all the output devices 31 Off Off R O Allocate memory for ADM module and uncompress it Give control to ADM module for initialization Initialize language and font modules for ADM Activate ADM module 33 Off Off O O Initialize the silent boot module Set the window for displaying text i...

Страница 161: ...Display error to the user and gets the user response to error 87 R G G G Execute BIOS setup if needed requested 8C O G Off Off Late POST initialization of chipset registers 8D O G Off G Build ACPI tables if ACPI is supported 8E O G G Off Program the peripheral parameters Enable disable NMI as selected 90 R Off Off R Late POST initialization of system management interrupt A0 R Off R Off Check boot ...

Страница 162: ... manufacturers The error associated with this value may be different from one platform to the next Check point Diagnostic LED decoder G Green R Red O Orange Description Before D1h R R Off O Early chipset initialization is done Early super I O initialization is done including RTC and keyboard controller NMI is disabled D1 R R Off O Perform keyboard controller BAT test Check if waking up from power ...

Страница 163: ... execute serial flash D8 O R Off R The Runtime module is uncompressed into memory CPUID information is stored in memory D9 O R Off O Store the Uncompressed pointer for future use in PMM Copying Main BIOS into memory Leaves all RAM below 1 MB Read Write including E000 and F000 shadow areas but closing SMRAM DA O R G R Restore CPUID value back into register Give control to BIOS POST ExecutePOSTKerne...

Страница 164: ...y of the recovery file configuration to the current configuration of the flash part FB O R O O Make flash write enabled through chipset and OEM specific method Detect proper flash part Verify that the found flash part size equals the recovery file size F4 R O R R The recovery file size does not equal the found flash part size FC O O R R Erase the flash part FD O O R O Program the flash part FF O O...

Страница 165: ...onfigured onboard peripherals memory and I O decode windows in PCI PCI bridges and noncompliant PCI devices Static resources are also reserved Boot Output Device Initialization function 2 Searches for and initializes any PnP PCI or AGP video devices 38 Initialize different buses and perform the following functions Boot Input Device INitialization function 3 Searches for and configures PCI input de...

Страница 166: ...he CD or DVD drive and the IDE connector on the system board or controller card Your CD or DVD drive tray does not open Press a straightened paper clip wire into the CD or DVD drive s manual eject hole The drive tray opens If this problem happens frequently while the server is turned on the drive may be defective Diskette drive The diskette drive is not recognized Restart your server Open your ser...

Страница 167: ...driver For more information see the card s documentation Reseat the card For more information see Installing PCI expansion cards on page 69 Install the card in a different slot Hard drive The hard drive cannot be accessed or you receive a General failure reading drive C error message If a diskette is in the diskette drive eject it and restart your server by pressing the reset button Restart your s...

Страница 168: ...at the power cable and SCSI cable are attached securely to the drive cage Make sure that the last device on the SCSI cable is correctly terminated For more information about SCSI device configurations see the device s documentation Use a different SCSI cable You are having problems with a SATA drive For normal SATA drives not SATA RAID check the BIOS setup utility to see if the BIOS has recognized...

Страница 169: ...ff your server and unplug the keyboard Clean the keyboard and turn it upside down to drain it Let the keyboard dry before using it again If the keyboard does not work after it dries you may need to replace it This type of damage is not covered by your server s warranty Memory Memory errors were detected during server start up Open your server and make sure that the memory modules are installed cor...

Страница 170: ...ings are correct Make sure that you are not using a digital rollover or PBX line These lines do not work with your modem Check for line noise scratchy crackling or popping sounds Line noise is a common problem that can cause the modem to connect at a slower rate abort downloads or even disconnect The faster the modem the less line noise it can tolerate and still work correctly Listen to the line u...

Страница 171: ...he modem device driver For more information see Using Your System Companion CD Open your server and reseat the modem For more information see Installing PCI expansion cards on page 69 Monitor Your server is running but there is no picture Adjust the brightness and contrast controls to the center position Make sure that the monitor is plugged in and turned on If the monitor is turned on the power L...

Страница 172: ...ed securely to an electrical outlet turned on and working correctly One way to check this is to plug the server directly into a wall outlet bypassing the UPS Make sure that the electrical outlet is working by plugging a working device such as a lamp into the outlet then turning it on to test the outlet Open your server and make sure that the power supply cable and power button cable are connected ...

Страница 173: ...sing a program see The program s online Help The program s documentation Your operating system s documentation The software or hardware manufacturer s Web site See Troubleshooting on page 149 Have your client ID serial number located on the back of your server case and order number available along with a detailed description of your issue including the exact text of any error messages and the step...

Страница 174: ...ial assistance for software issues 800 229 1103 charged to your credit card Gateway Customer Care Talk to a Gateway Customer Care representative about a non tutorial technical support question 877 485 1464 US option 6 800 846 3609 Canada and Puerto Rico 605 232 2191 all other countries Sales accounting and warranty Get information about available systems pricing orders billing statements warranty ...

Страница 175: ...170 www gateway com Chapter 7 Troubleshooting 8510725 book Page 170 Tuesday May 17 2005 5 45 PM ...

Страница 176: ...erver Specifications The following specifications are for the standard configuration Your server may contain optional equipment All specifications are subject to change 8510725 book Page 171 Tuesday May 17 2005 5 45 PM ...

Страница 177: ...ys available standard Optional drives 3 5 inch diskette CD ROM CD R or DVD ROM Tape drive Hard Drives Support for six hot swap SATA hard drives standard OR Support for six hot swap SCSI hard drives optional Support for an additional four hot swap SCSI hard drives optional Card sizes Supports full length full height PCI expansion cards Power supply modules 730 W RPS 1 included in base configuration...

Страница 178: ...t 6 PCI X 64 bit 100 MHz Note Slot 2 is for the RAID DIMM accessory only Do not attempt to install a PCI card in this slot Video On board ATI Rage XL SVGA video controller with 8 MB of SDRAM RAID Two Serial ATA 150 ports from the ICH5 R supporting entry level RAID functionality including Integrated Mirroring and Integrated Striping RAID levels 0 and 1 The LSI Logic 53C1030 supports the LSI logic I...

Страница 179: ...30 controller Dual channel Ultra320 SCSI channels with integrated RAID 0 1 support Accessible at back panel ACPI ACPI compliance Supports S0 S1 S4 S5 Hardware Monitor Main logic board sensors n Voltage sensors n Temperature sensors n Adaptive fan speed control and fan speed detection 8510725 book Page 174 Tuesday May 17 2005 5 45 PM ...

Страница 180: ...ng 40 to 158 F 40 to 70 C Operating 41 to 95 F 5 to 35 C derated 0 9 F 0 5 C for every 1 000 feet 305 meters Altitude 10 000 feet 3 048 meters maximum Humidity Operating wet bulb Not to exceed 91 4 F 33 C with diskette drive or hard drive Nonoperating 90 relative noncondensing at 86 F 30 C Shock Operating 2 0 g 11 msec sine Packaged Operational after 18 inch free fall cosmetic damage might occur A...

Страница 181: ... X X X 1280 1024 43 60 X X X X 1280 1024 70 72 X X X 1600 1200 60 66 X X X X 1600 1200 76 85 X X X 3D Mode 3D Video Mode Support w Z Buffer Enabled 640 480 60 72 75 90 100 X X X X 800 600 60 72 75 90 100 X X X X 1024 768 60 72 75 90 100 X X X X 1280 1024 43 60 70 72 X X 1600 1200 60 66 76 85 X 3D Mode 3D Video Mode Support w Z Buffer Disabled 640 480 60 72 75 90 100 X X X X 800 600 60 72 75 90 100...

Страница 182: ... www gateway com Video specifications bits per pixel 1280 1024 43 60 70 72 X X X 1600 1200 60 66 76 85 X X Mode Refresh Rate Hz 8 bpp 16 bpp 24 bpp 32 bpp 8510725 book Page 177 Tuesday May 17 2005 5 45 PM ...

Страница 183: ...0A0000h to 0BFFFFh 128 KB Video or SMM memory 0C0000h and 0DFFFFh 128 KB Expansion card BIOS and buffer area 0E0000h to 0FFFFFh 128 KB System BIOS 0E0000h to 0EFFFFh 2 MB Extended system BIOS FC000000h to FFFFFFFFh 64 MB PCI memory space Important If you disable an IDE controller to free the interrupt for that controller you must physically unplug the IDE cable from the system board Simply disabli...

Страница 184: ...PIRQA USB 1 1 controller 1 and 4 PIRQB Video PIRQC USB 1 1 controller 3 Native IDE SATA PIRQD USB 1 1 controller 2 PIRQE Option for SCI TCO HPET 0 1 2 PIRQF Option for SCI TCO HPET 0 1 2 PIRQG Option for SCI TCO HPET 0 1 2 PIRQH USB 2 0 EHCI controller 1 Option for SCI TCO HPET 0 1 2 Ser IRQ SIO3 Device Interrupt A Interrupt B Interrupt C Interrupt D USB Controller 1 and 4 ICH5R_PIRQA USB Controll...

Страница 185: ...PCI Exp x4 N A N A N A N A Slot 4 PCI Exp x8 N A N A N A N A Slot 5 PCI X 64 133 PXH_PAIRQ0 PXH_PAIRQ1 PXH_PAIRQ2 PXH_PAIRQ3 Slot 6 PCI X 64 100 PXH_PBIRQ0 PXH_PBIRQ1 PXH_PBIRQ2 PXH_PBIRQ3 Slot 6 Upper slot of optional 2 slot riser PXH_PBIRQ0 PXH_PBIRQ1 PXH_PBIRQ2 PXH_PBIRQ3 Slot 7 Lower slot of optional 2 slot riser PXH_PBIRQ0 PXH_PBIRQ1 PXH_PBIRQ2 PXH_PBIRQ3 Device Interrupt A Interrupt B Interr...

Страница 186: ... about your server such as memory size hard drive size and processor type visit Gateway s eSupport page at support gateway com The eSupport page also has links to additional Gateway documentation and detailed specifications for your own server 8510725 book Page 181 Tuesday May 17 2005 5 45 PM ...

Страница 187: ...182 www gateway com Appendix A 8510725 book Page 182 Tuesday May 17 2005 5 45 PM ...

Страница 188: ...Appendix B 183 BIOS Settings You can print this appendix then record your custom BIOS settings on the printout 8510725 book Page 183 Tuesday May 17 2005 5 45 PM ...

Страница 189: ... BIOS menu BIOS submenu Setting Value Main System Overview AMIBIOS Version Build date Processor Type Speed Count System Memory Size System Time HH MM SS System Date DAY MM DD YYYY Language English French German Italian Spanish Advanced Processor Configuration Manufacturer Band String Frequency FSB Speed CPU1 CPUID Cache L1 Cache L2 Cache L3 CPU2 CPUID Cache L1 Cache L2 Cache L3 8510725 book Page 1...

Страница 190: ...ts Definition A1 Master A2 Slave A1 Slave A2 Master Mixed P ATA S ATA Selects Mixed P ATA S ATA submenu for configuring mixedP ATA and S ATA Primary IDE Master Selects IDE Device Configuration submenu with additional device details settings Primary IDE Slave Selects IDE Device Configurationsub menu with additional device details settings Secondary IDE Master Selects IDE Device Configuration submen...

Страница 191: ...ice Host Device Floppy Configuration Floppy A Disabled 720 KB 3 1 2 1 44 MB 3 1 2 2 44 MB 3 1 2 Onboard Floppy Controller Disabled Enabled Super I O Configuration Serial Port A Address Disabled 3F8 IRQ4 2F8 IRQ3 3E8 IRQ4 2E8 IRQ3 Serial Port B Address Disabled 3F8 IRQ4 2F8 IRQ3 3E8 IRQ4 2E8 IRQ3 USB Configuration USB Devices Enabled List of USB devices detected by BIOS BIOS menu BIOS submenu Setti...

Страница 192: ...e Configuration Selects USB Mass Storage Device Configuration submenu with USB Device enable PCI Configuration Onboard Video Disabled Enabled Dual Monitor Video Enabled Disabled Onboard NIC 1 Bottom Disabled Enabled Onboard NIC 1 ROM Disabled Enabled Onboard NIC 2 Top Disabled Enabled Onboard NIC 2 ROM Disabled Enabled Onboard SCSI Disabled Enabled Onboard SCSI ROM Disabled Enabled BIOS menu BIOS ...

Страница 193: ...ve for additional information Disabled Enabled Slot 1 Option ROM Disabled Enabled Slot 3 Option ROM Disabled Enabled Slot 4 Option ROM Disabled Enabled Slot 5 Option ROM Disabled Enabled Slot 6 Option ROM Disabled Enabled Memory Configuration DIMM 1A Information Installed Not Installed Disabled Spare DIMM 1B Information Installed Not Installed Disabled Spare DIMM 2A Information Installed Not Insta...

Страница 194: ...lled Not Installed Disabled Spare DIMM 4B Information Installed Not Installed Disabled Spare Extended Memory Test 1 MB 1 KB Every Location Disabled Memory Retest Enabled Disabled Memory Remap Feature Enabled Disabled Memory Sparing Disabled provides the most memory space Sparing reserves memory to replace failures Sparing Disabled Boot BIOS menu BIOS submenu Setting Value 8510725 book Page 189 Tue...

Страница 195: ...ash Area Disabled Enabled Boot Device Priority 1st Boot Device Varies Specifies boot sequence from the available devices A device enclosed in parenthesis has been disabled nth Boot Device Varies Specifies boot sequence from the available devices A device enclosed in parenthesis has been disabled Hard Disk Drive 1st Drive Varies Specifies boot sequence from the available devices BIOS menu BIOS subm...

Страница 196: ...from the available devices nth Drive Varies Specifies boot sequence from the available devices Security Administrator Password is Installed Not installed User Password is Installed Not installed Set Admin Password Set or clear Admin password Set User Password Set or clear User password User Access Level No Access View Only Limited Full Access Clear User Password Fixed disk boot sector protection D...

Страница 197: ...sabled Enabled Video Blanking Disabled Enabled Power Switch Inhibit Disabled Enabled NMI Control Disabled Enabled Server System Management Server Board Part Number Varies Server Board Serial Number Varies NIC 1 MAC Address Varies NIC 2 MAC Address Varies System Part Number Varies System Serial Number Varies Chassis Part Number Varies Chassis Serial Number Varies BIOS menu BIOS submenu Setting Valu...

Страница 198: ...roller N A if not present HSC FW Revision HSBP B Firmware revision of the Hotswap controller N A if not present Serial Console Features BIOS Redirection Port Disabled Serial A Serial B Baud Rate 9600 19 2K 38 4K 57 6K 115 2K Flow Control No Flow Control CTS RTS XON XOFF CTS RTS CD Terminal Type PC ANSI VT100 VT UTF8 ACPI Redirection Port Disabled Serial A Serial B BIOS menu BIOS submenu Setting Va...

Страница 199: ...or Logging Disabled Enabled Hublink Error Logging Disabled Enabled Server Cont d Assert NMI or SERR Disabled Enabled Assert NMI or PERR Disabled Enabled Resume on AC Power Loss Stays Off Power On Last State Only displayed if Intel Management Module is present Default if present FRB 2 Policy Disable BSP Do not disable BSP Retry on Next Boot Disable FRB2 Timer BIOS menu BIOS submenu Setting Value 85...

Страница 200: ...inutes 20 minutes PXE OS Boot Timeout Disabled 5 minutes 10 minutes 15 minutes 20 minutes OS Watchdog Timer Policy Stay On Reset Power Off Platform Event Filtering Enabled Disabled Exit Save Changes and Exit F10 Discard Changes and Exit ESC key Discard Changes F7 Load Setup Defaults F9 Load Custom Defaults Save Custom Defaults BIOS menu BIOS submenu Setting Value 8510725 book Page 195 Tuesday May ...

Страница 201: ...ay Changing the mode could damage the current operating system installation on the RAID volume BIOS submenu BIOS 2nd level submenu Setting Value IDE Configuration Cont d Mixed P ATA S ATA First ATA Channel P ATA M S S ATA M S Second ATA Channel S ATA M S None BIOS submenu BIOS 2nd level submenu Setting Value IDE Configuration Cont d IDE Device Configuration Device Device information Vendor Device ...

Страница 202: ...ock Multi Sector Transfer Mode Disabled Auto PIO Mode Auto 0 1 2 3 4 DMA Mode Auto SWDMA0 2 MWDMA0 2 UWDMA0 5 S M A R T Auto Disabled Enabled 32 bit Data Transfer Disabled Enabled BIOS submenu BIOS 2nd level submenu Setting Value USB Configuration Cont d BIOS submenu BIOS 2nd level submenu Setting Value 8510725 book Page 197 Tuesday May 17 2005 5 45 PM ...

Страница 203: ...etected Includes a DeviceIDstringreturned by the USB device Emulation Type Auto Floppy Forced FDD Hard Disk CDROM Device n Displayed if a device is detected Includes a DeviceIDstringreturned by the USB device Emulation Type Auto Floppy Forced FDD Hard Disk CDROM BIOS submenu BIOS 2nd level submenu Setting Value 8510725 book Page 198 Tuesday May 17 2005 5 45 PM ...

Страница 204: ...Appendix C 199 Safety Regulatory and Legal Information Safety information Legal and Regulatory Information 8510725 book Page 199 Tuesday May 17 2005 5 45 PM ...

Страница 205: ...m make sure that the total ampere rating on the products plugged into the extension cord does not exceed the extension cord ampere rating If your system is fitted with a TV Tuner cable or satellite receiver card make sure that the antenna or cable system is electrically grounded to provide some protection against voltage surges and buildup of static charges Care during use Do not walk on the power...

Страница 206: ...azardous locations Such areas include patient care areas of medical and dental facilities oxygen laden environments or industrial facilities Warning To reduce the risk of fire use only No 26 AWG or larger telecommunications line cord 8510725 book Page 201 Tuesday May 17 2005 5 45 PM ...

Страница 207: ...d for use with this device The modem is designed to be connected to the telephone network or premises wiring using a compatible modular jack which is Part 68 compliant See installation instructions for details The Ringer Equivalence Number REN is used to determine the number of devices which may be connected to the telephone line Excessive RENs on a telephone line may result in the devices not rin...

Страница 208: ...ut in the radio interference regulations of Industry Canada Le présent appareil numérique n émet pas de bruits radioélectriques dépassant les limites applicables aux appareils numériques de Classe A prescrites dans le règlement sur le brouillage radioélectrique édicté par Industrie Canada Telecommunications per DOC notice for products fitted with an IC compliant modem The Industry Canada label ide...

Страница 209: ...vice provides an indication of the maximum number of terminals allowed to be connected to a telephone interface The termination on an interface may consist of any combination of devices subject only to the requirement that the sum of the Ringer Equivalence Numbers of all the devices does not exceed 5 Warning To avoid electrical shock or equipment malfunction do not attempt to make electrical groun...

Страница 210: ... unit ever need servicing contact an authorized service location California Proposition 65 Warning Warning Use of controls or adjustments or performance of procedures other than those specified in this manual may result in hazardous radiation exposure To prevent exposure to laser beams do not try to open the enclosure of a CD or DVD drive Warning This product contains chemicals including lead know...

Страница 211: ... is no longer useful to you take it back to your local or regional waste collection administration for recycling In some cases your end of life product may be traded in for credit towards the purchase of new Gateway equipment Call Gateway to see if this program is available in your area If you need further assistance in recycling reusing or trading in your end of life product you may contact us at...

Страница 212: ...AY ActiveCPR ALR AnyKey black and white spot design CrystalScan Destination DestiVu EZ Pad EZ Point Field Mouse Gateway 2000 Gateway Country gateway net Gateway stylized logo Perfect Scholar Solo TelePath Vivitron stylized G design and You ve got a friend in the business slogan are registered trademarks and black and white spotted box logo GATEWAY Gateway Astro Gateway Work Gateway Connected touch...

Страница 213: ...208 www gateway com Appendix C 8510725 book Page 208 Tuesday May 17 2005 5 45 PM ...

Страница 214: ...IOS Setup utility menus 100 184 navigating through 100 opening 100 passwords 33 107 recording configuration 28 settings 184 submenus 196 197 troubleshooting 161 board front panel 90 boot device 20 menu 20 bootblock initialization code checkpoints diagnostic LEDs 157 bootblock recovery code checkpoints diagnostic LEDs 158 C card installing 69 reseating 69 retention levers 5 slot location 7 69 troub...

Страница 215: ...ery code checkpoints 158 DIM code checkpoints 160 POST code checkpoints 154 DIM code checkpoints 160 DIMM see memory diskette drive adapter tray 55 installing 54 location 2 replacing 54 troubleshooting 161 display troubleshooting 166 documentation Gateway Web site 9 System Companion CD 38 drive bays location 2 drive tray diskette 55 drivers installing 38 drives CD 2 54 configuring 53 diskette 2 54...

Страница 216: ...g 86 hot swap drives installing 59 location 2 hot swap fans installing 92 I IDE cables 54 drive configuration 53 IMM installing 76 indicators 2 control panel 3 LED 19 information LED 152 installing 5 25 inch drive 54 add in card 69 bezel assembly 49 card 69 CD or DVD drive 54 CMOS battery 93 diskette drive 54 expansion cards 69 front panel board 90 heat sink 73 hot swap backplane 86 hot swap cage ...

Страница 217: ...on 28 master boot record 163 memory installing 66 map 178 online sparing 68 troubleshooting 164 messages 147 modem connection speed 166 troubleshooting 164 module power distribution 83 monitor cleaning 27 port 5 troubleshooting 166 motherboard see system board mouse port 5 N network jack 5 O onboard RAID configuring 111 onboard SATA RAID 111 onboard SCSI RAID 111 online memory sparing 68 opening c...

Страница 218: ...BIOS console 118 ROMB 118 Web console 127 RAID drives installing 59 location 4 RAID Web Console 127 RAM see memory rear fan 5 recovering BIOS 102 relocking bezel 50 removing see installing replacing see installing reset button 3 resolution video 176 resources interrupts 178 memory map 178 RJ 45 jack 5 rolling BIOS 101 ROMB RAID configuring 118 127 S safety general precautions 12 200 guidelines for...

Страница 219: ...T tape drive cleaning 27 technical support Customer Care 168 resources 168 tips before contacting 168 telephone support 168 training CD 169 Gateway Learning Libraries 169 troubleshooting add in card 162 battery 149 beep codes 150 BIOS 161 card 162 CD drive 161 CD or DVD 161 diagnostic LEDs 154 diskette drive 161 error messages 147 expansion card 162 general guidelines 149 general safety guidelines...

Страница 220: ...www gateway com BIOS Setup 100 V VGA port 5 video 176 W Web console components 127 quick configuration steps 128 registration server 129 Web site Gateway 9 8510725 book Page 215 Tuesday May 17 2005 5 45 PM ...

Страница 221: ...216 www gateway com 8510725 book Page 216 Tuesday May 17 2005 5 45 PM ...

Страница 222: ...A MAN 9510 USR GDE R1 04 05 ...

Отзывы: