10
Getting Started
Installing an Optional Map Data Card
GARMIN map data cards allow your unit to display
detailed mapping data. Data can be transferred to a map data
card from a GARMIN MapSource
TM
CD-ROM (a collection of
data for a specific area, MetroGuide
®
U.S.A., World Map, etc.)
using a PC and interface cable. If you have already purchased
MapSource and a data card, you will want to install the data card
before continuing. If you would like to order MapSource, refer to
Appendix A for information.
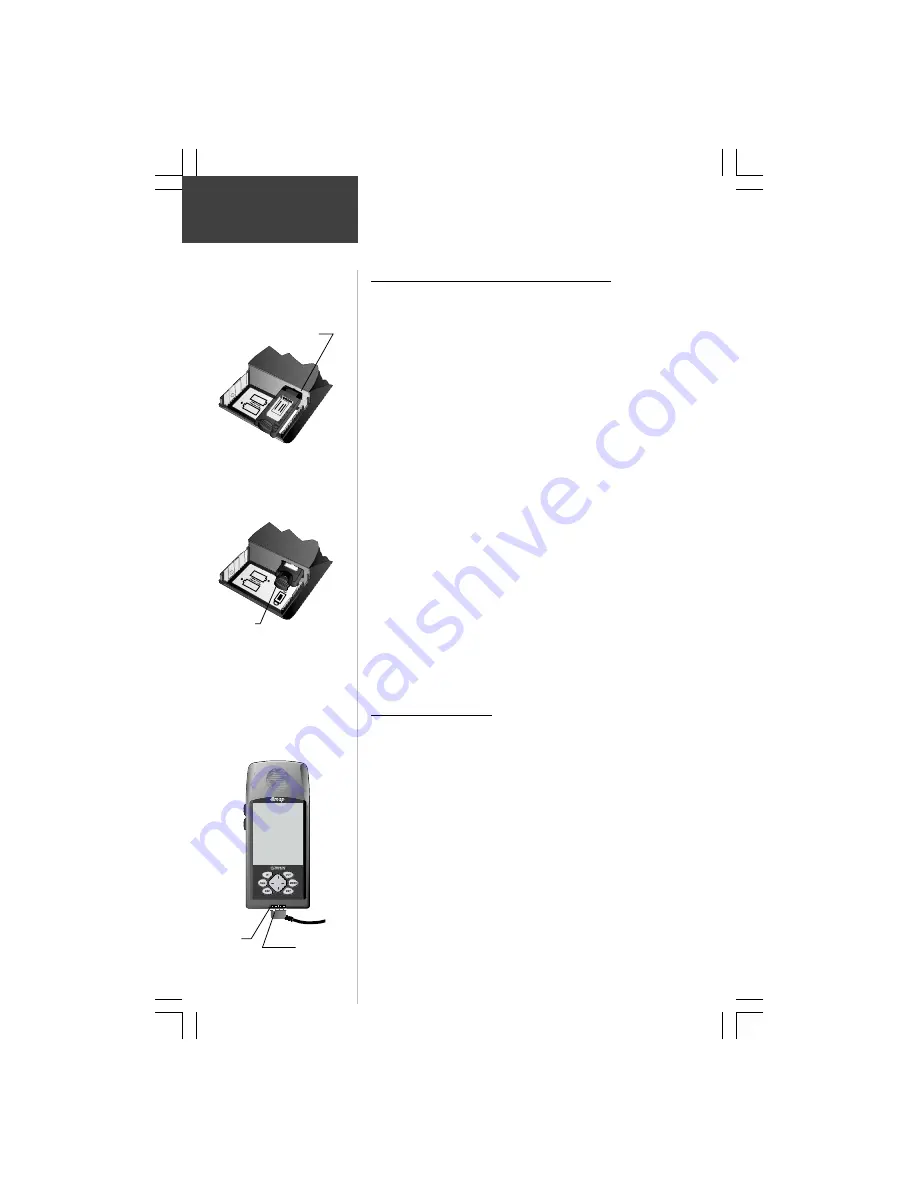
Map Data
Card
Installation
Install the map data card in
the slot inside the battery
compartment. Push in
carefully, until it is completely
inserted.
Pull out the extractor handle
to remove the map data card
from the eMap battery
compartment.
/&#&+.&%5+*'9#
AB#%&7#9%
C&"5'$
To install a map data cards:
1. Open the battery compartment cover on the back of
the unit by pressing the arrows, sliding back, and
then lifting up and away.
2. Remove the batteries to expose the card slot inside
the compartment.
3. Insert the card in the slot with the label facing you.
Be certain the connector end is inserted into the slot
and not the end with the extractor handle. Press
the card completely in place until the handle is flush
with the side of the compartment.
4. To remove the card, use a fingernail to pull out the
extractor handle and then slide the card free of the
slot.
5. Reinstall the batteries, noting polarity, and close
the cover.
Transferring
Map Data
Map Data Transfer
After you have installed a data card in the eMap, it must be
loaded with map data from a MapSource CD-ROM. In order to
transfer map data you will need to install MapSource on your
PC and connect the eMap PC Interface Cable to your PC and the
eMap unit.
Instructions for using MapSource are provided with the
CD-ROM. Instructions for transferring map data are
contained in the Reference section of the same manual
under the title “Transferring Data”.
To make the Interface Cable connection:
1. Connect the RS232 Serial Port Connector portion of
the Interface Cable to the serial port on your PC.
2. Slide the eMap Connector into the Data Connection
at the base of the eMap. The connector is indexed
to fit only one way. (See the illustration to the left)
Data
Connection
Interface Cable Plug
Indexing Slot


