System
Galaxy 11
QUICK GUIDE
Integrating Ademco Vista Panel
Page 13 of 22
Add Alarm Panel Points/Zones in SG
Alarm Panel Points are the same as Zones in the Vista interface.
NOTES
Operator login must be set to allow
full editing
of Alarm Panel features.
See Operator Programming screen.
Graphic Symbols: (if using Graphic Floor plans) a point can be linked to images that represent each
possible status condition – this is done on the Graphic Symbols tab.
DVR Camera Setting: a point can be linked to a camera and setup to automatically call video
CCTV / Web Camera Settings: a point can be linked to a CCTV switch to control CCTV feed or WebCam URL.
Audio Settings: a point can be linked to audio files to sound for Alarm and Trouble states
Options: a point can be set to generate event log messages to email, file, or line transmission (RS232 or TCP/IP)
1.
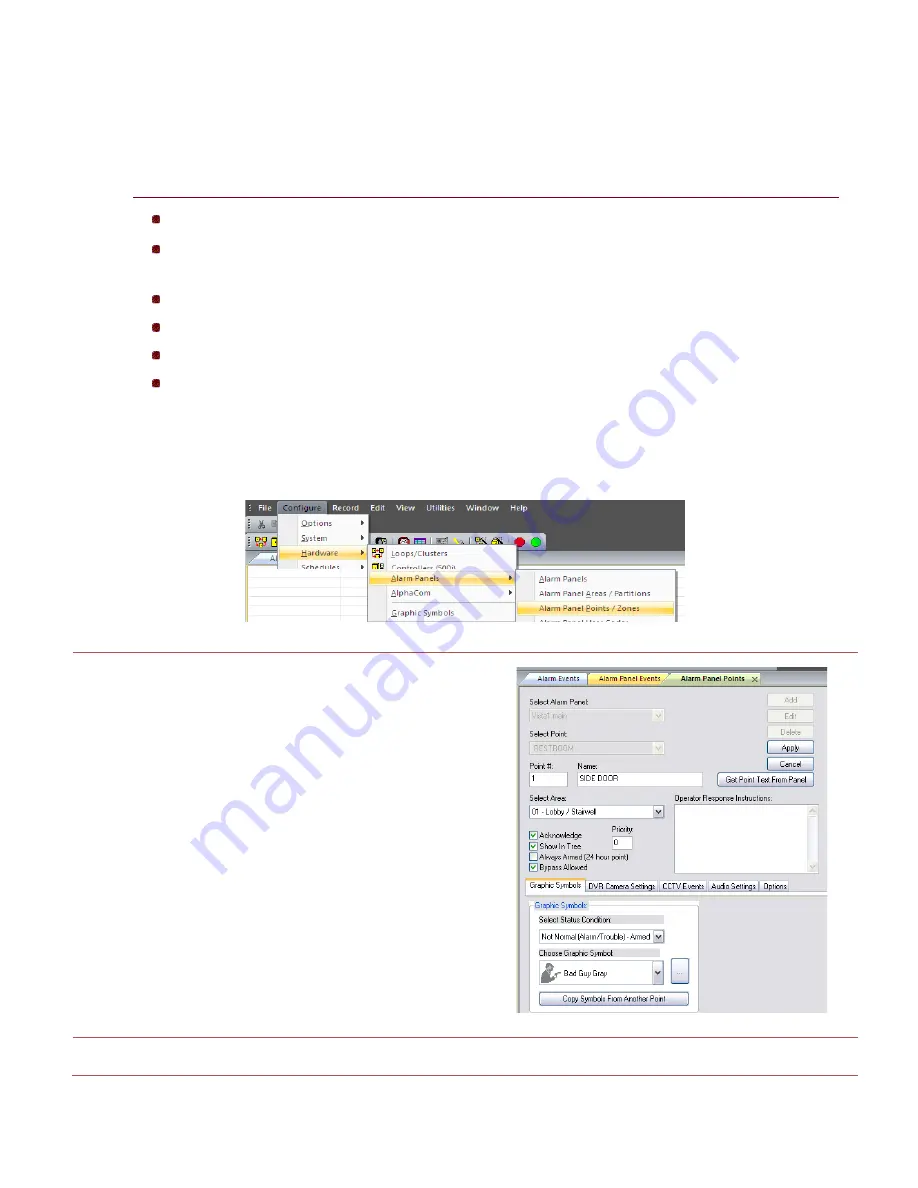
To add the points/zones, open the Alarm Panel Point Properties screen:
From the SG MENU: Configure > Hardware > Alarm Panels > Alarm Panel Points
2.
click the ADD button
3.
select the Area / Partition
4.
click [GET POINT TEXT FROM PANEL]
5.
type any operator response instructions
6.
set ALARM PRIORITY as desired
7.
check the ACKNOWLEDGE option to require an
operator acknowledgement and trigger SG Alarm
NOTE:
Point must also be armed to trigger an alarm.
8.
check the SHOW IN TREE checkbox
9.
check ALWAYS ARMED if this is a 24 hour zone
10.
check the BYPASS ALLOWED as needed
NOTE:
panel must support bypass.
11.
configure the symbols, cameras, cctv switching, audio
settings and output messaging as needed
12.
click APPLY to save (or continue for advanced settings)
Continue on next page


