4.12 Setting Folders for Saving Scanned Data
150
2. Press the [Add] button.
D
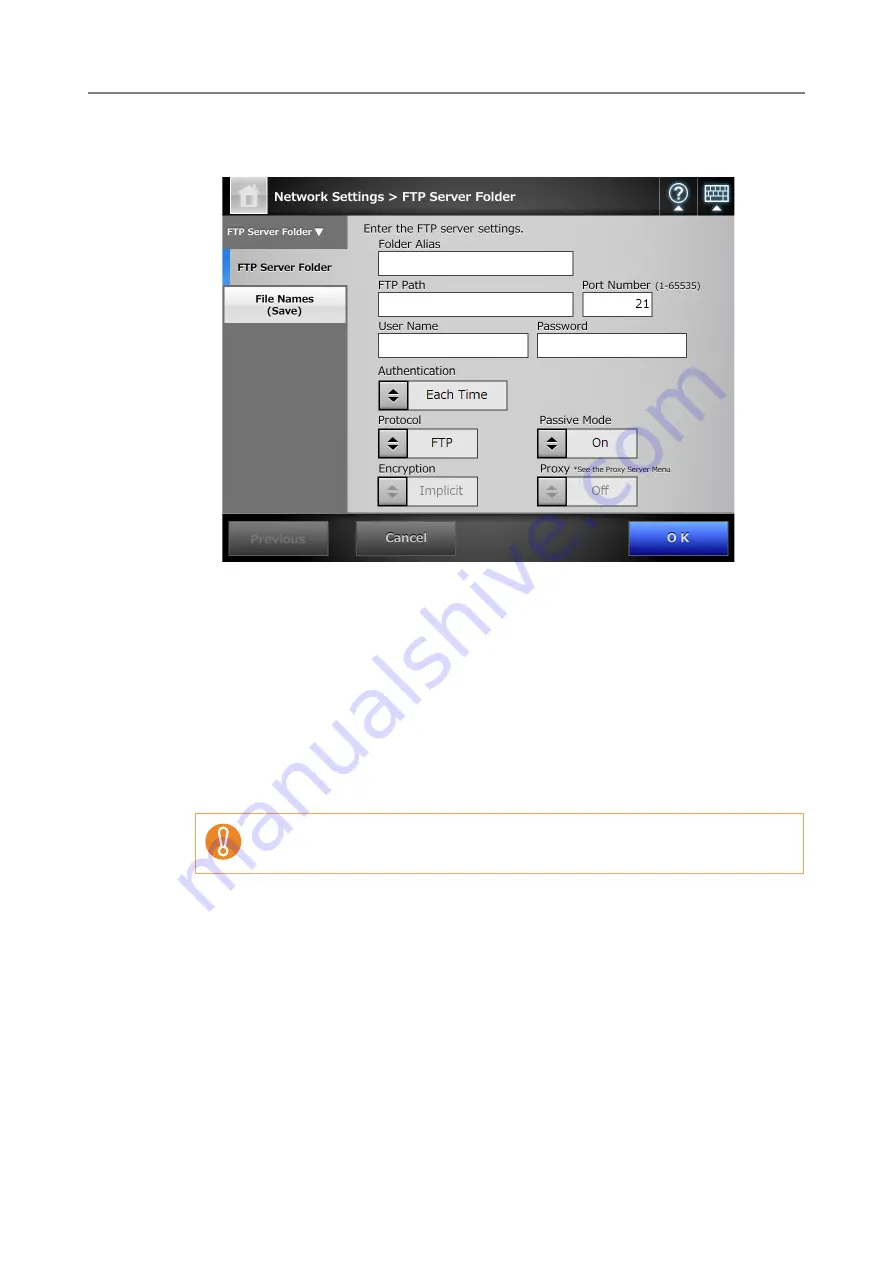
The window for setting an FTP server folder appears.
3. Enter a [Folder Alias] for the FTP server folder.
4. Enter an [FTP Path] for the FTP server folder.
5. Set a [Port Number] for the FTP server.
6. In the [User Name] and [Password] input fields, enter the authentication
information for logging in to the FTP server.
7. For [Authentication], specify whether or not to save the entered [User
Name] and [Password].
8. For [Protocol], specify how to access the FTP server.
9. For [Passive Mode], specify whether or not to access in passive mode.
10. For [Encryption], specify the type of encryption.
11. For [Proxy], specify whether or not a proxy server is to be used.
The [Proxy] setting is only available when a proxy server has been set on the [Proxy
Server] window. For details about proxy server settings, refer to
For the Central Admin Console, to use a Central Admin Server with an
enabled firewall, set the [Passive Mode] to [On].
Содержание ScanSnap N1800
Страница 1: ...ScanSnap N1800 Network Scanner Operator s Guide P3PC 3182 01ENZ0 ...
Страница 17: ...17 ...
Страница 29: ...29 ...
Страница 55: ...55 ...
Страница 65: ...65 ...
Страница 73: ...73 ...
Страница 271: ...271 7 Press the Back button D The Central Admin Console main window appears again ...
Страница 355: ...355 D The Main Menu window is shown again ...
Страница 379: ...379 4 Enter a password and confirm password 5 Press the OK button D The PDF will be created with password protection ...
Страница 415: ...415 ...
Страница 441: ...441 ...
Страница 481: ...481 ...
Страница 488: ...488 Appendix C Root Certification Authority This appendix provides an explanation of root certification authority ...
Страница 492: ...492 Appendix D Scanner Specifications This appendix gives specifications for the scanner ...
Страница 527: ...527 ...
Страница 528: ...528 Appendix G Glossary ...
Страница 533: ...533 ...
Страница 535: ...535 ...


