


4
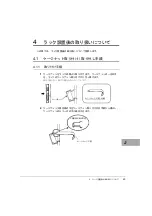
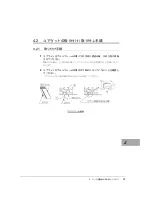
ラック設置後の取り扱いについて
41
J
7
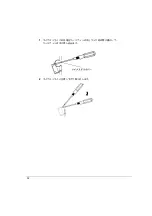
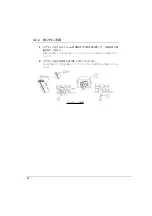
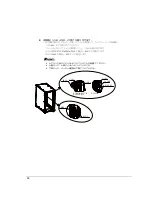
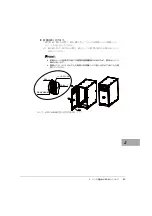
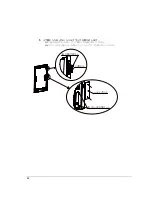
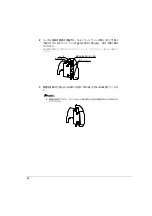
前扉にハンドルを取り付けます。
・ ハンドル本体の向きを
180
°回転させて
13mm
長
タッピンネジと
25mm
長
タッ
ピンネジでハンドルを取り付けてください。
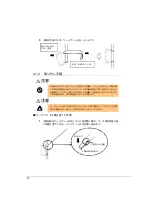
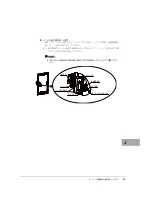
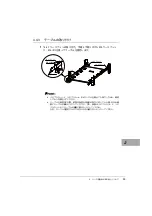
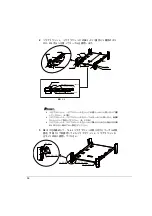
回転規制部材はギヤ部が上になるように取り付けます。向きを間違わないように
してください。
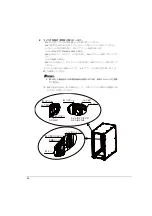
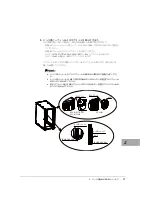
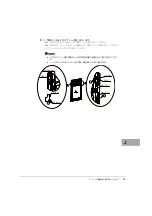
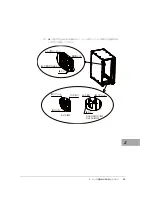
手順
6
で取り外した箇所と同じ長さのタッピンネジを使用してください。違う長
さのネジで締め付けた場合、部品を壊すことがあります。
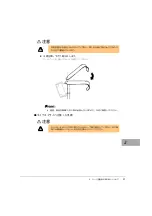
注) タッピンネジはトルクドライバーを使用し、
1.0N
・
m
の締め付けトルクで締め
付けてください。トルクドライバーが無い場合、きつく締めないよう注意して
ください。締めすぎた場合、ハンドル部分が壊れることがあります。
PP㛗ࢱࢵࣆࣥࢿࢪ
PP㛗ࢱࢵࣆࣥࢿࢪ
PP㛗ࢱࢵࣆࣥࢿࢪ
⢝ࣃࢿࣝ
ࣁࣥࢻࣝᮏయ
ᖹ࣡ࢵࢩ࣮ࣕ
ᅇ㌿つไ㒊ᮦ
Содержание 19R-261A2
Страница 20: ...20 3 3 後扉の開き方 1 扉用キーを回し解除します ラックハンドルを手前に引き上げ 矢印の方向にハンドルを回転し 手前に引きま す ...
Страница 32: ...32 1 マイナスドライバの先端をケージナットの爪とラック柱の間に挿入して ケージナットの爪に押し込みます 2 マイナスドライバを押し下げて取り外します ...
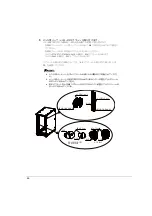
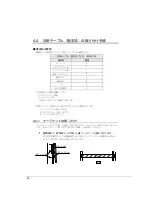
Страница 72: ...72 5 0 5 0 ࡢሙྜ ࢣ ࣈࣝ ࣝࢲ 0 ࢥ ࣛࢵࢺ 0 ࢧࣛࢿࢪ 5 0 5 0 ࡢሙྜ ࢣ ࣈࣝ ࣝࢲ 0 ࢥ ࣛࢵࢺ 0 ࢧࣛࢿࢪ ...
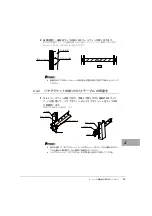
Страница 73: ...4 ラック設置後の取り扱いについて 73 J 5 0 5 0 ࡢሙྜ ࢣ ࣈࣝ ࣝࢲ 0 ࢥ ࣛࢵࢺ 0 ࢧࣛࢿࢪ 5 0 5 0 ࡢሙྜ ࢣ ࣈࣝ ࣝࢲ 0 ࢥ ࣛࢵࢺ 0 ࢧࣛࢿࢪ ...
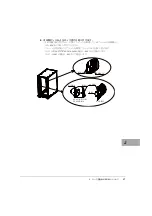
Страница 84: ...84 3 背面より M5 サラネジで取り付けプレートとラック およびスタビライ ザー本体を固定します 4 前面の M5 サラネジを本締めします 0 ࢧࣛࢿࢪ ྲྀ ࡅࣉࣞ ࢺ 㠃ഃ ...
Страница 88: ...88 ...
Страница 92: ...92 ...
Страница 95: ...4 ラック設置後の取り扱いについて 95 J 1 コンセントボックス 0U を実装したい箇所にコアラットを取り付けま す コアラットの取り付けは 4 2 コアラットの取り付け 取り外し手順 を参照して ください ...
Страница 100: ......
Страница 186: ......
Страница 188: ......


