


140
7
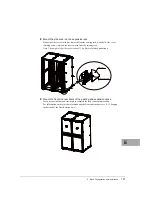
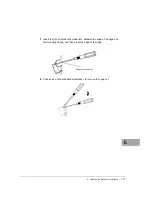
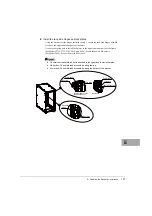
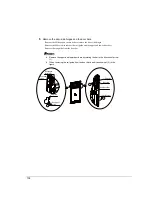
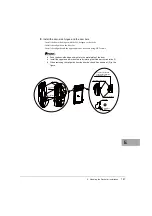
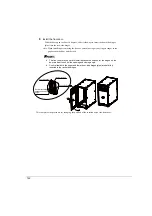
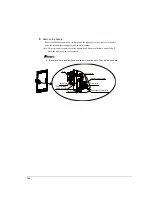
Install the handle on the front door.
・
Rotate the handle by 180 degrees to change the orientation, and secure the handle with the
tapping screws that are 13 mm and 25 mm long.
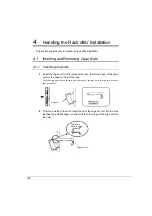
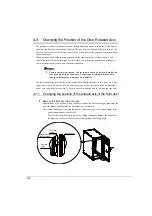
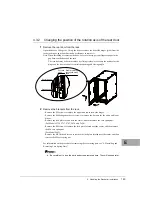
Install the rotation control member with the gear facing up. Be careful not to install
it in the wrong orientation.
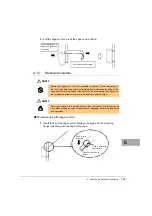
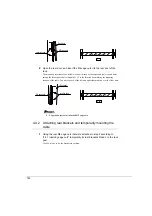
For each tapping screw location, use a tapping screw of the same length as that
removed in step 6. Using a tapping screw of a different length may damage the
part.
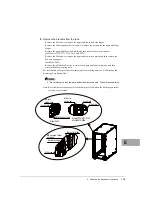
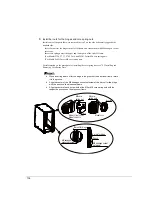
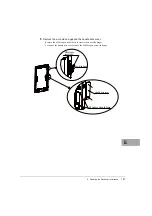
Note: Use a torque driver to tighten the tapping screws to a tightening torque of 1.0 N•m. If
no torque driver is available, be careful not to overtighten them. Otherwise, you may
damage the handle.
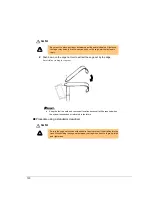
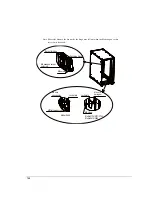
13-mm-long tapping
screws
13-mm-long tapping screws
Decorative
panel
Handle body
25-mm-long tapping screws
Flat washer
Rotation control member
Содержание 19R-261A2
Страница 20: ...20 3 3 後扉の開き方 1 扉用キーを回し解除します ラックハンドルを手前に引き上げ 矢印の方向にハンドルを回転し 手前に引きま す ...
Страница 32: ...32 1 マイナスドライバの先端をケージナットの爪とラック柱の間に挿入して ケージナットの爪に押し込みます 2 マイナスドライバを押し下げて取り外します ...
Страница 72: ...72 5 0 5 0 ࡢሙྜ ࢣ ࣈࣝ ࣝࢲ 0 ࢥ ࣛࢵࢺ 0 ࢧࣛࢿࢪ 5 0 5 0 ࡢሙྜ ࢣ ࣈࣝ ࣝࢲ 0 ࢥ ࣛࢵࢺ 0 ࢧࣛࢿࢪ ...
Страница 73: ...4 ラック設置後の取り扱いについて 73 J 5 0 5 0 ࡢሙྜ ࢣ ࣈࣝ ࣝࢲ 0 ࢥ ࣛࢵࢺ 0 ࢧࣛࢿࢪ 5 0 5 0 ࡢሙྜ ࢣ ࣈࣝ ࣝࢲ 0 ࢥ ࣛࢵࢺ 0 ࢧࣛࢿࢪ ...
Страница 84: ...84 3 背面より M5 サラネジで取り付けプレートとラック およびスタビライ ザー本体を固定します 4 前面の M5 サラネジを本締めします 0 ࢧࣛࢿࢪ ྲྀ ࡅࣉࣞ ࢺ 㠃ഃ ...
Страница 88: ...88 ...
Страница 92: ...92 ...
Страница 95: ...4 ラック設置後の取り扱いについて 95 J 1 コンセントボックス 0U を実装したい箇所にコアラットを取り付けま す コアラットの取り付けは 4 2 コアラットの取り付け 取り外し手順 を参照して ください ...
Страница 100: ......
Страница 186: ......
Страница 188: ......