


4
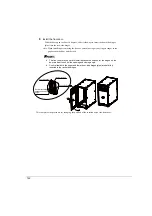
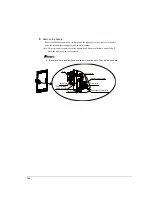
Handling the Rack after Installation
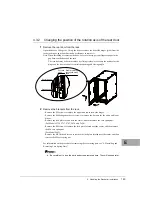
145
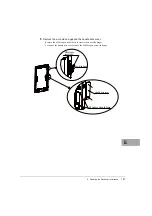
E
3
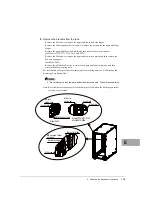
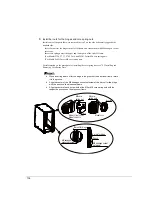
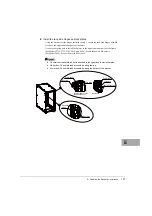
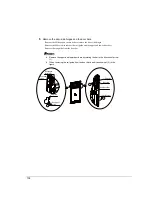
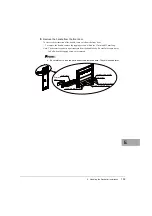
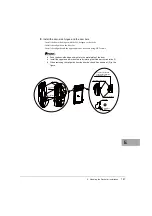
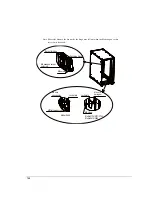
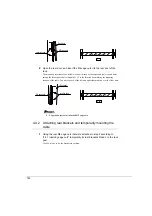
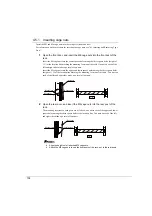
Install bar nuts for the hinges and core spring nuts.
Install some of the parts that were removed in step 2, on the side horizontally opposite the
standard side.
・
Insert bar nuts for the hinges in the right H frame, and secure them with M6 hexagon
socket set screws.
・
Insert a core spring nut near the center of the left H frame.
(For Models 2724, 2737, 2742, 2616, and 2624): Insert M6 core spring nuts.
(For Model 2642): Insert M5 core spring nuts.
For information on the procedure for installing the core spring nuts, see "4.2 Installing and
Removing Core Spring Nuts".
When inserting a bar nut for the hinge in the groove of the aluminum frame, rotate
it in the groove.
Align the center of the M6 hexagon socket set screw of the bar nut for the hinge
with the punch on the aluminum frame.
Align the center of each screw hole of the M5 or M6 core spring nuts with the
respective punches on the aluminum frame.
M6 core spring nut
M6 hexagon socket
set screw
M6 hexagon socket
set screw
Bar nut for hinge
Model 2724/2737/2742
Model 2616/2624
Model 2642
ࠬࠤ࡞
ࠬࠤ࡞
Punch
ᢿ㕙$$
ࠬࠤ࡞
Bar nut for hinge
Punch
Punch
Punches
Punches
M5 core spring
nuts
Содержание 19R-261A2
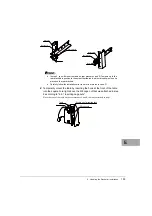
Страница 20: ...20 3 3 後扉の開き方 1 扉用キーを回し解除します ラックハンドルを手前に引き上げ 矢印の方向にハンドルを回転し 手前に引きま す ...
Страница 32: ...32 1 マイナスドライバの先端をケージナットの爪とラック柱の間に挿入して ケージナットの爪に押し込みます 2 マイナスドライバを押し下げて取り外します ...
Страница 72: ...72 5 0 5 0 ࡢሙྜ ࢣ ࣈࣝ ࣝࢲ 0 ࢥ ࣛࢵࢺ 0 ࢧࣛࢿࢪ 5 0 5 0 ࡢሙྜ ࢣ ࣈࣝ ࣝࢲ 0 ࢥ ࣛࢵࢺ 0 ࢧࣛࢿࢪ ...
Страница 73: ...4 ラック設置後の取り扱いについて 73 J 5 0 5 0 ࡢሙྜ ࢣ ࣈࣝ ࣝࢲ 0 ࢥ ࣛࢵࢺ 0 ࢧࣛࢿࢪ 5 0 5 0 ࡢሙྜ ࢣ ࣈࣝ ࣝࢲ 0 ࢥ ࣛࢵࢺ 0 ࢧࣛࢿࢪ ...
Страница 84: ...84 3 背面より M5 サラネジで取り付けプレートとラック およびスタビライ ザー本体を固定します 4 前面の M5 サラネジを本締めします 0 ࢧࣛࢿࢪ ྲྀ ࡅࣉࣞ ࢺ 㠃ഃ ...
Страница 88: ...88 ...
Страница 92: ...92 ...
Страница 95: ...4 ラック設置後の取り扱いについて 95 J 1 コンセントボックス 0U を実装したい箇所にコアラットを取り付けま す コアラットの取り付けは 4 2 コアラットの取り付け 取り外し手順 を参照して ください ...
Страница 100: ......
Страница 186: ......
Страница 188: ......