


3
Rack Configuration and Installation
121
E
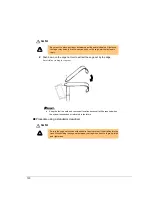
Warning
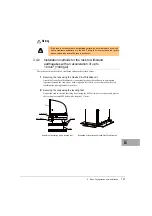
3.4.2
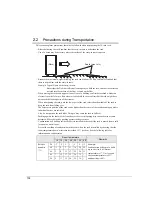
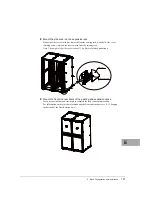
Installation methods for the rack to withstand
earthquakes with an acceleration of up to
10 m/s
2
(1000 gal)
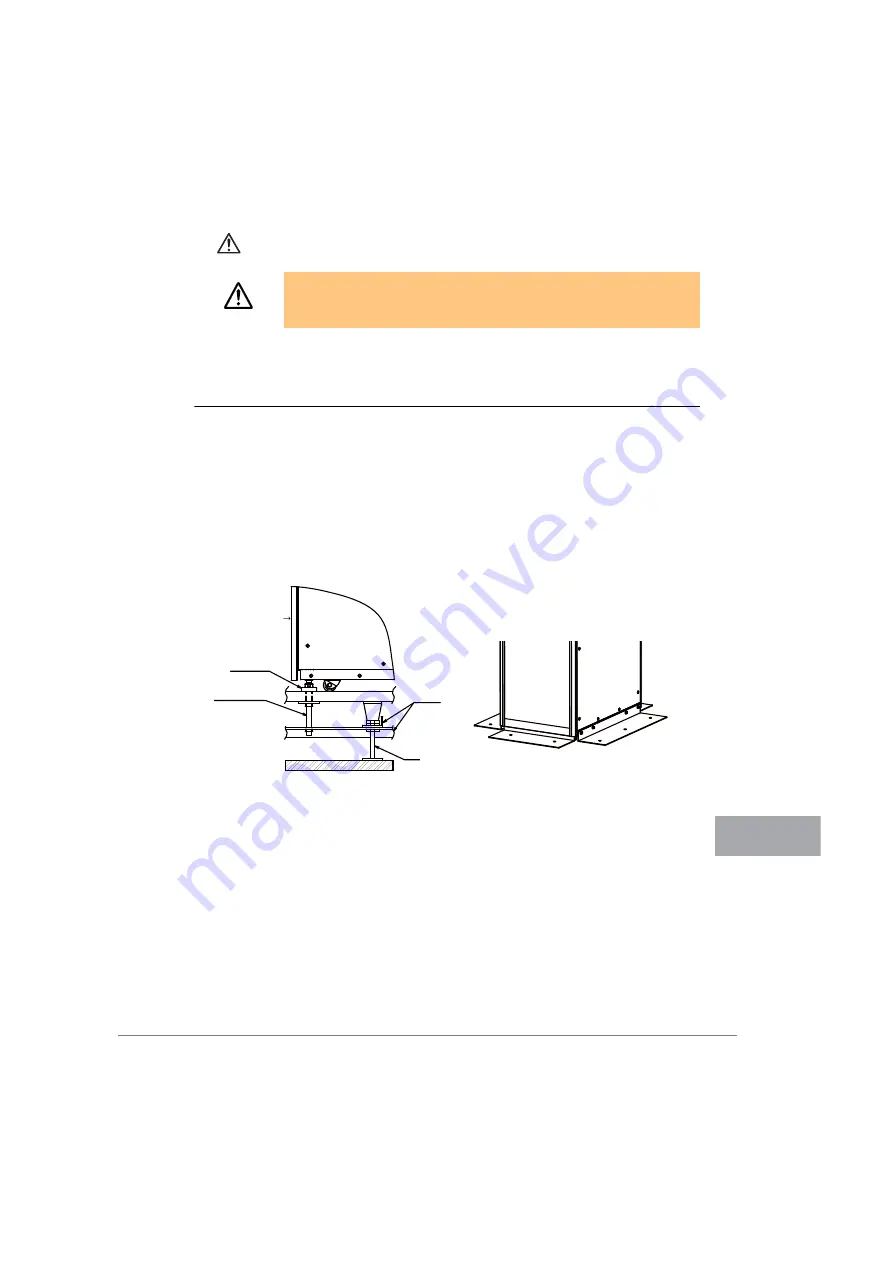
The rack must be anchored to a stabilizing surface as described below.
1
Securing the rack using the Quake Proof Stabilizer kit
Attach the Quake Proof Stabilizer kit (an optional product that will need to be prepared
separately) around the rack (front, back, right, and left). Then, secure the rack to the slab
(building floor) using the holes in the kit.
2
Securing the rack using the leveling feet
Anchor the rack to the slab (building floor) using the M20 screw holes in the ground plate of
the leveling feet and M20 bolts with a length of 17 mm.
’
・
If the rack is not anchored to a stabilizing surface, be sure to prepare one of the
above stabilizers and attach it to the rack. Failure to do so may cause the rack to
tip over when a device in the rack is pulled out.
Front
Bolt (M20)
Post
Frame
Leveling foot
(Free access floor)
Example of anchoring with a leveling foot
Illustration of the attached Quake Proof Stabilizer kit
Содержание 19R-261A2
Страница 20: ...20 3 3 後扉の開き方 1 扉用キーを回し解除します ラックハンドルを手前に引き上げ 矢印の方向にハンドルを回転し 手前に引きま す ...
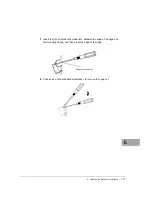
Страница 32: ...32 1 マイナスドライバの先端をケージナットの爪とラック柱の間に挿入して ケージナットの爪に押し込みます 2 マイナスドライバを押し下げて取り外します ...
Страница 72: ...72 5 0 5 0 ࡢሙྜ ࢣ ࣈࣝ ࣝࢲ 0 ࢥ ࣛࢵࢺ 0 ࢧࣛࢿࢪ 5 0 5 0 ࡢሙྜ ࢣ ࣈࣝ ࣝࢲ 0 ࢥ ࣛࢵࢺ 0 ࢧࣛࢿࢪ ...
Страница 73: ...4 ラック設置後の取り扱いについて 73 J 5 0 5 0 ࡢሙྜ ࢣ ࣈࣝ ࣝࢲ 0 ࢥ ࣛࢵࢺ 0 ࢧࣛࢿࢪ 5 0 5 0 ࡢሙྜ ࢣ ࣈࣝ ࣝࢲ 0 ࢥ ࣛࢵࢺ 0 ࢧࣛࢿࢪ ...
Страница 84: ...84 3 背面より M5 サラネジで取り付けプレートとラック およびスタビライ ザー本体を固定します 4 前面の M5 サラネジを本締めします 0 ࢧࣛࢿࢪ ྲྀ ࡅࣉࣞ ࢺ 㠃ഃ ...
Страница 88: ...88 ...
Страница 92: ...92 ...
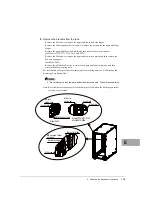
Страница 95: ...4 ラック設置後の取り扱いについて 95 J 1 コンセントボックス 0U を実装したい箇所にコアラットを取り付けま す コアラットの取り付けは 4 2 コアラットの取り付け 取り外し手順 を参照して ください ...
Страница 100: ......
Страница 186: ......
Страница 188: ......