


108
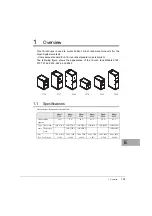
2.2
Precautions during Transportation
This section explains precautions that must be followed when transporting the 19-inch rack.
・
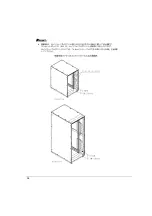
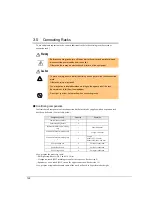
Before delivering the rack, confirm that the carry-in route is wider than the rack.
・
Use of a board may be necessary where the surface of the carry-in route is uneven.
・
Because the maximum weight including the rack can be about 1000 kg, confirm beforehand that
there is no problem with the carry-in route.
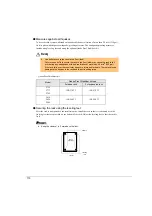
Example: Type of floors on the carry-in route
Ensure that the floor has sufficient load capacity to hold the rack, and that the casters do
not sink into the surface of the floor or catch on the floor.
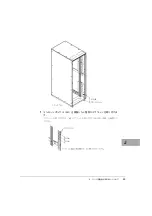
・
When moving the rack to an upper or lower floor of a building, confirm beforehand whether an
elevator is available for use. If an elevator is available for use, confirm that the rack weight does
not exceed the load capacity of the elevator.
・
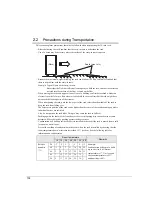
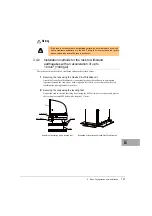
When transporting the rack, push the lower part of the rack rather than the middle of the rack to
keep the rack from falling over.
The barycentric position of the rack can be higher than the center of the rack depending on where
individual devices are installed.
Also, do not push on the rack sides. Doing so may cause the rack to fall over.
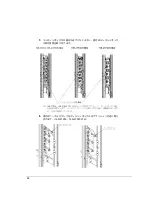
・
Pushing against the center of the front door or the air vent opening may cause them to become
deformed. Move the rack by pushing against the door corners.
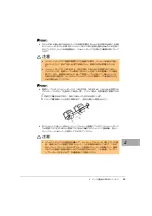
・
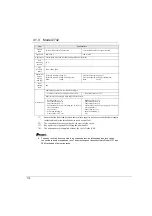
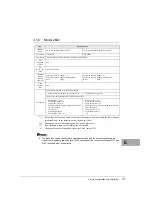
Condensation will build up inside the devices installed in the rack if the rack is moved from a cold
location to a warm room.
Prevent the buildup of condensation in the room where the rack is installed by ensuring that the
room temperature does not increase faster than 15
℃
per hour. See the following table for
information on condensation.
Room temperature
Remarks
10
15
20
25
30
35
40
Relative
humidity
(%)
20
-7
-5
-3
1
5
9
13
Example:
Condensation will begin to build
up in a device if its internal
temperature is 17
℃
or less and
the room temperature is 25
℃
and humidity is 60%.
40
-3
2
7
11
16
20
24
60
3
8
13
17
22
26
31
80
7
12
17
22
26
31
-
90
9
13
19
24
29
34
-
(Rack)
Board (steel, etc.)
Содержание 19R-261A2
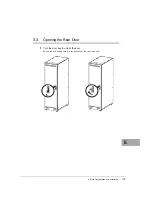
Страница 20: ...20 3 3 後扉の開き方 1 扉用キーを回し解除します ラックハンドルを手前に引き上げ 矢印の方向にハンドルを回転し 手前に引きま す ...
Страница 32: ...32 1 マイナスドライバの先端をケージナットの爪とラック柱の間に挿入して ケージナットの爪に押し込みます 2 マイナスドライバを押し下げて取り外します ...
Страница 72: ...72 5 0 5 0 ࡢሙྜ ࢣ ࣈࣝ ࣝࢲ 0 ࢥ ࣛࢵࢺ 0 ࢧࣛࢿࢪ 5 0 5 0 ࡢሙྜ ࢣ ࣈࣝ ࣝࢲ 0 ࢥ ࣛࢵࢺ 0 ࢧࣛࢿࢪ ...
Страница 73: ...4 ラック設置後の取り扱いについて 73 J 5 0 5 0 ࡢሙྜ ࢣ ࣈࣝ ࣝࢲ 0 ࢥ ࣛࢵࢺ 0 ࢧࣛࢿࢪ 5 0 5 0 ࡢሙྜ ࢣ ࣈࣝ ࣝࢲ 0 ࢥ ࣛࢵࢺ 0 ࢧࣛࢿࢪ ...
Страница 84: ...84 3 背面より M5 サラネジで取り付けプレートとラック およびスタビライ ザー本体を固定します 4 前面の M5 サラネジを本締めします 0 ࢧࣛࢿࢪ ྲྀ ࡅࣉࣞ ࢺ 㠃ഃ ...
Страница 88: ...88 ...
Страница 92: ...92 ...
Страница 95: ...4 ラック設置後の取り扱いについて 95 J 1 コンセントボックス 0U を実装したい箇所にコアラットを取り付けま す コアラットの取り付けは 4 2 コアラットの取り付け 取り外し手順 を参照して ください ...
Страница 100: ......
Страница 186: ......
Страница 188: ......