100
6.1 CAMERA CONNECTION
DISCHARGE
DISCHARGE
OK
OK
RESET
RESET
OK
OK
USB MODE
USB MODE
1394 MODE
1394 MODE
SET−UP
SET−UP
3/3
3/3
1
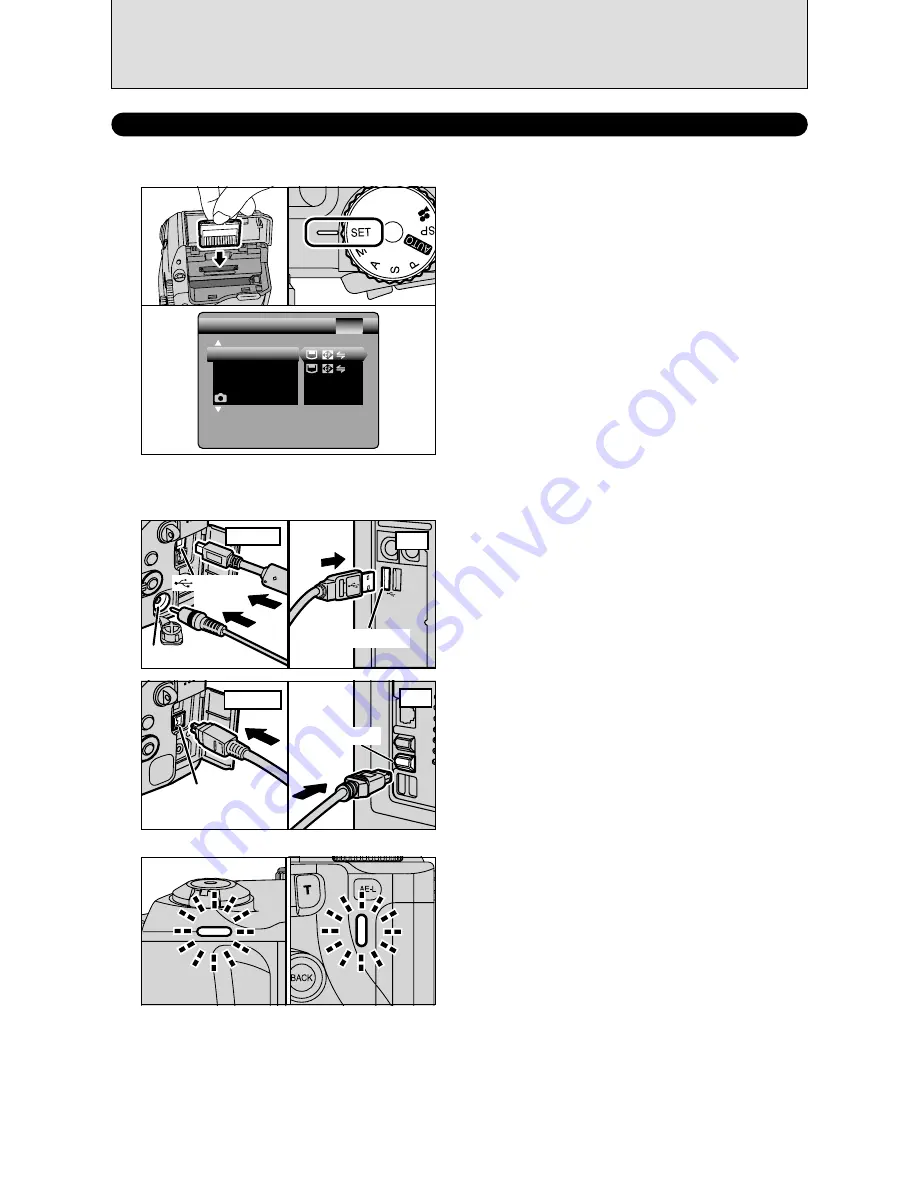
Insert the media with images into the camera.
2
Set the Mode dial to “
W
” and then set the
Power switch to “
q
”.
3
Select “
ºª
” in “USB MODE” or “1394 MODE”
in the SET-UP menu (
➡
P.83) and then turn the
camera off.
●
!
Use the AC Power Adapter AC-5VH/AC-5VHS (sold
separately) for the connection (
➡
P.98). If shutting off power
supply during communication, the files on the media may be
damaged.
●
!
If inserting a
xD-Picture Card
and a Microdrive into the
camera at the same time, images will be recorded onto the
media selected as the “MEDIA” (
➡
P.83).
1
Turn your PC on.
2
Connect the camera to the PC using the USB
cable (mini-B) or IEEE 1394 cable.
3
Set the camera Power switch to “
w
”.
●
!
Always use the cable provided with your camera. If you use
other cable, your camera may not work correctly.
●
!
Make sure that the USB cable (mini-B) or IEEE 1394 cable is
connected correctly and is pushed in.
●
!
Do not connect the USB cable (mini-B) and the IEEE 1394
cable at the same time.
●
!
Connect your camera and a PC with the IEEE 1394 cable
only when the Power switch is set to “
w
”.
If the Power switch is set to “
q
”, the lens of the camera will
be extended.
DC IN 5V socket
Camera
USB socket
(mini-B)
(USB) socket
PC
IEEE1394 socket
Camera
PC
IEEE
1394 socket
h
When the camera and computer are exchanging
data, the self-timer lamp blinks and the indicator
lamp blinks alternately green and orange.
h
“
≥
” appears on the screen.
h
Power save and Auto power off are disabled
during USB connection.
●
!
Before replacing the media, always disconnect the camera
from the PC using the procedure on P.102.
●
!
Do not disconnect the USB cable (mini-B) or IEEE 1394 cable
while communication is in progress. If shutting off power supply
during communication, the files on the media may be damaged.
0
1
0
3
0
2
USE AT DSC MODE
1
Set a camera
2
Connect a camera to a computer


