52
53
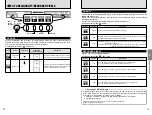
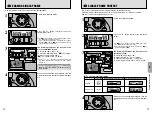
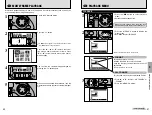
EXPOSURE MODES M
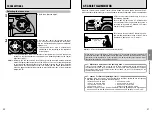
TAKING PICTURES WITH AE LOCK
Advanced
Photography
3
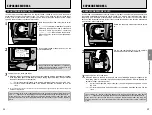
AE lock allows you to set the exposure for a specific subject in your shot. This technique is
useful when brightness of your subject differs greatly from its surroundings.
1
Centre-Weighted Metering
Spot Metering
Rotate the metering system selector to select
Centre-Weighted or Spot Metering.
h
Matrix Metering is not recommended since the
effect of the Auto Exposure Lock cannot be
effectively attained.
2
Position the focus area over the subject you
want correctly exposed, press and hold the
shutter button down halfway and then press the
“AE-L/AF-L” button. The “EL” (exposure lock)
indicator appears in the viewfinder.
h
The exposure and focus are locked as long as
the “AE-L/AF-L” button is held down (default
setting).
h
If you press the “AE-L/AF-L” button in the AF-
S or AF-C focus mode when the shot is not in
focus, the exposure is locked with the shot out
of focus. Always check that the “
●
” focus
indicator is lit.
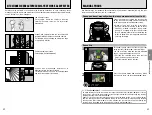
3
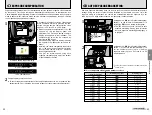
While keeping the “AE-L/AF-L” button pressed,
recompose, focus and shoot.
h
Because the settings are maintained after you
take the shot for as long as the “AE-L/AF-L”
button is held down, you can keep the same
settings as you recompose the shot.
h
The following functions can be operated while
the “AE-L/AF-L” button is kept pressed:
1. In “
P
” exposure mode: Sets program shift.
2. In “
S
” exposure mode: Changes the shutter
speed.
3. In “
A
” exposure mode: Changes the aperture.
h
Rotating the metering system selector to
another setting does not change the metering
system during Auto Exposure Lock operation.
Release the AE lock.
CSM
5: Auto Exposure Lock can be set to be activated by lightly pressing the shutter
release button (
➡
P.97).
CSM
9: The operation performed when the “AE-L/AF-L” button is pressed can be modified
(
➡
P.97).
Operation: AF/AE lock (default setting), AE lock only, AF lock only, AE lock maintained, AF
operation
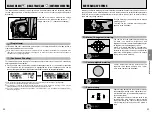
Bulb Photography (“
™
”)
Bulb photography is useful when you want to take pictures with any shutter speed. You should
use a tripod to keep the camera steady because the shutter stays open for as long as the
shutter button is held down.
1
CSM
6: To use the “
™
” shutter speed (for
long exposures), the custom settings
must be modified (
➡
P.97).
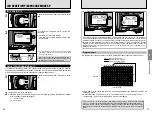
1
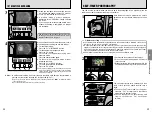
Set the exposure mode dial to “
CSM
”.
2
Use the main command dial to select “6. LONG
EXP. (BULB) AT MANUAL MODE”.
3
Use the sub-command dial to select “1:
ACTIVATED”.
2
Set the exposure mode dial to “
M
”.
h
Bulb photography can only be used in Manual
exposure mode.
h
A tripod should be used for bulb photography.
3
1
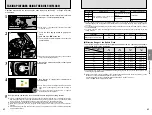
Use the main command dial to set the shutter
speed to “
™
” and then
2
use the sub-
command dial to set the aperture setting
(narrowest aperture to widest aperture).
4
Compose picture, focus and shoot.
h
The shutter will be open as long as the shutter release button is kept fully depressed.
h
Using the cable release (sold separately) attached to the release terminal instead of
pressing the shutter button with your finger also reduces camera shake.
0
2
0
1
Images shot with long exposures (1 second or longer) may appear coarse and may also be
affected by noise such as white dots.
0
1
0
2
0
3
CUSTOM SETTING
CUSTOM SETTING
6.LONG EXP.(BULB) AT MANUA
6.LONG EXP.(BULB) AT MANUAL MODE
L MODE
0 DISABLED
DISABLED
1 ACTIVATED
ACTIVATED
MAIN
MAIN
MENU
MENU
SETTING
SETTING
SUB
SUB
Содержание FinePix S2 Pro
Страница 64: ......


