89
Settings
5
88
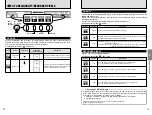
FRAME No.
RENEW/CONT.
See P.94 for details.
RENEW
PC MODE
1394 DOWNLOADING/
USB DOWNLOADING/
1394 SHOOTING
See P.100-103 for details.
1394
DOWN
LOADING
BEEP
≤
LOW/HIGH/OFF
Use this setting to set the volume of the beep emitted when
the camera controls are used.
LOW
LANGUAGE
ENGLISH/
FRANCAIS/
DEUTSCH/
JAPANESE
Use this setting to specify the language used for LCD monitor
display.
ENGLISH
DATE/TIME
[
SET
See P.24 for details.
—
RESET ALL
[
OK
Use this setting to reset all the settings in the SET-UP menu
other than DATE/TIME and CUSTOM WB.
—
■
SET–UP Menu Options
Setting
Display
Details
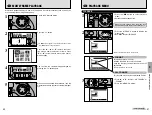
IMAGE DISPLAY
OFF/POSTVIEW/
PREVIEW/
x
PREVIEW
Use this setting to specify whether previews of photographed
images are displayed for checking. See P.90 for details.
Default
OFF
CUSTOM WB
[
SET
Use this setting to specify an the correct white balance setting
for a light source. See P.91 for details.
—
HIGH MODE
TIFF-RGB/
CCD-RAW
When “HIGH” is specified as the Quality setting, use this
setting to specify the file format used.
TIFF-RGB
MEDIA
SMARTMEDIA/
CF Type II
Use this setting to specify the media used when a
SmartMedia and a Microdrive are loaded in the camera.
SMART
MEDIA
TEST-SHOOTING
(NO CARD)
ON/OFF
Set this option to ON to allow the shutter to be released when
there is no media in the camera.
ON
VOICE MEMO
OFF/ON
See P.93 for details.
OFF
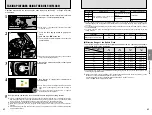
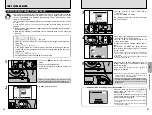
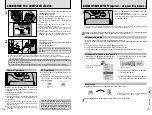
Setup operations
1
SET−UP
SET−UP
CUSTOM WB
CUSTOM WB
HIGH MODE
HIGH MODE
MEDIA
MEDIA
TESTーSHOOTING(N0 CARD)
TESTーSHOOTING(N0 CARD)
IMAGE DISPLAY
IMAGE DISPLAY
TIFF−
TIFF−RGB
RGB
SMARTMEDIA
SMARTMEDIA
OFF
OFF
ON
ON
VOICE MEMO
VOICE MEMO
OFF
OFF
SET
SET
OK
OK
BACK
BACK
0
2
0
1
1
Switch the camera on and select Photography
mode.
2
Press the “MENU/OK” button to display the
SET–UP screen.
●
!
Always switch the camera off when you replace the
batteries. If you open the battery cover or disconnect the
AC power adapter without switching the camera off, the
camera settings may revert to the factory default settings
set at shipment.
2
1
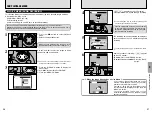
Unlock the 4-direction button.
2
Press “
a
” or “
b
” to select an option and “
d
”
or “
c
” to change the setting.
3
When you have completed the settings, press
the “MENU/OK” button.
●
!
Press “
c
” for the “CUSTOM WB”, “DATE/TIME” and
“RESET ALL” settings.
0
1
0
2
0
3
5
Settings
SET–UP
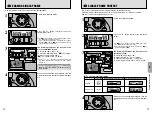
LCD BRIGHTNESS
1
0
1
0
2
1
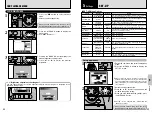
Press the “
d
” button to select Playback
mode.
2
Unlock the 4-direction button.
2
1
Press the “MENU/OK” button to display the
menu screen.
2
Use “
g
” to select “
G
”.
0
2
0
1
3
1
Pressing the “MENU/OK” button displays the
monitor brightness setting screen.
2
Press “
d
” or “
c
” to adjust the monitor
brightness.
◆
Brightness adjustment checking bar
◆
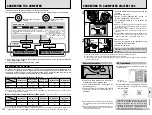
You can specify whether or not the brightness adjustment checking bar is displayed in the
brightness setting screen.
BRIGHTNESS
BRIGHTNESS
OK
OK
BACK
BACK
BRIGHTNESS
BRIGHTNESS
OK
OK
BACK
BACK
0
2
0
1
b
PLAYBACK MENU
LCD BRIGHTNESS
LCD BRIGHTNESS
SET
SET
When you have finished using the menu, lock
the 4-direction button to prevent accidental use.
When you have finished using the menu, lock
the 4-direction button to prevent accidental use.
Содержание FinePix S2 Pro
Страница 64: ......


