64
5
65
●
!
To exit this procedure without changing the settings,
press the “BACK” button.
●
!
Use “LCD BRIGHTNESS” to adjust the brightness of the screen
you are currently using. You can set separate brightness
settings for the LCD monitor and the electronic viewfinder.
i
When you are using the LCD monitor
→
Adjust “LCD
BRIGHTNESS”.
i
When you are using the electronic viewfinder
→
Adjust
“EVF BRIGHTNESS”.
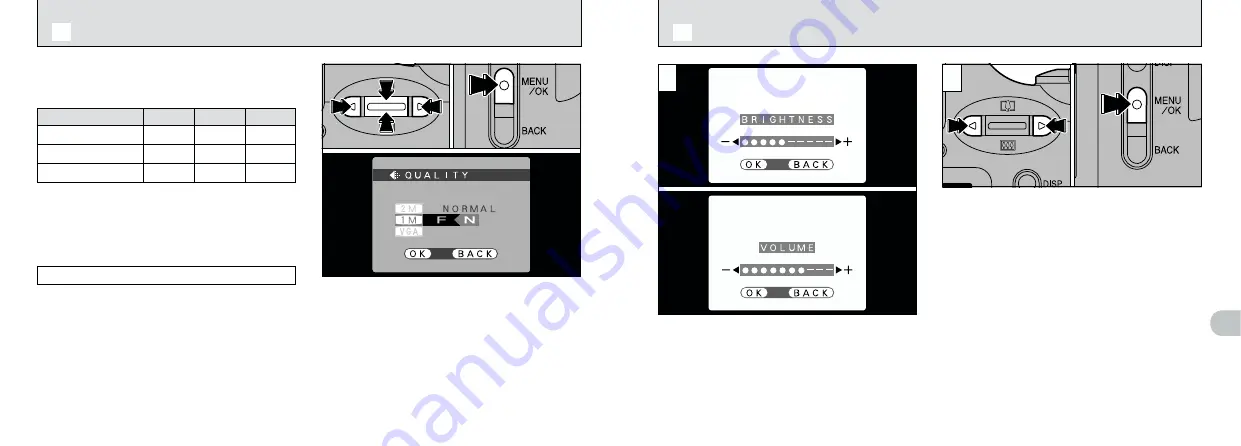
When you select the “BRIGHTNESS” or “VOLUME”
menu option, an adjustment bar appears on the LCD
monitor or viewfinder (EVF).
1
Use “
d
” and “
c
” to adjust the screen
brightness or speaker volume.
2
Press the “MENU/OK” button to confirm the
new setting.
d
LCD BRIGHTNESS/VOLUME
●
!
To exit this procedure without changing the settings,
press the “BACK” button.
1
Use “
a
(
[
)” or “
b
(
]
)” to change the file
size setting and “
d
” or “
c
” to change the
quality setting.
2
Press the “MENU/OK” button to confirm the
setting.
●
!
The number of available shots varies depending on
the combination of file size and quality settings you
select (
➡
P.25).
0
1
0
2
You can choose any combination of 3 file sizes
and 3 image quality settings. Use the table below
as a guide to the best settings for your shots.
Select “FINE” for better image quality and
“BASIC” to increase the number of available
shots.
In most cases, the “NORMAL” setting provides
more than adequate image quality.
Quality (compression ratio)
!
: For printing the whole image at A5 size or
printing a part of the image at A6 size
@
: For printing at A6 size
#
: For use via the Internet as an e-mail
attachment, etc.
BASIC
NORMAL
FINE
File size
8
(1600
×
1200)
9
(1280
×
960)
!
!
@
@
@
—
0
(640
×
480)
—
#
—
1
2
0
1
0
2
d j
SETTING THE FILE SIZE AND QUALITY (COMPRESSION RATIO)


