background image

ES08

15


Controller


v1.01.05


2022

02

03


FS

Curtis


Page


36


The alarm symbol (

) will appear at the bottom of the home page screen in the event of an active alarm 

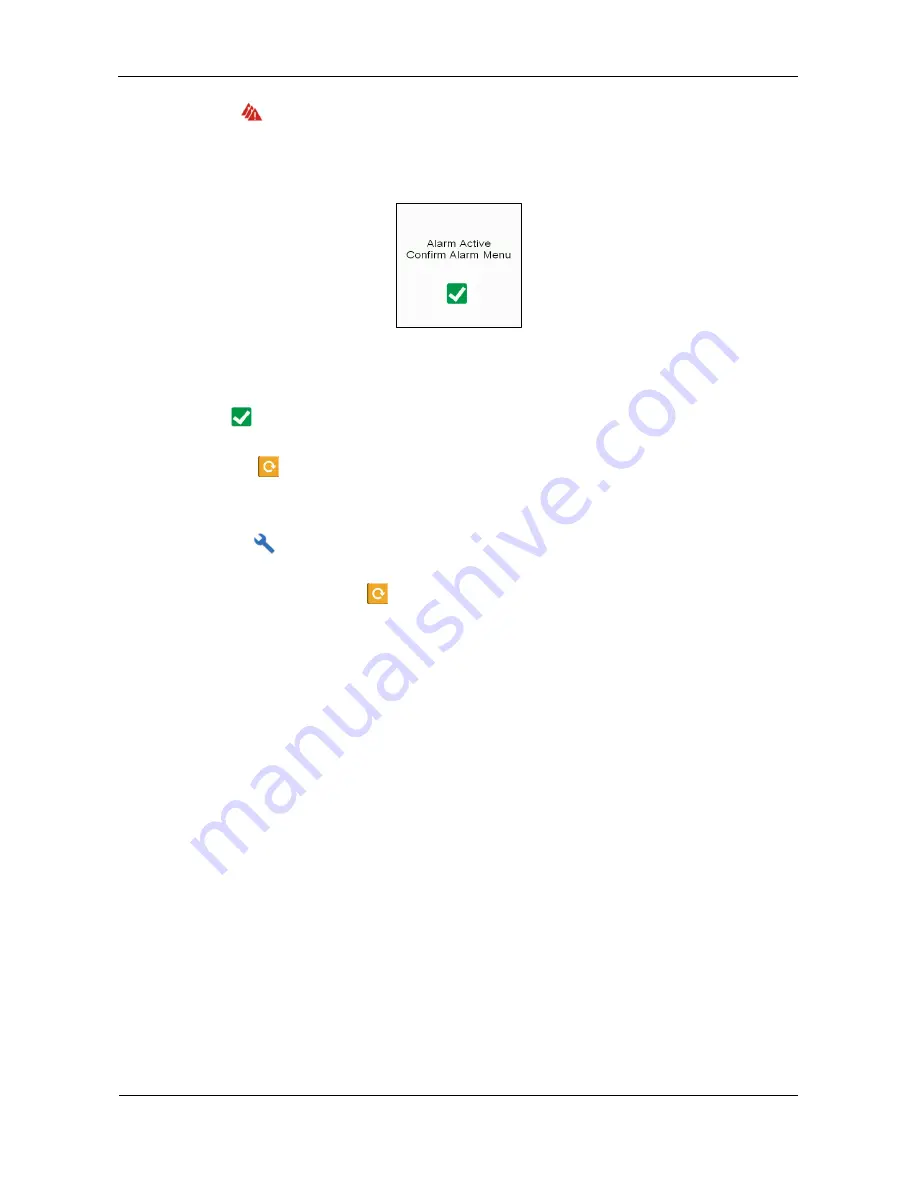
and it may be preceded by the appearance of a pop-up message box, an example of which is shown in 

Figure 2.19. 


Figure 2.19 – Pop-Up Alarm Message 


Press on the OK (

) button to acknowledge the message and then proceed to the alarm status screen to 

ascertain the details. The alarm condition should be investigated, rectified as appropriate and then cleared 

by pressing the reset (

) button for two seconds. If properly resolved, the alarm message will move from 

the current (active) list to the historical (cleared) list on the alarm status screen. 


The warning symbol (

) will appear at the bottom of the home page screen in the event of an active 

operating or maintenance warning. The warning condition should be investigated, rectified as appropriate 

and then cleared by pressing the reset (

) button for two seconds. If properly resolved, the warning 

message will move from the current (active) list to the historical (cleared) list on the alarm status screen. 


The following events will initiate an operating or maintenance alarm: 


a)  Air-end outlet temperature above warning value (see Table 2.3). 

b)  Maintenance task overdue (see Table 2.10). 


The following events will initiate a shutdown alarm of an individual motor and air-end module:   


a)  Air-end outlet temperature above shutdown value (see Table 2.3). 

b)  Air-end drive motor starts per hour above shutdown value (see Table 2.5). 

c) Air-end 

drive 

motor 

overload. 


Where possible, the automatic shutdown of one or more modules will not prevent any other operable 

modules from running. 


Содержание ECO Scroll Series

Страница 1: ...Revision 2022 02 03 Instruction Manual Controller v1 01 05 ECO Scroll Series Oil Free Compressors Models ES08 ES11 ES15 ...

Страница 2: ...creen 10 2 5 Pressure Menu Screen 11 2 6 System Operation Menu 14 2 7 Calibration Menu 18 2 8 Sequential Operation Menu 20 2 9 Maintenance Status Screen 24 2 10 Motor V Belt Air End Air Filter High Pressure Hose Check Valve and Safety Valve Maintenance Screens 25 2 11 Maintenance Log Screen 28 2 12 Time Settings Menu 28 2 13 Communication Settings Menu 29 2 14 Language Menu 30 2 15 Sequential Cont...

Страница 3: ...The controller should be provided with weather protection against precipitation and direct sunlight Keep the screen clean and dry If necessary use a proprietary LCD screen cleaning solution and a soft anti static scratch free cloth to remove any dust and fingerprints Do not use harsh solvents or abrasive cleaners 1 2 Password Security A three tiered system of passwords is used to safeguard the con...

Страница 4: ...tus Screen Motor Maintenance Screen V Belt Maintenance Screen Air End Maintenance Screen Tip Seal Maintenance Screen Bearing Grease Maintenance Screen Air Filter Maintenance Screen High Pressure Hose Maintenance Screen Check Valve Maintenance Screen Safety Valve Maintenance Screen Maintenance Log Screen Time Settings Menu Communication Settings Menu Language Menu Sequential Control Screen Equipmen...

Страница 5: ...rt the home screen is automatically displayed on the controller as shown in Figure 2 1 Figure 2 1 Home Screen Each of the home screen symbols is described in Table 2 1 Table 2 1 Home Screen Symbols Item Symbol or Field Name Description Password 1 Control Mode Indicates the control mode setting Local On Off Control Remote On Off Control None ...

Страница 6: ...Note To start an interconnected group of compressors it is necessary to access the sequential control menu screen on the master unit None 5 Stop Button Press and hold for two seconds to turn this compressor off i e stop this compressor Note To stop an interconnected group of compressors it is necessary to access the sequential control menu screen on the master unit None 6 System Menu Press to acce...

Страница 7: ...atic adjustment for daylight saving time None 13 Compressor Module Status Indicates each motor and air end module s operating status Stopped Off or Stand by Running None 14 USB In Use Indicates that the controller s USB port is being used to download software or upload historical operating data None 14 Sequential Control Active Indicates that the compressor is configured for operation in a sequent...

Страница 8: ...Sequential Control Screen Press to access the sequential control screen Note This symbol appears only on the controller of the master unit in a sequentially controlled group None 2 2 User Login Screen The user login screen is accessed by pressing the User Login button on the bottom right hand side of the home screen The user login screen is shown in Figure 2 2 Figure 2 2 User Login Screen Enter th...

Страница 9: ...r serves as a portal to the various sub menus for the compressor s operation and maintenance The system menu screen is shown in Figure 2 3 Figure 2 3 System Menu Screen Each of the system menu screen symbols is described in Table 2 2 Table 2 2 System Menu Screen Symbols Symbol Name Description Password Temperature Menu Press to access the temperature menu screen User or Service Pressure Menu Press...

Страница 10: ...o keep English as the selection User or Service Reset Button Press to change all controller parameters to their factory default settings Note The factory defaults may differ from the parameter setpoints specified herein Factory Bottom Right Hand Side of Screen Control Mode Switch Press to toggle between local automatic control via the controller screen or remote on off control via a hardwired swit...

Страница 11: ... the left hand side and displaying grey colour only as shown in Figure 2 3 the compressor can provide remote indication of when it is running With the slider button pushed to the right hand side and displaying green colour the compressor can provide remote indication of when it is either running or on active standby and ready to run This is the standard setting Note The remote status indicator cir...

Страница 12: ...a the system menu Logging in with the user password allows limited access to view or edit the parameters logging in with the service password is necessary to edit most of the set values The temperature menu screen is shown in Figure 2 4 Figure 2 4 Temperature Menu Screen Each of the temperature menu parameters is described in Table 2 3 Table 2 3 Temperature Menu Parameters Parameter Set Value Func...

Страница 13: ...emperature monitoring function has been enabled Note The compressor set does not have this functionality Service Factory Warning Ambient Temperature This parameter will not be displayed if the ambient temperature monitoring function is disabled Provision for a warning that will be activated if the ambient temperature reaches this set value and the ambient temperature monitoring function has been e...

Страница 14: ...rd To View Password To Edit Unit of Pressure bar Pressure unit of measure Note 1 bar 100 kPa Note Changing the unit of pressure to MPa psi or kg cm2 will reset all the pressure menu values User Service Start Pressure 6 00 bar The compressor set will start running at or below this discharge air pressure User User Stop Pressure 8 00 bar The compressor set will stop running at or above this discharge...

Страница 15: ...the power supply is energised User Service Pressure Band Function Enable with the slider button pushed to the right hand side and displaying green colour as shown in Figure 2 5 or Disable with the slider pushed to the left hand side and displaying grey colour only Disable is the standard setting Enables or disables different start and stop pressures to apply during compressor operation in each of ...

Страница 16: ...sk control recommendations a Do not operate the compressor with any of its maintenance access panels open or removed b Before opening or removing any of its maintenance access panels or performing any maintenance work on the compressor or connected pneumatic system Switch off the unit isolate and tag out the power supply carefully release the residual air pressure from the internal piping and any ...

Страница 17: ...n the compressor set User Factory Motor Starts per Hour 30 The maximum permissible number of motor starts per hour for each module User Factory Start Delay 2 seconds The response delay time for a start signal to the first module User Service Stop Delay 2 seconds The response delay time for a stop signal to the first module User Service Start Interval 2 seconds The response delay time for a start s...

Страница 18: ...his function The function can be enabled if required by setting a value of 1 1 200 seconds The elapsed time after a power supply interruption is rectified before the compressor will automatically restart if it was previously operating in automatic on off mode User Service 1 Main Motor Test Output 2 Main Motor Test Output 3 Main Motor Test Output ES11 ES15 4 Main Motor Test Output ES15 Fan Motor Dr...

Страница 19: ... hours The interval in running hours between the starting sequence being cycled so as to maintain equal run time across all the modules User Service Warning The compressor set s built in auto restart function allows it to be switched on automatically after a power supply interruption has been rectified This feature does not include provision for any alarm or annunciation that the unit is about to ...

Страница 20: ...e compressor sets Only a single standalone compressor set can be operated by remote control Note Incorrect rotation of the drive motor will cause permanent damage to the compressor air end that is not a warrantable fault Ensure that the 3 phase electrical power supply is connected with clockwise red white blue phase sequence rotation BEFORE starting the compressor When using the main motor test fu...

Страница 21: ... added to the raw output value from the measuring instrument sensor to obtain the corrected true value Service Service 1 Outlet Temperature 0 0 C The calibration value either positive or negative is added to the raw output value from the measuring instrument sensor to obtain the corrected true value Service Service 2 Outlet Temperature ES08 ES11 ES15 0 0 C The calibration value either positive or ...

Страница 22: ...r to obtain the corrected true value Service Service 2 8 Sequential Operation Menu The sequential operation menu is accessed via the system menu Logging in with the user password allows full access to view the parameters logging in with the service password is necessary to edit the set values The sequential operation menu screen is shown in Figure 2 8 Figure 2 8 Sequential Operation Menu Screen Ea...

Страница 23: ...it in an interconnected group Disable is the standard setting Identifies this compressor set as the master unit in an interconnected group operating under sequential control User Service Seq Slave Enable with the slider button pushed to the right hand side and displaying green colour if this compressor set is a slave unit in an interconnected group or Disable with the slider pushed to the left han...

Страница 24: ...me value for each compressor set in the interconnected group The lead compressor set in the interconnected group will stop running at or above this discharge air pressure User Service Warning The compressor set s built in sequential operation function allows it to be switched on and off automatically according to the sequential control parameters This feature does not include provision for any ala...

Страница 25: ... described below The parameters in the communication settings menu must also be set appropriately as per the guidance provided in Table 2 11 a Locate the RS 485 and SG i e signal ground terminals on the underside of PLC1 inside the electrical cabinet of each interconnected ES08 ES11 or ES15 compressor set as shown in Figure 2 9 Figure 2 9 RS 485 Terminals on ES08 15 Controller b Locate the RS 485 ...

Страница 26: ... The maintenance status screen is shown in Figure 2 10 Figure 2 10 Maintenance Status Screen Each of the maintenance status screen symbols is described in Table 2 8 Table 2 8 Maintenance Status Screen Symbols Symbol Name Description Password To View Password To Edit Motor Press to access the motor maintenance screen User Service V Belt Press to access the V belt maintenance screen User Service Air...

Страница 27: ...or the component tagged with one or more of these circular symbols Press the relevant component maintenance screen to investigate and rectify the maintenance problem The numerical value identifies the motor and air end module n a n a Maintenance Log Press to access the maintenance log screen User n a For air end related maintenance warnings only the indicator lights are colour coded to identify th...

Страница 28: ...Model ES08 Each of the air filter maintenance screen symbols parameters and data fields is described in Table 2 9 This format is typical of all the component maintenance screens Table 2 9 Air Filter Maintenance Screen Symbols Symbol or Field Name Description Password To View Password To Edit Module Assigned motor and air end module identification number 1 or 2 ES08 1 2 or 3 ES11 1 2 3 or 4 ES15 Us...

Страница 29: ...o go forward to the next screen which is limited to moving between the air end tip seal and bearing grease maintenance screens User n a The set values for the run time and elapsed time maintenance intervals for each of the component maintenance screens are listed in Table 2 10 Please refer to the Instruction Manual for detailed guidance about the maintenance procedures Table 2 10 Run Time and Elap...

Страница 30: ...d via the maintenance status screen It can be viewed by logging in with the user password There are no editable fields on this screen it serves only to display a record of maintenance alarm reset actions as per the example shown in Figure 2 12 Figure 2 12 Maintenance Log Screen 2 12 Time Settings Menu The time settings menu is accessed via the system menu Logging in with the user password allows f...

Страница 31: ...cation Settings Menu The RS 485 communication settings menu is accessed via the system menu Logging in with the service password is necessary to view the parameters or edit the set values The communication settings menu screen is shown in Figure 2 14 Figure 2 14 Communication Settings Menu Screen Each of the RS 485 communication settings menu parameters is described in Table 2 11 These are relevan...

Страница 32: ...vice Stop Bits 1 bit Stop bits per byte in a Modbus message Service Service Note After making any changes to the set values press on the back button to exit from this menu The compressor set must then be powered off and back on again for the changes to take effect Note All devices on the interconnected network must have the same RS 485 communication settings except for the device addresses that mu...

Страница 33: ...reen The sequential control screen can be accessed via the home screen without any password provided that the compressor set is configured as the master unit in an interconnected group operating under sequential control Pressing on the sequential control screen symbol on the home screen as described in Section 2 1 will then bring up the sequential control screen as shown in Figure 2 16 Figure 2 16...

Страница 34: ...peration Running Hours Cumulative Running Hours Each interconnected compressor set s cumulative lifetime running hours Comm Status Communication Status The message Comm Error is displayed for any compressor set in the interconnected group that is not properly communicating with the master unit via the RS 485 link Otherwise this field will appear blank Outlet Press Outlet Pressure The compressed ai...

Страница 35: ...me Compressor Module Status Indicates the operating status of each motor and air end module within this master compressor set Stopped Off or Stand by Running Sequential Control Active Indicates that the compressor is configured for operation in a sequentially controlled group Reset Button After any attempt to rectify a communication error press this button to retest the connection Home Screen Pres...

Страница 36: ...ol or Field Name Description Module Number Assigned motor and air end module identification number 1 or 2 ES08 1 2 or 3 ES11 1 2 3 or 4 ES15 Module Status Indicates each motor and air end module s operating status Off or Stopped Stand by Running Warning Alarm Shutdown Alarm Outlet Temperature The discharge temperature for each air end Running Hours The cumulative lifetime running hours for each mo...

Страница 37: ...no editable fields on this screen it serves only to display any current active and historical cleared alarms and warnings An example of this screen is shown in Figure 2 18 Figure 2 18 Alarm Status Screen The upper section of the screen displays a listing of any current active alarms and warnings including the time at which each was initiated The lower section displays the historical cleared events...

Страница 38: ... the bottom of the home page screen in the event of an active operating or maintenance warning The warning condition should be investigated rectified as appropriate and then cleared by pressing the reset button for two seconds If properly resolved the warning message will move from the current active list to the historical cleared list on the alarm status screen The following events will initiate ...

Страница 39: ...fault c Fan motor overload 2 18 HMI System Menu Pressing on any blank space on the home screen for more than three seconds will cause the human machine interface HMI system menu to appear as a dropdown at the top left hand corner of the screen see Figure 2 20 Figure 2 20 HMI System Menu Note DO NOT proceed further in this menu which is reserved for use by the manufacturer Press only on the close b...

Страница 40: ......

Отзывы: