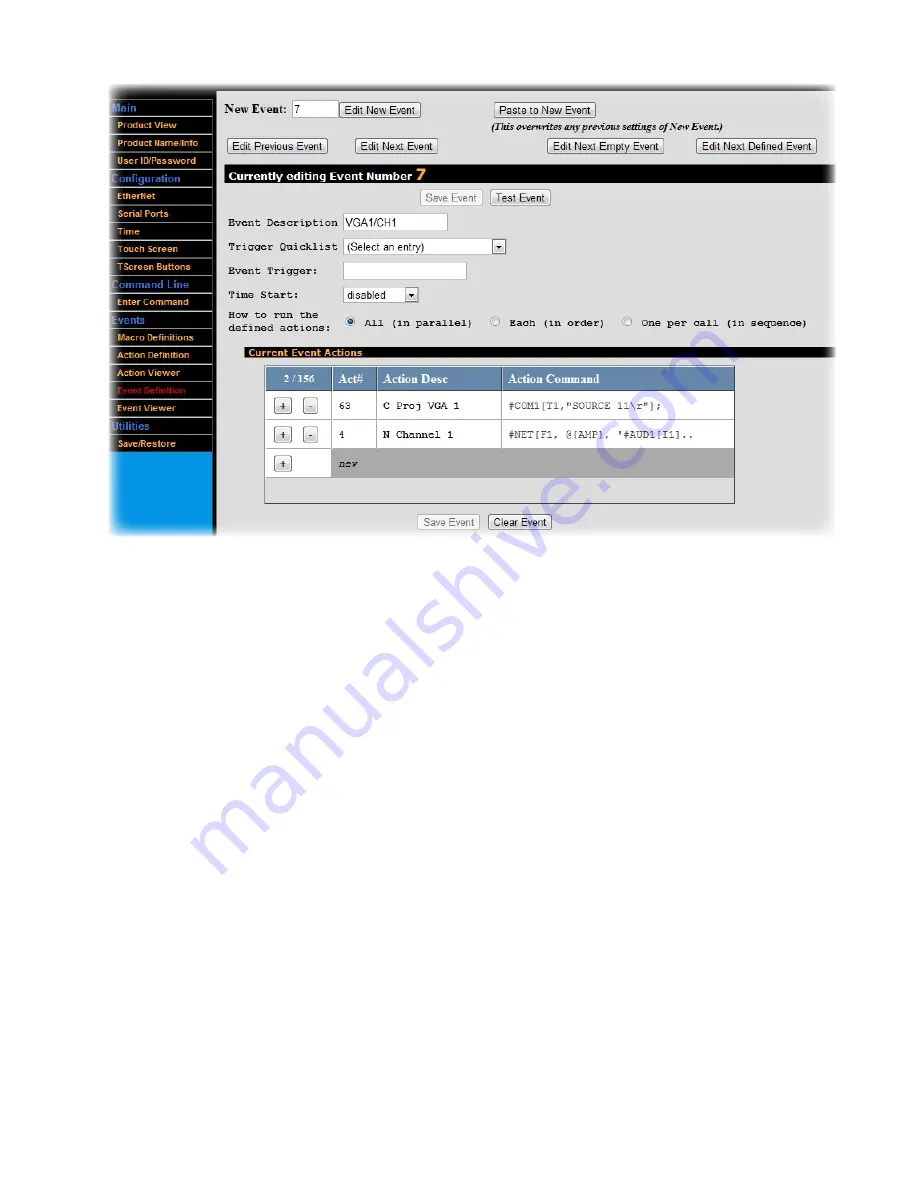
To create or edit an Event:
•
Select
Event Definitions
. (Note that it may be more convenient to navigate to previously defined Events via the
Event Viewer
.)
•
You can move through various Events using the buttons at the top of this screen. (
CAUTION: Save your work
on the current Event before navigating away or your changes will be lost!
)
•
Edit New Event
: Lets you modify the Event definitions for a saved Action.
•
Paste to New Event
: Useful for cloning the current Event (displayed in the black strip labeled “Currently
editing Event Number xx.”) to another Event. Change the New Event field to the number of the target
Event and click the Paste to New Event button. The current Event data will be copied to the target Event.
(
CAUTION: This will overwrite the target Event!
)
•
Edit Previous Event
: Moves to the previous Event record
•
Edit Next Event
: Moves to the next Event record.
•
Edit Next Empty Event
: Moves to a new undefined Event record.
•
Edit Next Defined Event
: Moves to the next defined Event (skipping over any undefined records)
•
Give the Event a useful description (e.g., “Mute”)
•
If you want to have the Event initiated by a button press, you will eventually assign a button to this Event in the
TScreen Buttons
interface (see Appendix B.2)
•
If you want to have the Event initiated by a general purpose input signal, make a selection in the
Trigger
Quicklist
and define the specific Trigger in the
Event Trigger
field. The CB6000 constantly scans all inputs,
searching for an event that matches any Triggers you have defined. When a matching event is recognized, the
corresponding output actions are executed in rapid succession.
•
If you want to have the Event initiated according to a schedule, select the schedule you’d like using the
Time
Start
menu
21
Содержание CB6000
Страница 1: ...CB6000 Installer Guide ...


