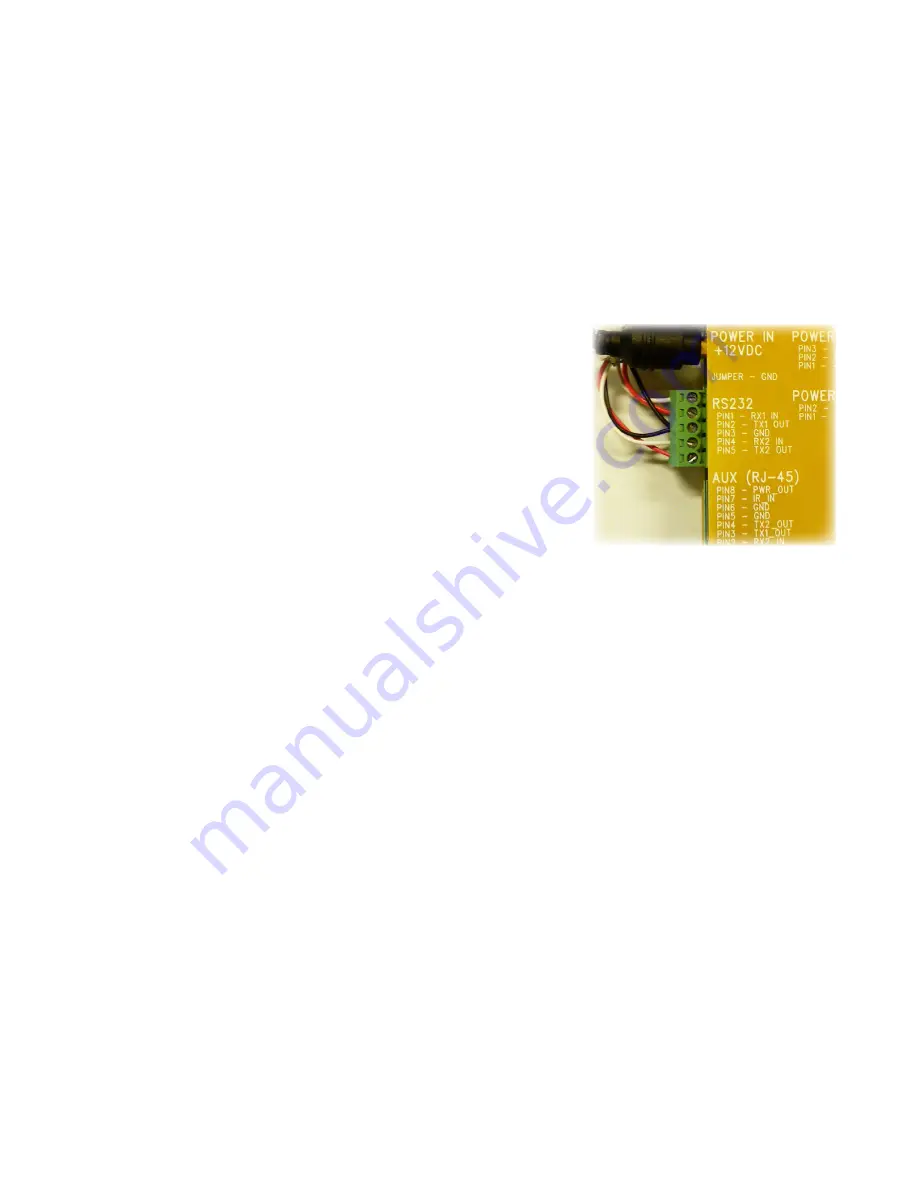
4. If using the CB6000 as a standalone controller with the TB14 adapter:
•
Mount the TB14 adapter securely near the projector or other device to be controlled.
•
Thread Cat 5 cable from the electrical box to the location of the TB14 adapter. Ensure the cable is installed in
compliance with your national and local electrical codes.
•
Connect the Cat 5 cable to the CB6000’s
AUX
jack
WARNING: CONNECT TO THE CB6000’S
“AUX“
JACK! YOU CAN DAMAGE YOUR
DEVICES IF YOU CONNECT TO THE
“NETWORK ONLY”
JACK.
•
If you are controlling a serial device (e.g., projector), connect the provided serial cable(s) to the TB14 adapter’s
RS232
captive screw connector. You can have up to two separate serial cables. Wiring is as follows:
•
To control the first device:
•
Black (ground) to Pin 3/GND
•
Red (input to device) to Pin 2/TX1 OUT
•
White (output from device) to Pin 1/RX1 IN
•
To control a second device:
•
Black (ground) to Pin 3/GND
•
Red (input to device) to Pin 5/TX2 OUT
•
White (output from device) to Pin 4/RX2 IN
IMPORTANT: Be sure to keep wiring and Action commands consistent to avoid prob-
lems. For example, serial Actions sent to COM1 should use the TX1/RX1 pins; actions
sent to COM2 should use the TX2/RX2 pins. (See Appendix A.)
•
If you are controlling a device via infrared (e.g., a DVD player), connect an IR emitter cable (not included; part
number 520-3001-001) to the TB14’s IR jack and secure the emitter end to the controlled device’s infrared sen-
sor. You can control up to two separate infrared devices.
•
Connect the power supply to the TB14 adapter
•
Connect the Cat 5 cable to the
AUX
jack on the TB14 adapter
5. Confirm that button presses result in the expected actions. If there are any errors, check wiring and confirm
configuration control logic. (Refer to Step 3 and Appendix A as needed.)
6. Screw the CB6000 panel into the electrical box with the screws provided
CAUTION: DO NOT OVER-TORQUE SCREWS WHEN MOUNTING CB6000 — THIS CAN
DAMAGE THE LCD SCREEN.
7. Check for good responsiveness of buttons to touch; if needed, recalibrate using the built-in calibration tool
(see Step 1.2)
16
Содержание CB6000
Страница 1: ...CB6000 Installer Guide ...


