


135
15-2. Selecting the Split-screen Type
The type of split-screen to be used can be selected in the [SETUP - OUTPUT-MV1] menu.
There are three different types.
(1) Quickly press MV1 twice in the KEY/AUX block to display the [SETUP - OUTPUT- MV1]
menu.
OUTPUT : DIV :SCREEN :SIGNAL : CHARA : 1/6
MV1 : =
4
: =1 : =IN01 : = OFF :
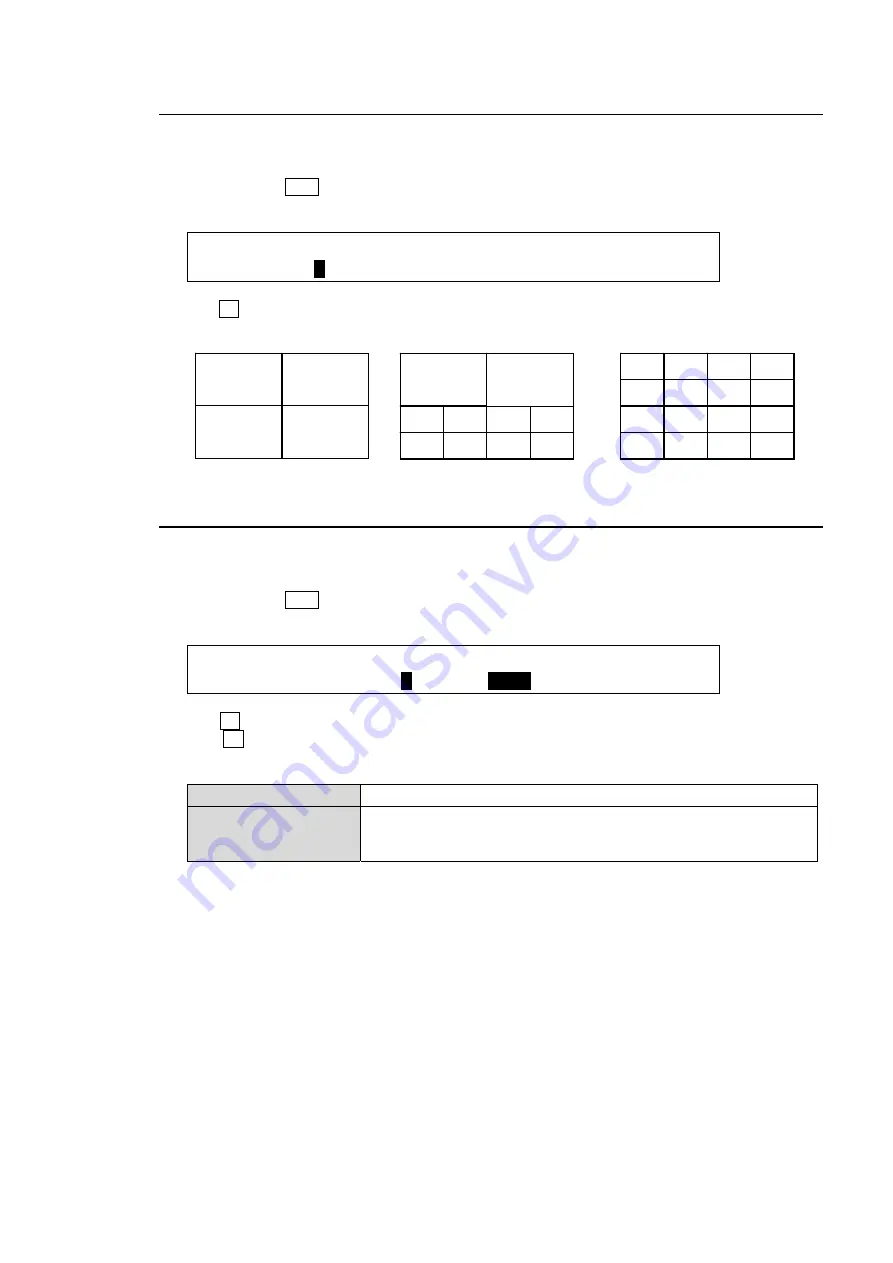
(2) Turn F1 to select the split screen type from 4, 10 or 16-way. (See the split screen images with
channel numbers below.)
15-3. Selecting Video for Each Split Area
This section shows how to select a video source for each split area in the multiviewer screen.
This is done in the [SETUP - OUTPUT - MV1] menu.
(1) Quickly press MV1 twice in the KEY/AUX block to display the [SETUP - OUTPUT - MV1]
menu.
OUTPUT : DIV :SCREEN :SIGNAL : CHARA : 1/6
MV1 : =4 : =
1
: =
IN01
: = OFF :
(2) Turn F2 to select a channel number (split area) of the split screen under the
SCREEN
item.
(3) Turn F3 to select video to display on the split area. The following video sources are
selectable.
Input images
IN01 - IN24
Internal bus images
BLK(BLACK), STL1 to STL4, STK1 to STK4, MATT1, MATT2,
CLBR(Color bar), M/E1 PGM, M/E1 PREV, M/E1 CLN,
M/E2 PGM, M/E2 PREV, M/E2 CLN, AUX1 to AUX8, CLOCK
(4) Repeat steps (2) and (3) to assign images to the multiviewer channels.
02
01
06
05
04
03
08
07
10
09
14
13
12
11
16
15
01
04
03
08
07
06
05
10
09
02
01
02
03
04


