background image

Chapter 13

Settings menu

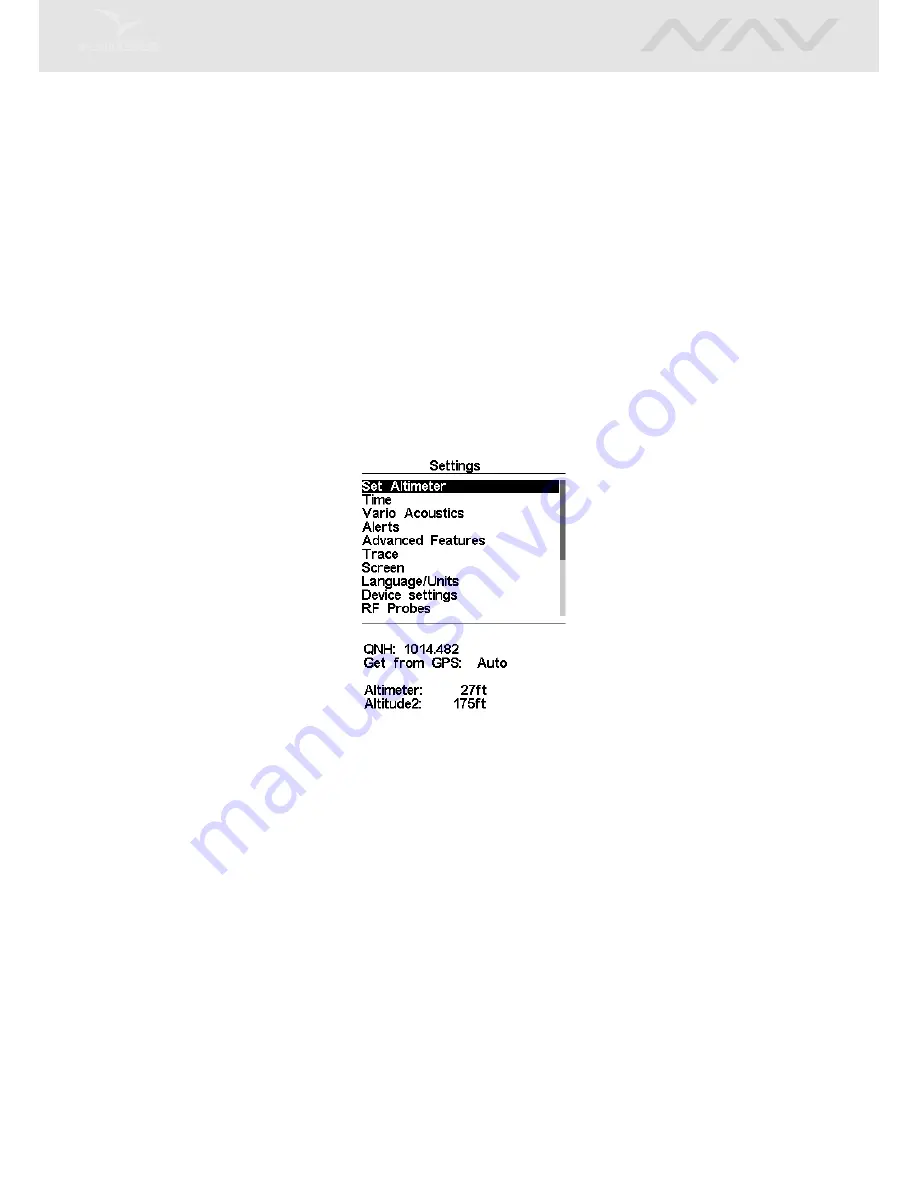
The settings menu (Figure

13.1

) is used to configure the NAV ’s many features. The menu is divided

into two sections, the menu option and the associated configurable fields.

To use the configuration menu, select the desired option by using the arrow keys (UP and

DOWN), then push the ENTER key to edit the fields.

Figure 13.1: Settings Menu

Note that on the right hand side of the display is a scroll bar showing where the relative position

of the displayed menu compared to all of the other settings available in this menu.

13.1

Set Altimeter

The

Set Altimeter

page (Figure

13.2

) allows the user to adjusts the barometric altimeter. A baro-

metric altimeter calculates altitude based on atmospheric pressure. Since atmospheric pressure can
vary substantially with meteorological conditions it should be calibrated prior to takeoff.

Calibrating the altimeter can be achieved by entering the know altitude of the location. Entering

an altitude automatically calculates the QNH. Conversely, if the QNH is changed then the altitude
is adjusted accordingly. This method allows calibrating the altimeter by either entering a know
altitude at the current location, or known QNH for a particular instant in time at the current
location.

44

Содержание NAV

Страница 1: ...User manual Document version 3 4...

Страница 2: ...Avionics re serves the right to change or improve its products and to make changes in the content without obligation to notify any person or organisation of such changes or improvements Visit the Flym...

Страница 3: ...ation Circle 13 3 1 6 Airspaces 15 3 1 7 Altitude graph 16 3 1 8 Wind Arrow 17 3 1 9 Map Page 18 3 2 Data field Elements 19 4 Menu mode 23 5 Waypoints and Task 25 5 1 Waypoints Actions Menu 26 5 1 1 A...

Страница 4: ...ack interval 45 13 2 3 UTC o set 46 13 3 Vario Acoustics 46 13 3 1 Climb Threshold 46 13 3 2 Sink Threshold 46 13 3 3 Sink Alarm 46 13 3 4 Base Frequency 46 13 3 5 Increments 47 13 3 6 Volume 47 13 4...

Страница 5: ...ings 55 13 11RF Probes 55 13 12Heart G 56 13 13Data fields 56 13 14FS Keys 56 13 15Navigation Settings 57 13 15 1Safety Margin 57 13 15 2Turnpoint Size 57 13 15 3Datum 57 13 16Airspace settings 57 14...

Страница 6: ...urce Quick charge mode is activated when charging with the wall charger or the car charger while Slow Charge mode is activated when a USB cable connected to a PC or MAC is used Charging and battery st...

Страница 7: ...ne by pressing the MENU key in flight mode Once in the menu UP S3 and DOWN S4 keys can be used to scroll up and down through the menu options list Once the desired option is selected the option is hig...

Страница 8: ...sleep To switch o the NAV push the S1 menu key to activate menu mode using the arrow keys S3 or S4 scroll the cursor to the Shutdown item and push the S2 Enter Key 1 5 Resetting the NAV The reset proc...

Страница 9: ...taining multiple pages has been defined the user can switch page using one of the configurable function keys see Section 13 14 in Flight Mode Figure 2 1 Layout page examples Screen layout can be confi...

Страница 10: ...each of the available 16 pages The Designer works by what you see is what you get This means that when you insert a element in a page and after uploading the layout to the instrument you will see exa...

Страница 11: ...ist includes the following graphical elements 3 1 1 Battery The Battery Element provides a graphical indication of the current battery level In Table 3 1 it is possible to see the relationship between...

Страница 12: ...a tracklog when 3D information is available The NAV has an high sensitivity 50 channel GPS receiver which o ers unmatched tracking performance in harsh signal environments 160 dBm sensitivity and very...

Страница 13: ...to 10 m s depending if you are climbing or sinking In this Element a black bar starts from the middle of the scale and grows at 0 1 m s increments up to 5 m s at the top of the scale When 5 m s value...

Страница 14: ...nt after the next one This element cannot be resized but can be re positioned For navigation information to be displayed the NAV must have a valid GPS fix Figure 3 5 Navigation Element Navigation info...

Страница 15: ...f the navigation wheel In the example in Figure 3 6 this arrow is pointing along the green line which shows the direction to WP2 even though WP1 has not been reached Small course corrections are somet...

Страница 16: ...nt provides information to the user relative to specific three dimensional objects of the atmosphere previously loaded to the instrument Each of this objects can be an airspace area Airspace informati...

Страница 17: ...positive vertical distance indicates that you are outside the airspace whereas a negative distance indicates that you are inside the airspace Additionally the CTR status field will indicate if an air...

Страница 18: ...used in a layout an arrow is draw showing the wind direction relative to the pilot direction direction the wind is coming FROM For example if the pilot is facing the wind then the arrow points south...

Страница 19: ...le on the bottom left The scale can be manually changed by pressing the F1 button to enlarge the map and therefore reduce the scale and conversely by pressing the F2 button to reduce the map and there...

Страница 20: ...itude is calculated based on the baro metric pressure and depends on the QNH value Altitude2 Second Altimeter which can be set independently to the main altimeter Arrival Goal Estimated arrival height...

Страница 21: ...NH of 1013 25hPa Fuel Fuel level in liters available when connected with Flymaster M1 G Force Current G Force being experienced by the pilot when using the Heart G sensor Goal Close Remaining time to...

Страница 22: ...g TAS True Air Speed This information is available when the instrument is used in conjunction with the Flymaster TAS pitot probe Therm Dur Time pilot has spent in the most recent thermal Thermal top T...

Страница 23: ...n a pilot enters a thermal the NAV will reset the Gain indicator to 0 and will start to track how much altitude the pilot has gained At a certain point in the thermal the lift may become weaker and in...

Страница 24: ...Accesses NAV s waypoints and Taskdefinitions see Chapter 5 Task delay Shifts all time parameters in the active task see Chapter 6 TaskNavigator Allows manual override of navigation see Chapter 7 Near...

Страница 25: ...24...

Страница 26: ...a At the top of the page next to the title Waypoints is the total number of Waypoints stored in the NAV instrument 1 The first waypoint on the list appears highlighted and the corresponding data of th...

Страница 27: ...disabled 5 1 1 Add Waypoint to Route To add a waypoint to the task select the waypoint that is to be added by pressing either the UP or DOWN buttons until the desired waypoint is reached Pressing the...

Страница 28: ...l Delete Task the last think you want is to be sitting on takeo with no waypoints in the NAV to clear the previous task use the Delete Task function described in section Section 5 2 4 5 1 6 Go To Poin...

Страница 29: ...the chosen waypoint and the radius can be defined by the user The default value usually 400m for the radius is defined in the Turnpoint Size settings During naviga tion NAV will advance to the next t...

Страница 30: ...udible notice informing the user that navigation has advanced to the next waypoint this audible notice can be disabled in the Turnpoint Complete in the Alerts setting see Section 13 4 1 by changing th...

Страница 31: ...ute Point option and push ENTER button A cursor will be shown next to the selected waypoint Using the UP and DOWN buttons move the task point to the desired position and push ENTER 1 5 2 3 Remove Rout...

Страница 32: ...ER GOOSEN TP5 2 km END OF SPEED SECTION WHALEL TP6 2 km GOAL 05 00 00 PM WHALEL TP6 400m 5 3 1 Setting up the task Start by deleting any existing task on the NAV see Section 5 2 4 Then add to the task...

Страница 33: ...s are the ones wanted Regarding the Goal edit the first occurrence of WHALEL and change its type to End of Speed Section For the second occurrence change the type to GOAL remembering that the radius d...

Страница 34: ...Instead of having to edit the defined task the NAV o ers a task delay feature which moves all defined times in a task forward by X minutes Figure 6 1 Task Delay To delay a task when in the Task Delay...

Страница 35: ...ntering into the Task Navigator menu all of the route points are shown as both the short name and long name Figure 7 1 Selecting any of the routepoints will show a navigation wheel in the lower part o...

Страница 36: ...number of airspace polygons loaded into the instrument Figure 8 1 Critical Airspace On selecting enter the lower field is populated with key data Figure 8 2 This list shows the Distance to the CTR if...

Страница 37: ...Figure 8 2 Critical Airspace Data 36...

Страница 38: ...an be accessed directly from the Flight Mode screen by using a short cut function key see section Section 13 14 In order to define a waypoint as a landing the Landing parameter should be set to Yes in...

Страница 39: ...ected using UP and DOWN keys For the selected flight additional information is displayed on the bottom half of the screen Max Altitude Maximum altitude during flight ASL T o Alti Take o altitude Above...

Страница 40: ...wnloads the correct flight 10 1 Delete Flight Similarly selecting the Delete Flight option will delete the selected flight from memory Before deleting the flight a message is displayed asking the user...

Страница 41: ...you set it to a 10 second recording interval you get 360 hours See Section 13 2 2 on how to change the interval Also important to understand is how the data is organised there are 256 blocks of data w...

Страница 42: ...f precision pdop shown gives an indication of how reliable the GPS altitude is at the moment The lower the pdop value the more accurate the position fix Values bellow 2 5 are fairly accurate If the NA...

Страница 43: ...the Designer Figure 12 1 Available Pages example You can select di erent pages by selecting either the UP or DOWN keys F1 and F2 respectively If you press ENTER for that page 2 options become availab...

Страница 44: ...12 3 Also all triggers associated with the disable page will be ignored Figure 12 3 Disable Page Once a page is disabled an asterisk will be shown on the list prior to the name indicating it is disabl...

Страница 45: ...vailable in this menu 13 1 Set Altimeter The Set Altimeter page Figure 13 2 allows the user to adjusts the barometric altimeter A baro metric altimeter calculates altitude based on atmospheric pressur...

Страница 46: ...e 13 2 Set Altimeter 13 2 Time The Time page allows the user to set the vario integration time track log parameters and the Universal Coordinated Time UTC o set Figure 13 3 Figure 13 3 Timing Paramete...

Страница 47: ...reshold is the rate of descent at which the vario will emit a constant low frequency sound The deeper the sink rate the lower the frequency will sound Default value for this item is 2 m s we suggest s...

Страница 48: ...Mode the current volume level can be seen using the sound element see Section 3 1 2 for more details The NAV has six di erent sound levels plus no sound Pressing UP or DOWN keys will respective increa...

Страница 49: ...et more of the NAV vario acoustics Figure 13 6 Figure 13 6 Advanced Features 13 5 1 Damper The NAV s vertical speed calculation is based on air pressure variations It is very seldom to have air pressu...

Страница 50: ...en 0 and 9 with each unit corresponding to be 0 1 m s ie 3 is 0 3m s Subtracting this decimal value from the climb threshold will give us the value at which the NAV will start buzzing For example with...

Страница 51: ...s rising at 0 1 m s but both pilots are descending at 0 9 m s In the second zone of the thermal the air is rising at 0 8 m s and so pilots are descending at 0 2 m s At this stage the orange pilot star...

Страница 52: ...alue For example if Auto Silent is on the vario will only beep after the flight starts The track data is also only saved after the flight starts 13 6 Trace This option sets the behaviour of the traces...

Страница 53: ...e 13 9 Track Up O Figure 13 10 Track Up On 13 7 Screen The screen menu option allows the user to set the Screen contrast to Enable Disable the pages triggers and to colour invert the titles Figure 13...

Страница 54: ...view di erent pages according to di erent flight contexts These can be automatically activated switched if a certain condition is met One good example is an airspace control page In an airspace contr...

Страница 55: ...12 Inverse Titles The figure of the left shows the normal display and that on the right shows the same display with inverse titles set to Yes 13 9 Language Units The Language and Units menu option all...

Страница 56: ...rdware reset to the instrument The result is the same as the one presented in Section 1 5 In order to reset the instrument use UP or DOWN key to change the Reset Now parameter to Yes and then confirm...

Страница 57: ...wn needs using this menu UDF s are numbered from 1 to 6 A description of available data Fields can be found in Section 3 2 If UDF data fields are set up in the current layout then this menu can be use...

Страница 58: ...being 8m further away The size of the safety margin can be changed by scrolling through the numbers using the UP and DOWN keys Pressing ENTER moves to the next digit 13 15 2 Turnpoint Size The default...

Страница 59: ...te the airspace s proximity The parameter can be set to GPS Altitude Altitude given by the GPS Altitude Barometric altitude Flight Level Altitude considered standard pressure value 1013 hPa for the QN...

Страница 60: ...r setup and follow the on screen instructions Once the driver and the update tool are correctly installed do the following procedure 1 Double click the firmware file this will start the Flymaster Firm...

Страница 61: ...Figure 14 1 Firmware Update 60...

Страница 62: ...installed on the computer and that GPSDump has been installed 15 1 Configuring GPSDump Before you can start interfacing your Flymaster GPS unit with your computer you must first make sure that you hav...

Страница 63: ...t are currently interfacing with the instrument Flymaster instruments typically populate with high COM port numbers such as COM 11 in the example below Figure 15 3 Figure 15 3 COM port options Once th...

Страница 64: ...ure 15 4 Waypoint list Once the file has been opened select alll of the waypoints COMMAND A in MAC and CON TROL A for PC In the drop down menu for WPTS you should see the following options Figure 15 5...

Страница 65: ...sending the waypoint ID or the waypoint name or both Once you select the type of waypoints to send you should see the the waypoints being sent to the instrument 15 3 Downloading tracklogs To download...

Страница 66: ...on the instrument Figure 15 7 Figure 15 7 Tracklog list Simply clicking on the desired flight will download the tracklog to the computer Once the tracklog has been downloaded it is possible to save t...

Отзывы: