


10.5.0 Servo/s calibration (ground based)
The calibration procedure is mandatory: if you try to engage the autopilot without first calibrate the servo, Eclipse will
show the error message “AUTOPILOT DISENGAGE! ROLL/PITCH SERVO CALIB”.
THE CALIBRATION MUST ALSO BE REPEATED IN THE EVENT OF ANY CHANGES TO MECHANICAL
INSTALLATION OF THE SERVO/S.
NOTE:
The “neutral position” terms used in the following explanation means the center of the servo arm travel relative
to the position of the limiting bracket:
•
To begin the calibration procedure:
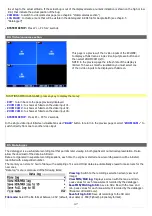
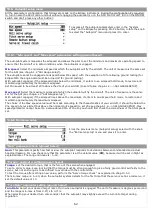
From the Autopilot setup menu select and enter in the “Servo(s) travel calib” menu. The display shows the word
“IDENTIFICATION” or, if instead it was already made a previous calibration, the display shows the data of the
previous calibration as in example below:
NOTE
: If appears the message “NO SERVO(S) FOUND” it means that the servos are not properly connected.
•
Press
P3
button (START) and follow the onscreen instructions; if you have installed the servos on both axis the
complete procedure will be as follows:
•
Step#1: center the control stick in neutral position and then click on
P3
button (NEXT) to go to the next step.
•
Step#2: position the control stick to the left limit (without forcing), paying attention to not move it in the pitch
axis during the motion. After doing so, the calibration automatically switch to the next step:
•
Step#3: center the control stick in neutral position and then click on
P3
button (NEXT) to go to the next step.
•
Step#4: position the control stick to the forward limit (without forcing), paying attention to not move it in the
roll axis during the motion. After doing so, the calibration automatically switch to the next step or, if you have
not installed the pitch servo, click on
P3
button (NEXT) to go to the next step.
•
Step#5: center the control stick in neutral position and then click on
P3
button (NEXT) to go to the next step.
•
Step#6: position the control stick to the left limit (without forcing). Click on
P3
button (NEXT) or the remote
button to store the position and go to the next step.
•
Step#7: position the control stick to the right limit (without forcing). Click on
P3
button (NEXT) or the remote
button to store the position and go to the next step.
60
Содержание Eclipse
Страница 6: ...ECLIPSE PART I INSTALLATION 6 ...
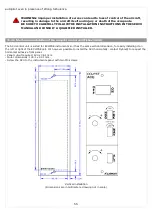
Страница 7: ...2 Dimensions 7 ...
Страница 22: ...ECLIPSE PART II OPERATING MANUAL 22 ...


