background image

Lit. No. 49591, Rev. 05 

July 15, 2020

27775, 28069, 57000, 57000‑1, 57000‑3

6. 

Turn the control ON and completely angle the 

blade to the left and right several times. Raise and 

lower the snowplow several times. Activate the 

control FLOAT function and manually collapse the 

lift ram all the way. Turn the control OFF.

7.  Remove the fill plug and check the fluid level. 

With the lift ram fully retracted, the fluid level 

should reach the fill hole. If additional fluid is 

needed, fill the reservoir with FISHER

®

 EZ Flow 

Hydraulic Fluid rated to –40°F (–40°C), or 

other fluid conforming to Military Specification 

MIL‑H‑5606 A, such as Mobil Aero HFA or Shell 

AeroShell

®

 Fluid 4.

NOTE: Remove fill plug slowly to relieve any 

pressure in reservoir.

8. 

Replace and tighten the fill plug.

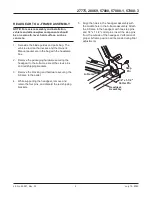
HYDRAULIC UNIT

The SD Series snowplow hydraulic unit comes from 

the factory pre‑assembled, partially filled, and fully 

tested.

1. 

Attach the snowplow to the vehicle according to 

the instructions on the headgear.

2. 

Remove the cover of the hydraulic unit.

3. 

Remove and discard the factory‑installed pipe 

plug from the breather port. Install the 90° elbow 

into the port, with the elbow pointing up.

4. 

Install the breather into the elbow.

5. 

Replace the cover.

 WARNING

Keep 8' clear of the blade when it is being 

raised, lowered, or angled. Do not stand 

between the vehicle and blade or directly in 

front of the blade. If the blade hits or drops on 

you, you could be seriously injured.

 CAUTION

Do not mix different types of hydraulic fluid. 

Some fluids are not compatible and may 

cause performance problems and product 

damage.

AeroShell

®

 is a registered trademark (

®

) of Shell Oil Company.

Drain Plug

Fill Plug

Breather

90° Elbow

FLUID CAPACITY

• 

Insta‑Act

®

 Unit Reservoir 

1‑3/4 quarts

• 

Insta‑Act System Total 

2‑3/8 to 2‑3/4 quarts

 WARNING

To prevent accidental movement of the blade, 

always turn the control OFF whenever the 

snowplow is not in use. The power indicator 

light will turn OFF.

Содержание 27775

Страница 1: ...ific vehicle application recommendations before installation The eMatch selection system has specific vehicle and snowplow requirements SD Series Snowplows Installation Instructions Fisher Engineering...

Страница 2: ...dous situation that if not avoided may result in minor or moderate injury It may also be used to alert against unsafe practices WARNING CAUTION AND INSTRUCTION LABELS Become familiar with and inform u...

Страница 3: ...ARNING Hydraulic fluid under pressure can cause skin injection injury If you are injured by hydraulic fluid get medical attention immediately SAFETY PRECAUTIONS Improper installation and operation cou...

Страница 4: ...orque values apply to fasteners except those noted in the instructions Torque ft lb Grade 5 Grade 8 Size Size Torque ft lb Class 8 8 Class 10 9 Torque ft lb Class 8 8 Class 10 9 Inch Fasteners Grade 5...

Страница 5: ...ring the headgear to the A frame except the clevis pins and red shipping brackets 3 Remove the blocking and hardware securing the A frame to the pallet 4 While supporting the headgear remove and retai...

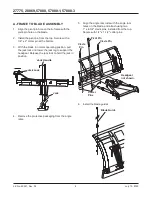
Страница 6: ...BLY 1 Align the pivot pin hole on the A frame with the pivot pin hole on the blade 2 Install the pivot pin from the top Secure with a 1 4 x 2 cotter pin at the bottom 3 With the blade in normal operat...

Страница 7: ...filled and fully tested 1 Attach the snowplow to the vehicle according to the instructions on the headgear 2 Remove the cover of the hydraulic unit 3 Remove and discard the factory installed pipe plu...

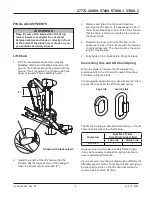
Страница 8: ...rubber washer must be installed under the slotted holes Hand tighten fasteners 4 Connect the headlamp wires to the headlamps 5 Aim the headlamps according to the Snowplow Headlamp Beam Aiming Instruct...

Страница 9: ...length as the chain on the driver s side 4 Reattach the loose end of the lift chain to the passenger s side of the A frame with the retained U bolt and locknuts The chain must be the same length on bo...

Страница 10: ...ecting pins to engage the vehicle pushplates while pushing back on the headgear Adjust the connecting link up one link from the factory setting If there is too much slack in the lift chain adjust the...

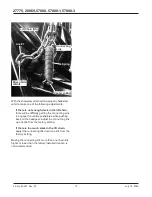
Страница 11: ...ctionality of the snowplow DRLs will depend on the type of module installed on the vehicle With the headlamp switch OFF activate the vehicle DRLs Snowplow lighting harness DISCONNECTED Vehicle DRLs sh...

Страница 12: ...rations or specifications used Fisher Engineering or the vehicle manufacturer may require or recommend optional equipment for snow removal Do not exceed vehicle ratings with a snowplow Fisher Engineer...

Отзывы: