


5
Mi2506
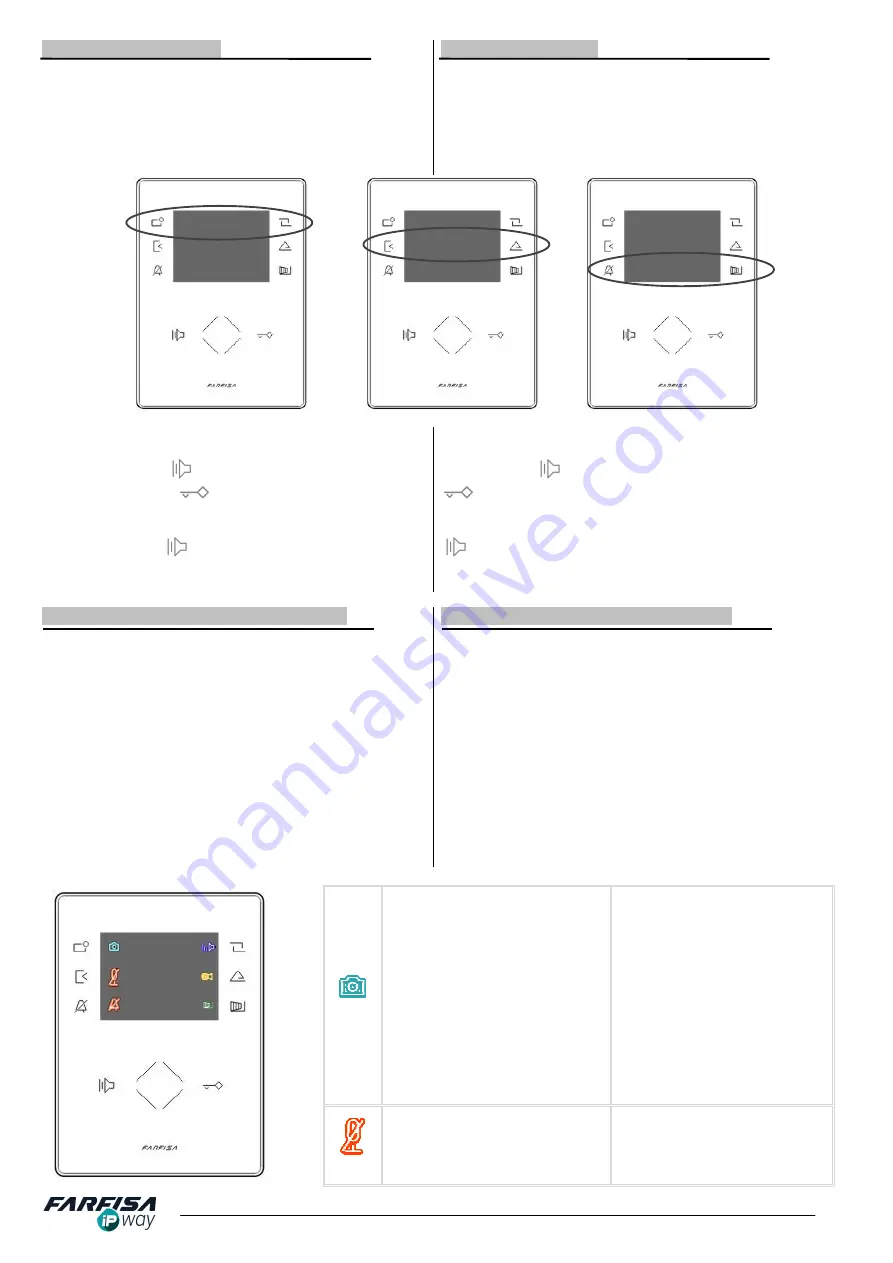
1.6 SEQUENZA DI AVVIO
Non appena il monitor viene alimentato, verrà avviata
automaticamente la sequenza di accensione. I led bianchi
frontali a fianco dello schermo LCD si accenderanno a gruppi in
sequenza ad evidenziare l'avanzamento del processo di avvio
come mostrato nella figura successiva (la sequenza richiede
circa 20 sec. in funzione della configurazione):
1.6 BOOT SEQUENCE
As soon as the monitor is ON, it starts automatically the boot
sequence. The frontal white led's groups on the sides of LCD
screen light up in sequence to show the progress of boot
sequence (about 20 sec. according to configuration) as in the
following picture:
Al termine di questa sequenza il monitor è pronto alla ricezione
di chiamate in modalità P2P dalla pulsantiera.
Toccare il pulsante
per rispondere e / o terminare una
chiamata e il pulsante
per aprire la serratura (prima uscita
relè della pulsantiera AgoràIP).
Quando il monitor si trova in modalità stand-by, sfiorare il
pulsante soft touch
per l'autoaccensione e visualizzare le
immagini provenienti dalla pulsantiera da cui è stata ricevuta
l'ultima chiamata.
At the end of this sequence the monitor is ready to receive a
P2P call from the door station.
Use the button
to answer and / or terminate the call and
button to release the door lock (first relay of AgoràIP door
station).
When the monitor is in stand-by mode, touch the soft button
to power it on and display pictures from the last door
station which has made a call to the monitor.
2.1 INTERFACCIA GRAFICA UTENTE (GUI)
Il monitor ZHeroIP può essere controllato, configurato e
programmato attraverso i pulsanti soft touch ai lati del display
LCD e la WHEEL centrale. L'utilizzo di questi pulsanti è
differente e varia in funzione dello stato di funzionamento del
monitor (stand-by, chiamata, conversazione) che viene
evidenziato dalle icone che appaiono a schermo.
Durante la configurazione delle opzioni attraverso il menù GUI
(Graphical User Interface) i pulsanti freccia possono essere
usati con funzione WHEEL: ad esempio ruotando il dito in
senso orario per aumentare in valore di un'opzione o in senso
anti orario per diminuire.
Mentre il monitor sta squillando durante una chiamata e durante
la conversazione verranno visualizzate le icone mostrate nella
figura seguente: utilizzare i pulsanti a lato dello schermo per
attivare la funzione relativa come descritto nella tabella:
2.1 GRAPHICAL USER INTERFACE (GUI)
ZHeroIP monitor can be controlled, set and programmed using
the 6 soft touch buttons on the LCD display sides and the
central WHEEL. The use of these buttons is different according
on monitor status (stand-by, call, conversation) and it is cleared
by the icons displayed on the screen.
When setting options into the GUI (Graphical User Interface)
menu the arrow buttons can be used as WHEEL, rotating the
finger clockwise to increase values or counter clockwise to
decrease values.
When the monitor is ringing (call) and during conversation the
following icons are displayed, use the side buttons to activate
the related function as described in the table:
Modalità AUTO: alla ricezione di
una chiamata dal posto esterno il
monitor salverà automaticamente
un'immagine
al
termine
del
conteggio di 3 secondi. E' possibile
memorizzare
ulteriori
immagini
sfiorando il pulsante relativo.
Modalità MANUALE: per salvare
un'immagine del visitatore sfiorare
il pulsante relativo.
MODALITA' MEMORIA IMMAGINI
(AUTO / MANUALE): può essere
programmata attraverso il menù
GUI come descritto più avanti.
AUTO mode: When there is a
visitor calling the monitor will save
a picture automatically, as soon
as the 3 seconds countdown is
expired. It is possible to save
further pictures touching on the
related button.
MANUAL mode: touch the side
button to save a picture of the
visitor.
PICTURE
MEMORY
MODE
(AUTO / MANUAL) can be set via
GUI menu as described below.
Sfiorare il pulsante a lato di questa
icona per disabilitare il microfono
durante la conversazione corrente.
Toccare nuovamente il pulsante
per abilitare il microfono.
Touch the side button to disable
monitor's
microphone
during
current conversation. Touch again
the
button
to
enable
the
microphone.
3
1
2


